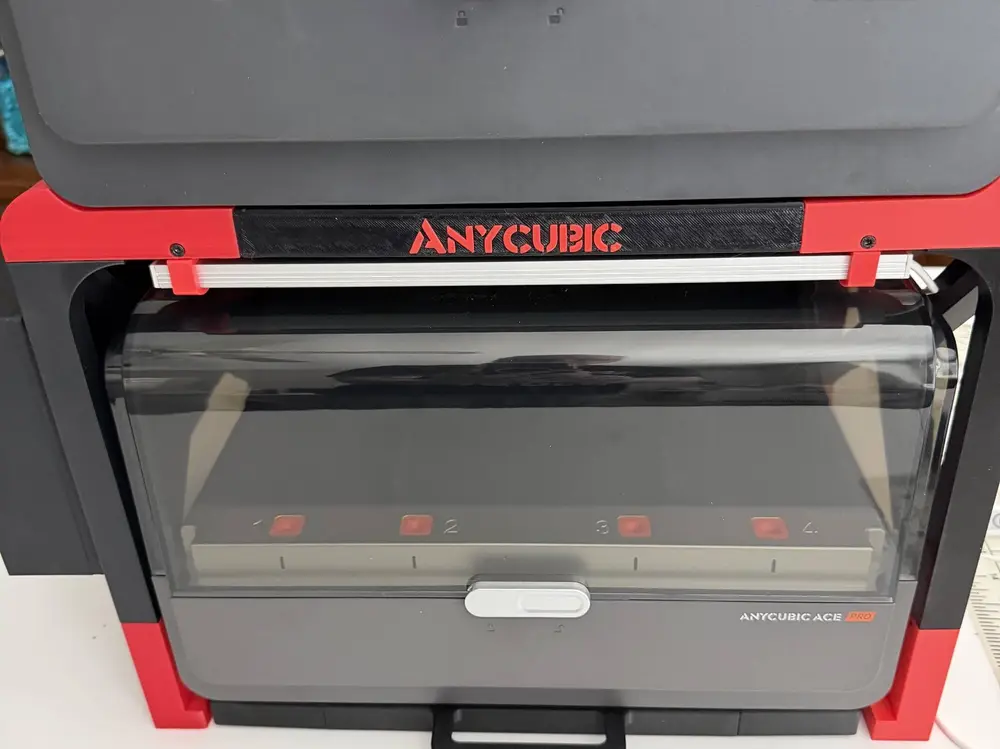
ACEPRO/2 "Dual Stack" with slide out lower tray


Description
ACEPRO and ACEPRO V2 "Dual Stack"
Upgraded to support both the ACEPRO and the ACEPRO2.
Added support for the new Kobra X 3D printer.
The Build plate holder will now support the larger Kobra X size.
I added option for LED light bar to the bottom ACEPRO. I never could see in to see what was running low.
Stack 2 ACEPRO units on top each other while allowing the bottom ACE to be pulled out to manage the filament.
I printed everything on a K3C and Kobra X in PLA.
My settings were; 0.2mm layer height. Infill = 15%. Wall Loops = 4. infill pattern = 3D Honeycomb.
Width of Dual Stack is ~16.5in(42cm), Depth is ~16in(40cm), Height is 20.5in(52cm)
Thats with none of the accessories attached and 15cm standoffs installed to keep it from the wall.
Options for support of power or tool box on ends of the stack.
Use the PTFE comb to manage the filament and run the PTFE tubes up and over the top of the printer, not to the left side.
Combs
The model requires 34 M3x16 SHCS screws to hold everything together. No glue required.
Affiliate Link: https://amzn.to/40nIDyz
Optionally 6 pieces of 608ZZ roller bearings or the included printed part may be used but will not roll as well.
Affiliate Link: https://amzn.to/40mlyfA
requires 4 10mmx3mm refrigerator magnets.
Affiliate Link: https://amzn.to/4fJYfkh
Assemble the Tray first, Print TraySidePro2.3mf and TrayFront.3mf
TraySideRightPro2, TraySideLeftPro2, TrayFront,
The TrayFront plate has 6 plastic bearings and bushings. You can also use the Metal Bushings
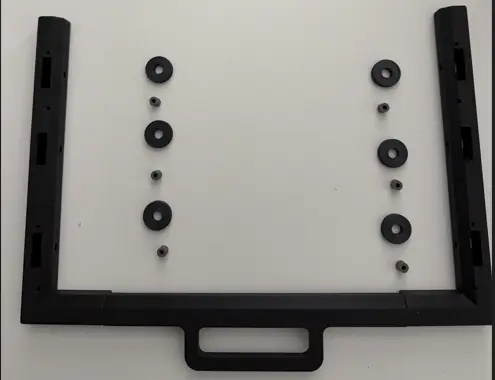
Insert the 8mm bushings into the bearings. Insert the 3 bearings into TraySideLeft/RightPro2. Use a M3x16 screw to fasten each bearing. Screws may not be needed.
Insert 2 of the 10mm magnets in the ends of the tray supports. Glue may be required. Make sure the magnets are installed the same (attracting not opposing).
Once the sides are assembled, attach the Trayfront with handle up to both sides and use 2 M3x16 screws to secure.
Next using 4 M3x16 screws attach the assembly to the bottom of the lower ACEPRO/ACEPRO2 unit.
The parts are marked V1 and V2.
I suggest you put the screws into the ACEPRO first to cut some threads before you try to assemble to the two.
Putting the ACE on its lid helps here. Careful not to scratch the top of the ACEPRO.
The ACE unit should now roll on the table freely.
Print Front (front Anycubic logo)
Select your colors. No logo, put logo in the back or stop printing at layer 100.

Assemble the support, Support.3mf (RackV2)
BottomPadM1, BottomPadM2, XRiser x4, TopSideRightM, TopSideLeftM, Backbar
Insert 2 of the magnets in the BottomPadM1 and BottomPadM2. May need glue.
Assemble the Risers with 1 M3x16 screw in the middle.
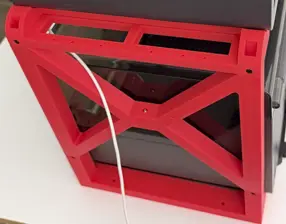
Install one set of risers to bottomPadM1 and the other set to bottomPadM2.
Now attach the left and right assemblies to the backbar and TopFrontLogo. Insert 2 M3x16 screws to hold it together.
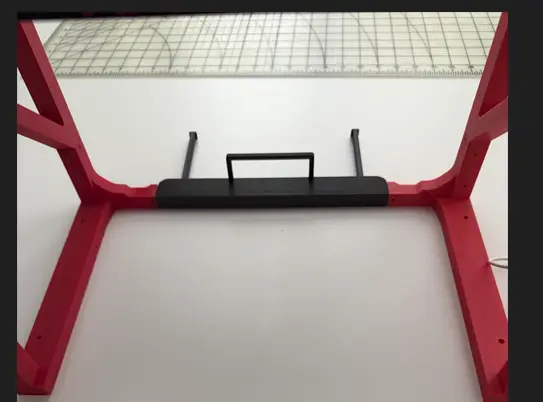
Now insert the other side.
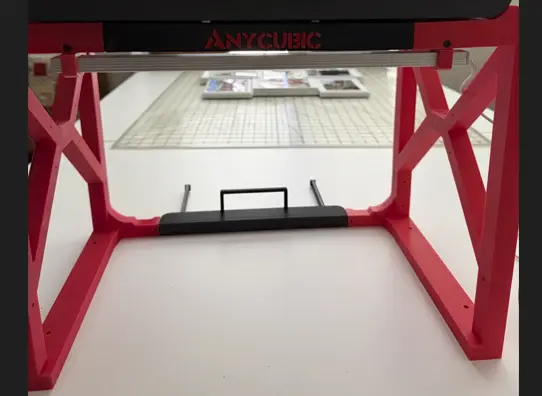
Make sure the Anycubic logo is towards the front if you want the LOGO, if not point it towards the back.
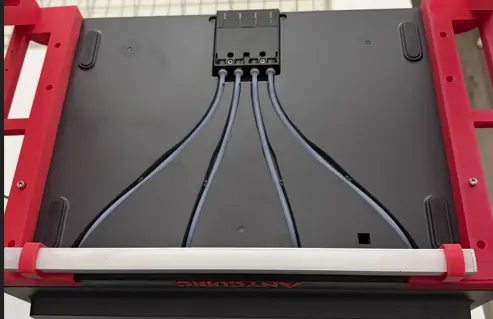 Flip the TOP ACEPRO upside down and lay the assembly on top.
Next using 4 M3x16 screws attach the upper ACE unit.
The parts are marked V1 and V2. Use the right 4 holes.
Optional Back Spacer.
You can attach the 100mm or the 150mm back spacers.
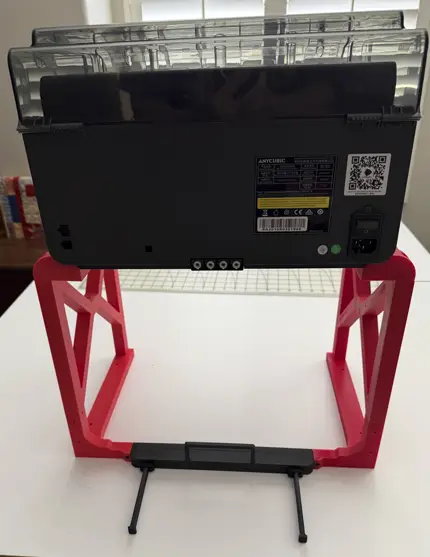
To keep it from getting too close to the wall. ACEBackspacer100mm and ACEBackSpace150mm
I added 100mm and 150mm. Use 2 of whatever works for you. Requires 4 M3x16 screws.
Optional power outlet:
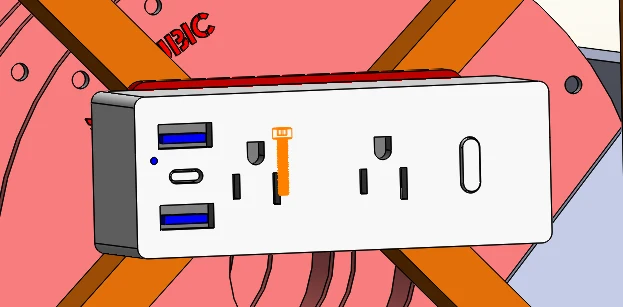
Bolt the PowerStripMount to the new Xriser with 4 M3x16 screws. Then place appropriate screws to hang power outlet.
I used #8 Sheet metal Screws. Drywall screws should also work. I provided 2 size holes just in case.
I also provided the STEP file so you can adjust the design to match your power strip.
Affiliate Link: https://amzn.to/40qqWOI
Optional LED Bar
The LED Latch plugs in right under the FrontLogo bar .
Slide the 2 Latches on to the LED bar as you can see and press it into the square holes and is secured with 2 M3x16 screws

Affiliate Link: https://amzn.to/4uZ5A7z
Optional BuildPlate Rack
The 2 build plate bracket Holder can be attached to the top of the TopSideLeftM or TopSideRightM with 2 M3x16 screws.
Upto 5 build plates can be supported including the Kobra X.
Optional ToolBox
Below the Build plates the Toolbox can be attached to the Xriser with 4 M3x16 screws.
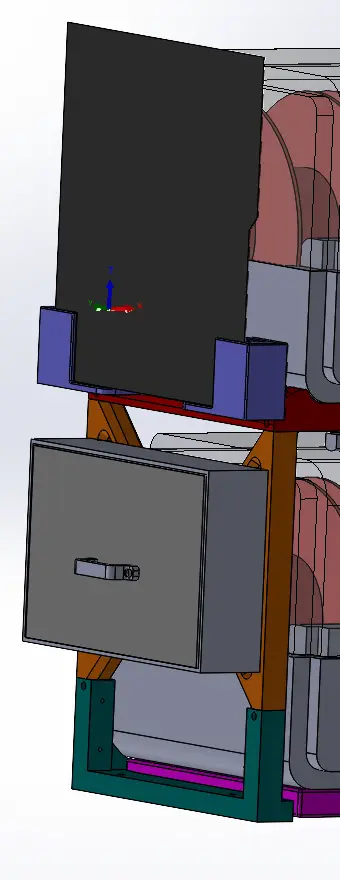
Toolbox's
Large Toolbox
Small Toolbox
Done:
Slide the ACE on the tray under the supported unit. Connect all your PTFE and ready to print.
i taped the USB cable to the upper back of the lower ACE to keep it out of the way.
Please comment and give a like if you like what you see.
If you see something you think might need modifying then comment and I will see what I can do for you.
You are prohibited from sharing, sub-licensing, selling, renting, hosting, transferring, or distributing the digital file or 3D printed versions of this object, as well as any other derivative work in either digital or physical form (including remixes).You are not allowed to use the objects in any manner that involves charging money or collecting fees without permission.