
Anycubic ACE Pro Filament Guide Upgrade – Dual Silica & Hygrometer Mount


Update January 13, 2026: I found an error with the hole spacing and the files have now been updated.
Hi everyone! 😊 This is an improved Filament Guide specifically designed for the Anycubic ACE Pro. I’ve optimized the design to use less material for better transparency (making it easier to see the filament) and lower consumption.
Key Features:
- Dual Silica Storage: Two integrated compartments for silica gel to keep your filament dry.
- Integrated Sensor Mount: Includes a mount for an affordable, standard humidity sensor.
- Compatibility: If your lid doesn't have screw holes, check my profile for my previous project, which is fully compatible and solves that issue.
Printing Recommendations
- Material: Use at least PETG. For better heat resistance and durability, PCTG, ABS, or ASA are highly recommended.
- Warning: Do NOT use PLA, as it may soften or deform over time in this application.
- Supports: This model requires support structures to print correctly.
- Z-Offset: Crucial! If you are using or importing my print profile, please double-check your Z-offset before starting the print to ensure perfect first-layer adhesion and safety.
Silica
To fill it, I simply rolled a sheet of A4 paper into a funnel.
Choose Your Version
You can choose between three different versions:
- Two-Part Version with Plastic Clips:
- Pro: No screws required, though they can still be used for extra security.
- Con: Depending on the spool, the clips might occasionally interfere (though I haven't had this issue).
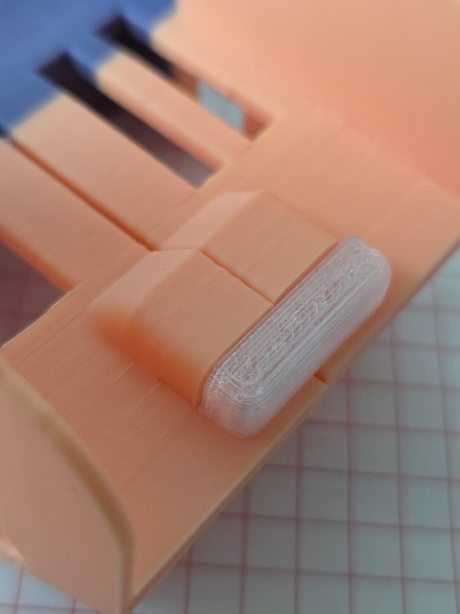
- Two-Part Version (No Clips): A clean design to be joined using screws, heat inserts, or nuts:
- Pro: nothing in the way of the spool
- Con: Due to the limited space, it can be tricky to work with the screws; you need extra hardware.
- Single-Part Version: For printing everything at once:
- Pro: No assembly required, one part, best appearance
- Con:This requires a larger build area than officially supported by the Anycubic Kobra S1, but it can be printed on a stock S1 with specific settings.
Assembly Tips
All versions can be assembled using M3 screws with either heat inserts or nuts.
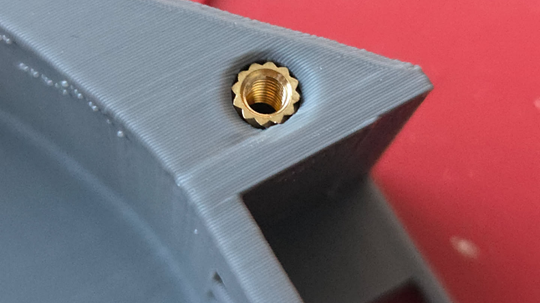
- Hardware: I recommend M3 20mm screws. For heat inserts, 15mm screws are sufficient.
- The "Nut Press" Trick: To make assembly easier in tight spots, I designed the part so you can "press-fit" the nut. Place the nut in its slot and use a screw from the opposite side to pull it firmly into the plastic. Then remove the screw, and the nut stays perfectly in place.

- Silica Lids: The lids are designed so you can be tighten or remove them using a simple coin.

Slicer Settings (For Kobra S1 Users)
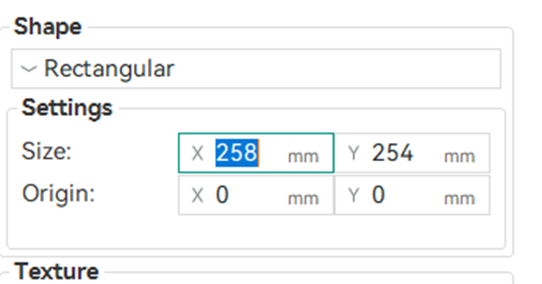
To print the Single-Part version on a Kobra S1, you must manually adjust your bed limits:
- Bed Size: Set to X: 258 mm and Y: 254 mm.
- Crucial Warning: Do NOT print in the front-right corner! The filament cutter is located there, and a collision will occur.
- Safety: I have defined an Excluded Area in my provided print profile to prevent this. Always double-check your Z-offset when adopting the profile!
Feedback
A lot of work went into this design. Please take a moment to leave feedback or share your "Makes" so I can improve the model for everyone. Happy printing! 😊

