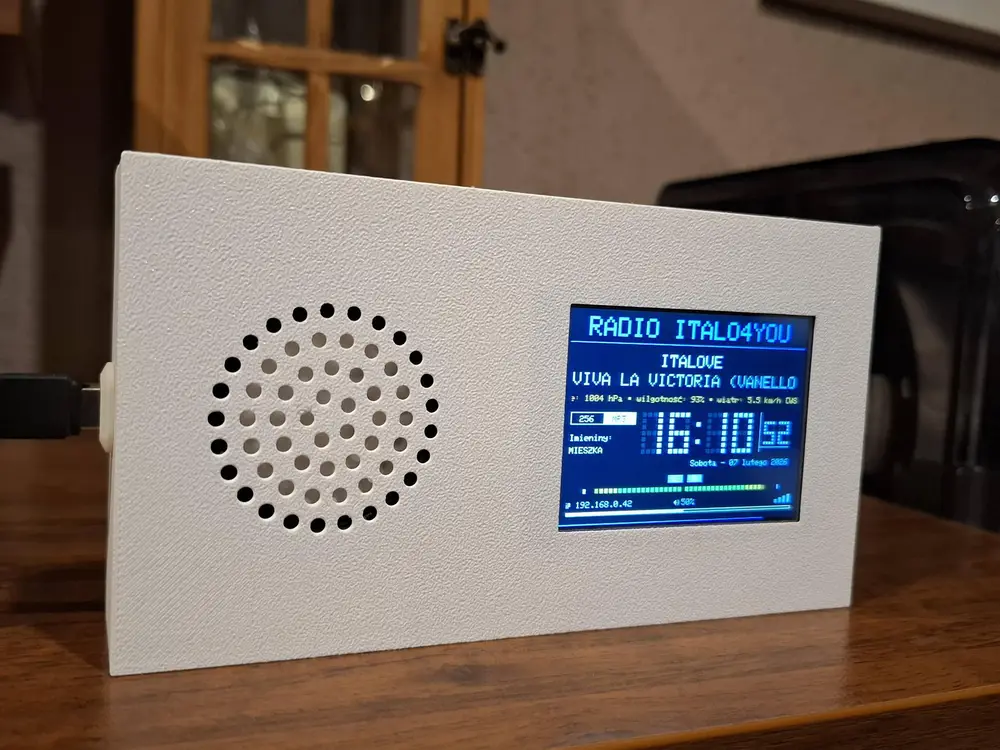
Bathroom Radio "SOAP DISH"


Bathroom Radio "SOAP DISH"
DESCRIPTION:
This radio was created specifically for the bathroom. In my home, it's mounted with double-sided adhesive tape. I later designed a mount that can be permanently mounted on the wall, allowing the radio to be placed in it or removed as needed. Multiple mounts can be printed and the radio can be moved to different locations. It can also be used without the mount as a portable radio, for example, by powering it with a power bank.
Because the radio was designed to be simple, it has minimal external components: a USB-C port, one speaker, and a touchscreen display. The radio is turned on using a touch switch mounted inside the radio. Since the bathroom is humid, I wanted to avoid mechanical components.
LIST OF ITEMS:
ILI9341 2.8" 240*320 TFT LCD Display (e.g.)
https://pl.aliexpress.com/item/1005006623369442.html
53MM 4 Ohm 3W Speaker (e.g.)
https://pl.aliexpress.com/item/1005007331185845.html
ESP32S3 N16R8 Chip (e.g.)
https://pl.aliexpress.com/item/1005008786048447.html
MAX98357 I2S Amplifier (3W) (e.g.)
https://pl.aliexpress.com/item/1005008743704078.html
Touch switch, e.g.
https://pl.aliexpress.com/item/1005010293550863.html
USB Type-C, e.g.
https://pl.aliexpress.com/item/1005006044405766.html
M2 8mm screws, e.g.
https://pl.aliexpress.com/item/4001074924245.html
Glue
https://pl.aliexpress.com/item/1005007794285022.html
ASSEMBLY:
It's best to solder the electronic circuit before placing it in the enclosure. Then, program the circuit. This way, you can test its operation before final assembly. You can use your own software or use designs available online. I recommend this project
https://github.com/VaraiTamas/yoRadio
It works very well and is stable. The website includes instructions for connecting and programming.
Next, we can print all the components. We place the display and speaker inside the case. I recommend mounting them with glue, but it's not required. Gluing will improve the case's seal. Then, we heat the plastic pins with a soldering iron to ensure the display and speaker are securely attached. We place the USB-C port in the hole. The touch switch needs to be trimmed slightly, as it's too wide. The cutting line can be seen in the photo "Bathroom radio - TOUCH SWITCH." Then, we mount it using double-sided tape. We solder the power cables. Finally, we place the back panel and secure it with screws.
SUMMARY:
I hope that assembling the radio won't be a problem for you, and that the descriptions provided will be helpful. If you're happy with my project and would like to support me, I encourage you to support me. This will encourage me to continue working on it and help me achieve my goals.
Thank you, and I encourage you to try my project.
You are prohibited from sharing, sub-licensing, selling, renting, hosting, transferring, or distributing the digital file or 3D printed versions of this object, as well as any other derivative work in either digital or physical form (including remixes).You are not allowed to use the objects in any manner that involves charging money or collecting fees without permission.