2026-09-27 08:49:57
438
7
Desk Deck

@Intrusionist_5776884
Donate
Message
Follow
Recommended printing method
Add
Wired Desk Deck
Kobra S1
Kobra S1 Max
、
Kobra 3
、
Kobra 2
、
Kobra 4
、
Kobra X
、
Kobra 3 V2
、
Kobra 3 Max
、
Kobra 2 Max
、
Kobra 2 Pro
、
Kobra 2 Neo
、
Kobra 2 Plus
/ Plates:2
/ 3h25m
TP4056 Backplate
Kobra S1
Kobra S1 Max
、
Kobra 3
、
Kobra 2
、
Kobra 4
、
Kobra X
、
Kobra 3 V2
、
Kobra 3 Max
、
Kobra 2 Max
、
Kobra 2 Pro
、
Kobra 2 Neo
、
Kobra 2 Plus
/ Plates:1
/ 46m
0
Share


Description
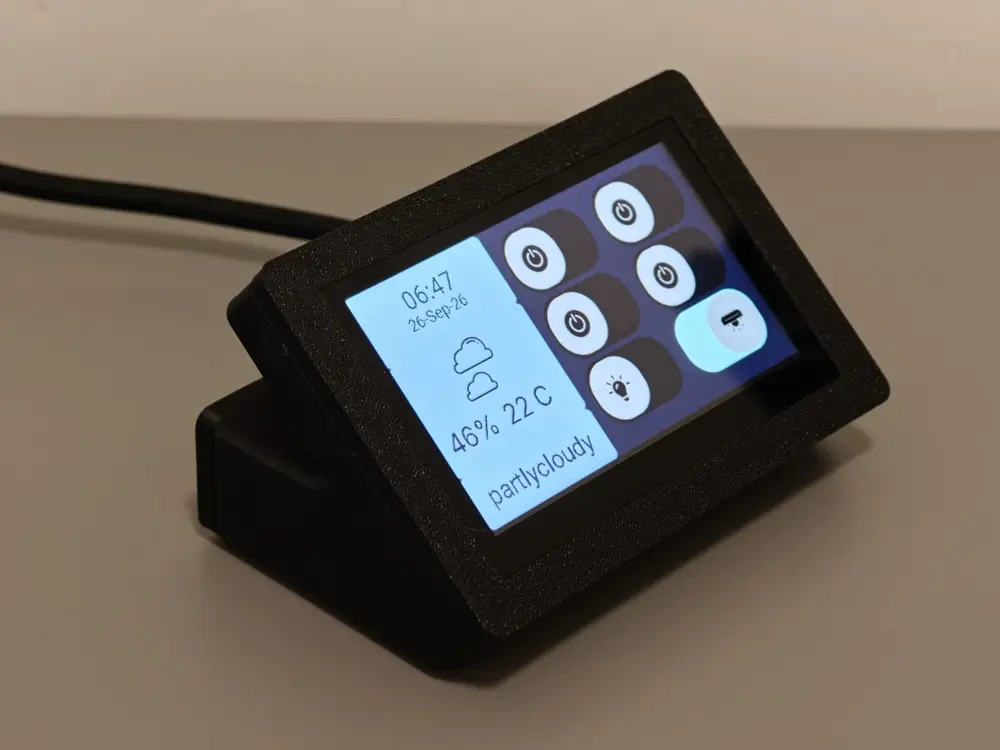
Desk Deck is a sleek, angled desktop stand and enclosure engineered specifically for the popular ESP32 4.3-inch Capacitive/Resistive Touch Display Development Board (JC4827W543 / ESP32-8048S043 series).
Software Agnostic – Use It for Anything!
While shown in the photos running a Home Assistant terminal, the hardware setup is completely open:
- Home Assistant / ESPHome / OpenHASP: Smart home dashboard, scene triggers, light controls, climate panels.
- SquareLine Studio / LVGL: Standalone embedded GUIs and DIY touch widgets.
- PC Hardware Monitor: Real-time stats display for CPU/GPU thermals, clocks, and memory via HWiNFO or AIDA64.
- Desk Gadgets: Crypto/stock tickers, weather clocks, stream decks, macro pads, or network status boards.
Key Features
- Ergonomic Viewing Angle: Angled for glanceable visibility and comfortable touch interaction on any desk, shelf, or nightstand.
- Modular Backplate System: The front bezel and main wedge housing are 100% universal across both versions. Only the backplate changes:
- Wired Version: Features dedicated cutouts for a panel-mount USB-C extension socket and a mini rocker switch.
- Battery / Wireless Version: Features a solid, clean backplate designed to house a flat internal LiPo battery and a TP4056 charging module for cord-free desk use.
- Tool-Free / Snap-Fit Back Closure: The backplate locks neatly into place without needing rear mounting screws, keeping the exterior clean and uncluttered.
- Secure Screen Mounting: The display board fastens securely to the front bezel using M2 brass heat-set inserts and machine screws, protecting the screen and providing durable retention.
- Roomy Enclosure: Plenty of internal volume for tidy wire routing, switch connections, and power management hardware.
3D Printing Guidelines
- Material: PETG, PLA, or ABS/ASA (PETG or PLA-CF recommended for a clean, textured matte look)
- Layer Height: 0.16 mm – 0.20 mm
- Infill: 15% – 25% (Gyroid or Grid)
- Walls/Perimeters: 3 to 4 walls
Hardware & Bill of Materials (BOM)
Core Components
- Display Module: 4.3-inch ESP32 Display Board (800×480 JC4827W543 / ESP32-8048S043 or compatible variant)
- Heat-Set Inserts: 4× M2 × 3mm (or M2 × 4mm) brass threaded inserts (OD ~3.0–3.2mm)
- Screen Mounting Screws: 4× M2 × 4mm (or M2 × 5mm) countersunk flat-head machine screws
Option 1: Wired Setup
- USB-C Port: Panel-mount USB-C female socket extension / pigtail cable
- Power Switch: Mini rectangular rocker switch (KCD11 / 10×15 mm)
Option 2: Battery / Untethered Setup
- Charging Module: TP4056 charger board
- Battery: 3.7V LiPo flat pouch cell (sized to fit the bottom internal cavity)
- Power Switch: Mini rocker switch or slider switch for battery cutoff
Assembly Instructions
- Install Heat-Set Inserts: Using a soldering iron with an insert tip (around 200–220°C for PLA/PETG), gently press the 4 M2 brass inserts into the screen mounting bosses inside the front bezel.
- Mount the Screen: Place the 4.3" ESP32 module inside the front bezel frame and secure it using the 4× M2 flat-head machine screws.
- Wire the Chosen Backplate:
- Wired: Press/mount the panel-mount USB-C socket into the rear port and wire 5V through the rocker switch to the ESP32 board's 5V and GND pins.
- Battery Version: Wire your 3.7V LiPo battery to the TP4056 B+/B- pads, route the power output through your power switch to the board, and mount the TP4056 and cell neatly inside the cavity.
- Close Up: Slide and press your chosen backplate into the main angled chassis until it sits flush.
Tags
License