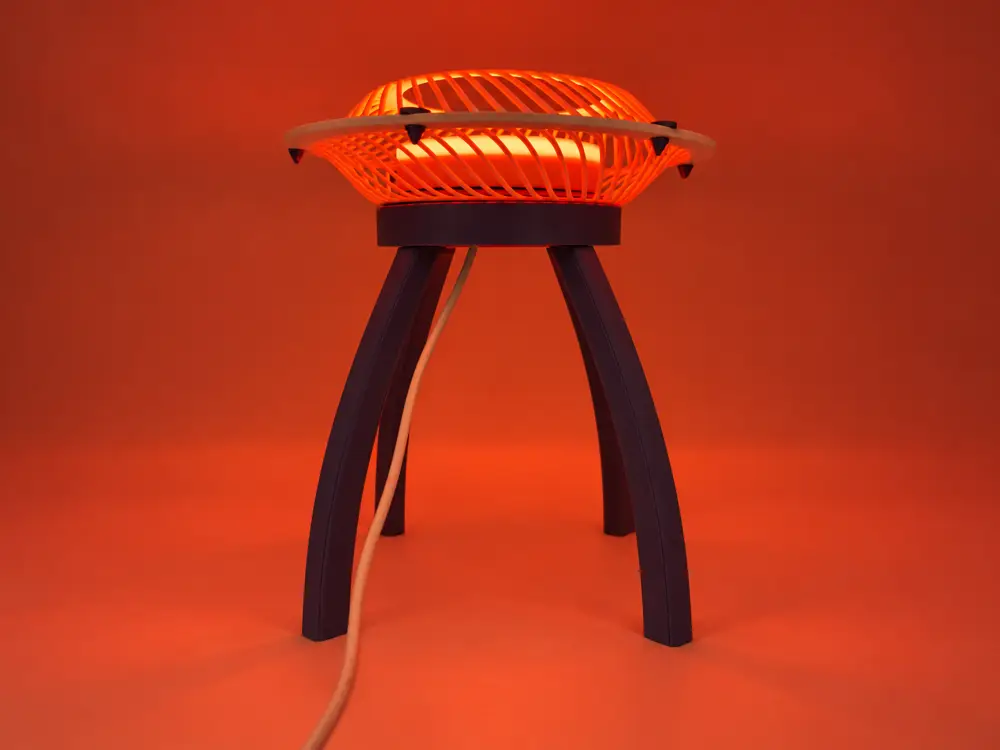
Favira Up - Thermoformed Table Lamp


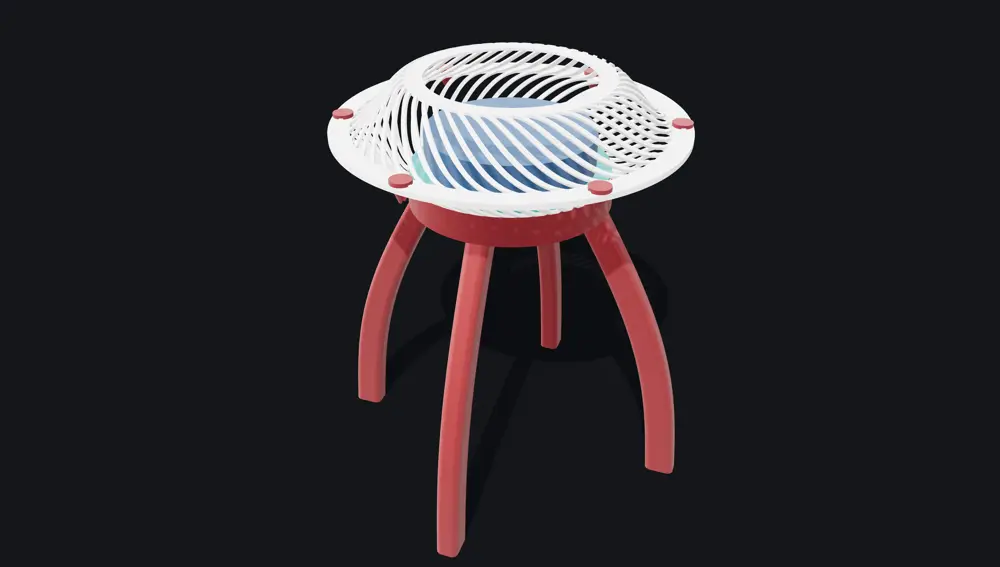
Favira Up is a table lamp with a shade that takes shape after printing. Both halves are printed flat, then heat-formed using a mould and a matching pressing tool. The mesh opens into two curved shells, which join around their rims to create a shape reminiscent of a small flying saucer.
The assembled lamp measures 156 mm at its widest point and 199 mm in overall height. Its base stands on four legs and houses a circular LED module powered via USB-C.
The model includes 6 matching shade pairs: 12 individual lower and upper shells, with different designs and geometries. Choose your favourite pair and combine colours for the base, legs and shade to create your own style.
How thermoforming works
The shade is not printed in its final shape. Each half starts as a flat disc, placed inside the mould and secured around its perimeter with a threaded clamping ring.
This ring keeps the outer rim in position during heating and pressing. It prevents the area containing the fastening holes from warping, so the two shells can align properly during assembly.
Heat the disc gradually and evenly with a hair dryer, without exceeding 80 °C. Once the material softens, press it into shape using the matching forming tool. Maintain pressure while it cools, and remove the shell once it is firm enough to hold its shape. Repeat with the other half.
ABS is recommended for the mould, pressing tool and clamping ring. These are forming tools, not lamp components, and can be reused to make additional shades.
Parts to print
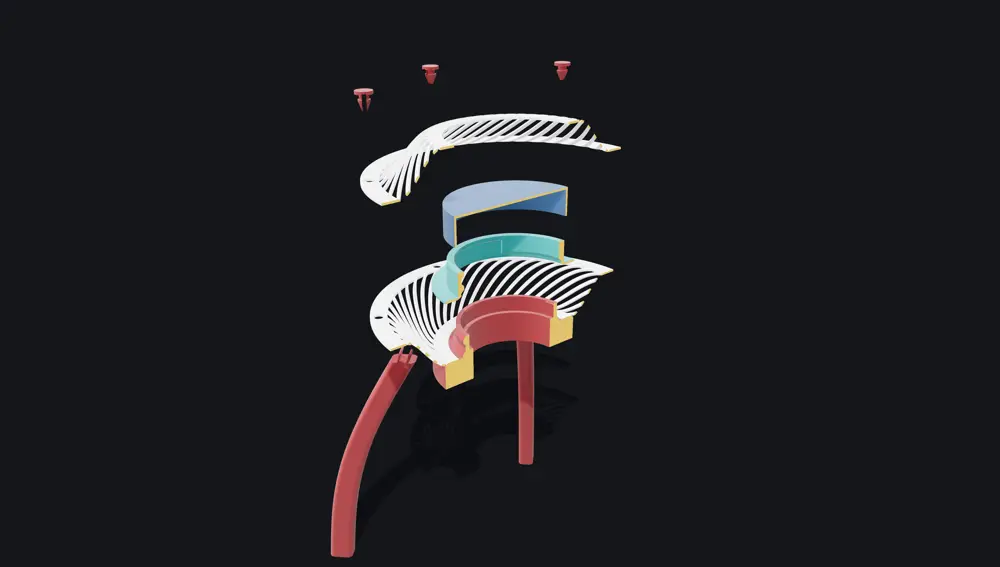
- Lower and upper shade shells: choose one of the 6 available pairs; both parts print flat.
- Base: 14 mm tall, with a recess for the LED and an opening for its cable.
- Shade retaining ring: secures the lower shell to the base with a bayonet fitting.
- Legs ×4: with push-fit joints; print lying flat.
- Fastening clips ×6: join the rims of the two shells.
- Optional inner shade: a cap-shaped insert that can be added during assembly.
- Lower mould: 167 mm in diameter.
- Pressing tool: 156 mm in diameter.
- Threaded mould ring: 178 mm in diameter, used to clamp the disc’s outer rim.
The threaded ring is used only to secure the disc inside the mould during thermoforming.
Print settings
- Nozzle: 0.4 mm.
- Layer height: 0.2 mm.
- Lamp material: PLA.
- Base infill: 40–60%.
- Supports: none required.
- Shade discs: print flat; thickness 1.2 mm.
- Legs and clips: print lying flat, following the supplied orientation.
For shade components that use infill, 15–25% is the suggested range. The thin mesh of the discs is handled by the print paths; the openings should remain empty.
For the forming tools, use ABS, 2–3 walls and 15% infill. Print them individually on the build plate; they do not need to be solid.
Additional components and equipment
- A 59.5 × 8 mm circular LED module compatible with the base recess, such as the Bambu Lab module specified for this size.
- A USB-C cable and power supply suitable for your chosen module.
- A hair dryer for gradual, even heating.
- Heat-resistant gloves for handling parts during forming.
- Optional felt pads beneath the feet to protect delicate surfaces.
A circular RGB LED module is recommended, allowing you to change the mood without replacing any printed parts. No lamp holder or mains-voltage wiring is needed inside the lamp.
Assembly
- Form both shade halves. Place the first disc in the mould, tighten the threaded clamping ring, heat it with the hair dryer without exceeding 80 °C, then press it with the forming tool. Allow it to cool before removal and repeat with the second disc.
- Fit the legs. Push the four joints into their seats beneath the base, with each leg’s flat face pointing outwards. The joints are a press fit; a small amount of glue is optional if you want a permanent connection.
- Install the LED. Feed the cable down through the opening in the base, then press the module into its recess. Small retaining tabs hold it in place.
- Position the lower shade. Place the shell’s central opening over the locating seat on the base, making sure it sits evenly and is correctly centred.
- Lock the shade retaining ring. Insert it and turn it approximately a quarter turn to engage the bayonet fitting.
- Add the optional inner shade. If desired, fit the cap-shaped insert before closing the lamp.
- Position the upper shell. Bring the two rims together and align their fastening holes.
- Insert the six clips. Push them through the holes until they engage, securing the two halves without screws or glue.
- Connect the power and switch on the LED once assembly is complete.