Inverted Spear of Heaven - Toji Fushiguro (Jujutsu Kaisen)



Description:
This is a 3D printable replica of the iconic Inverted Spear of Heaven, wielded by Toji Fushiguro in the anime Jujutsu Kaisen. Modeled from scratch in Blender, this piece features high accuracy and is optimized for 3D printing. Perfect for cosplay, display, or anime collections!
Print Settings:
- Material: PLA (shown in photos), PETG, or TPU.
- Infill: 15% - 20% (Gyroid infill recommended for optimal strength, but feel free to change it).
- Layer Height: 0.2mm.
Build Plate Breakdown:
Plate 1: The Blade
- Contains the main blade parts.
- No supports needed. Ready to print with standard settings.
Plate 2: Connectors & Guard
- Connector joint: Placed slightly further apart on the bed to prevent any print failures from affecting other parts. Supports required.
- Handguard (Largest piece): Pre-oriented in the most optimal position to minimize visible artifacting. Supports required underneath (the supported surface will be hidden once assembled). You may rotate it if preferred.
- Small parts: The remaining minor components on this plate do not require supports.
Plate 3: Handle & Ring
- Handle: Requires minor internal supports that are very easy to remove post-print.
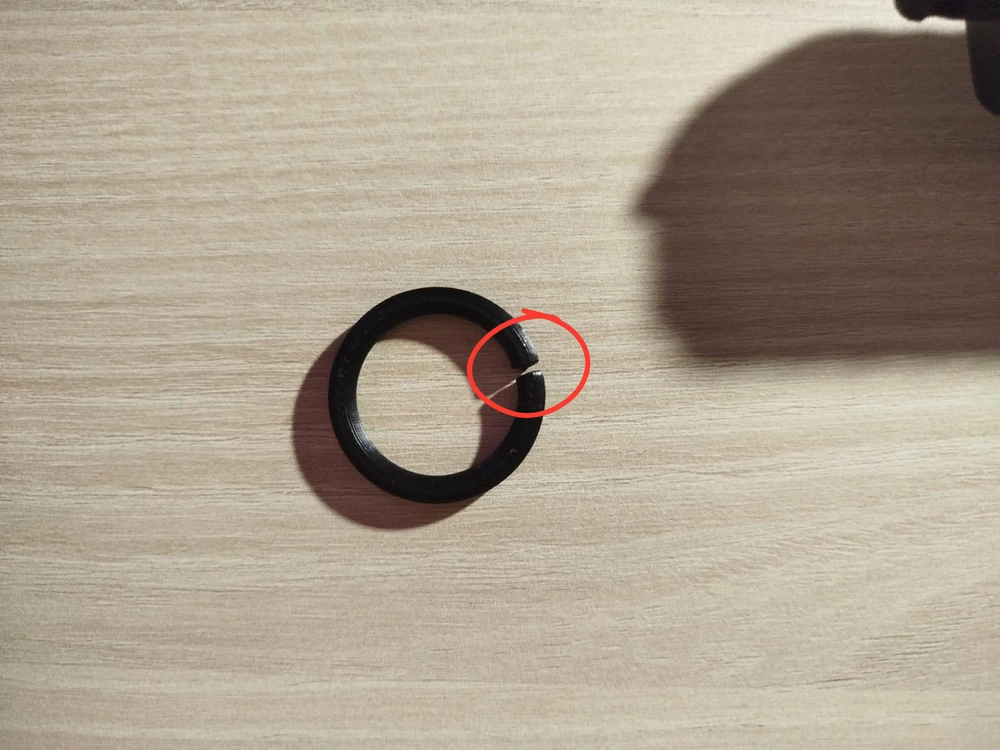
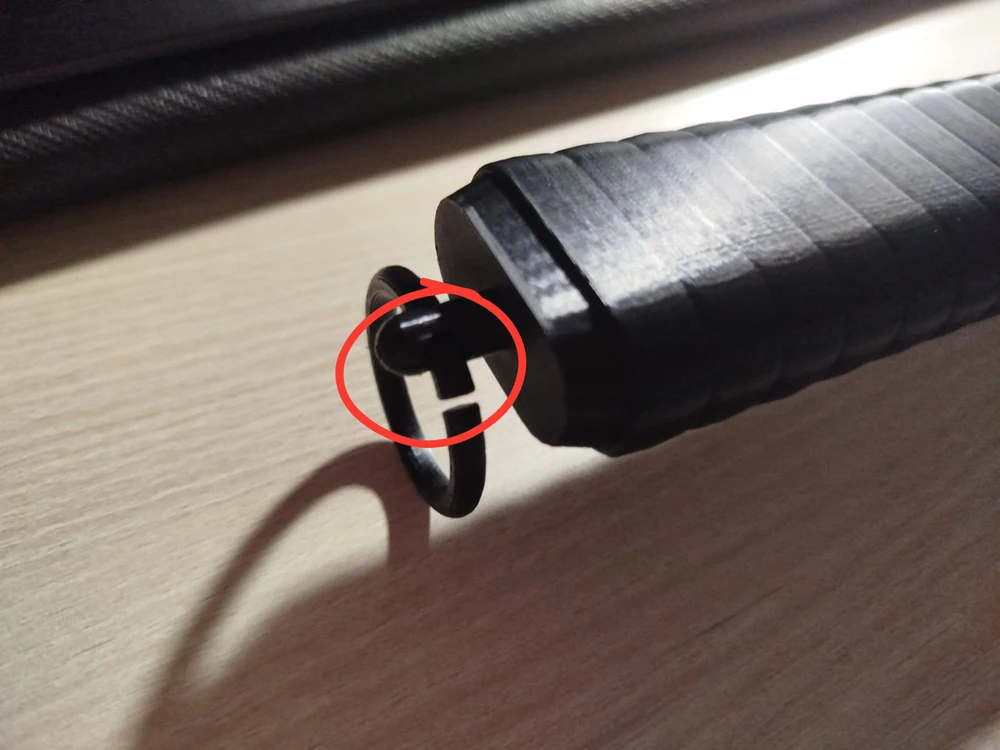
- Ring attachment: Features a small slit/cutout designed to easily snap or slide onto the handle.
Assembly Instructions:
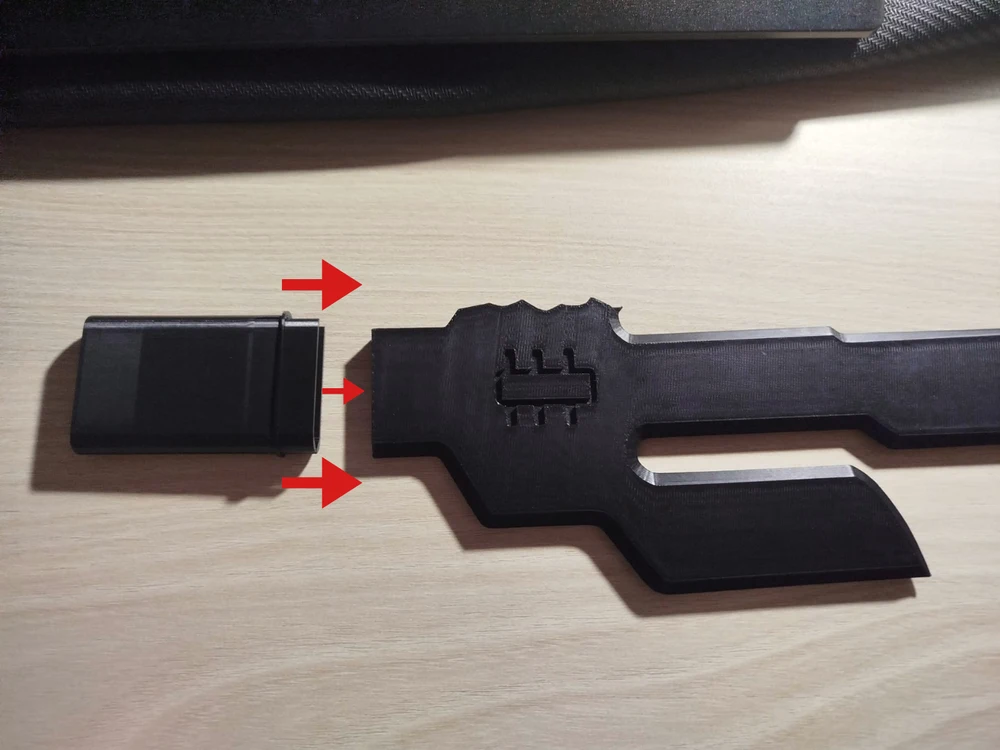
- Step 1: Connecting the Blade
Connect the main blade to the connector joint piece.
IMPORTANT: Be very careful with the connector joint. During test prints, the tabs that hold the blade broke twice—once because it dropped and another time because it was pressed too hard. Despite this, it functions perfectly if handled gently.
RECOMMENDATION: It is highly recommended to use the preferred glue for the specific print. Apply it to the inside of the connector joint before inserting the blade.
- Step 2: Attaching the Handguard
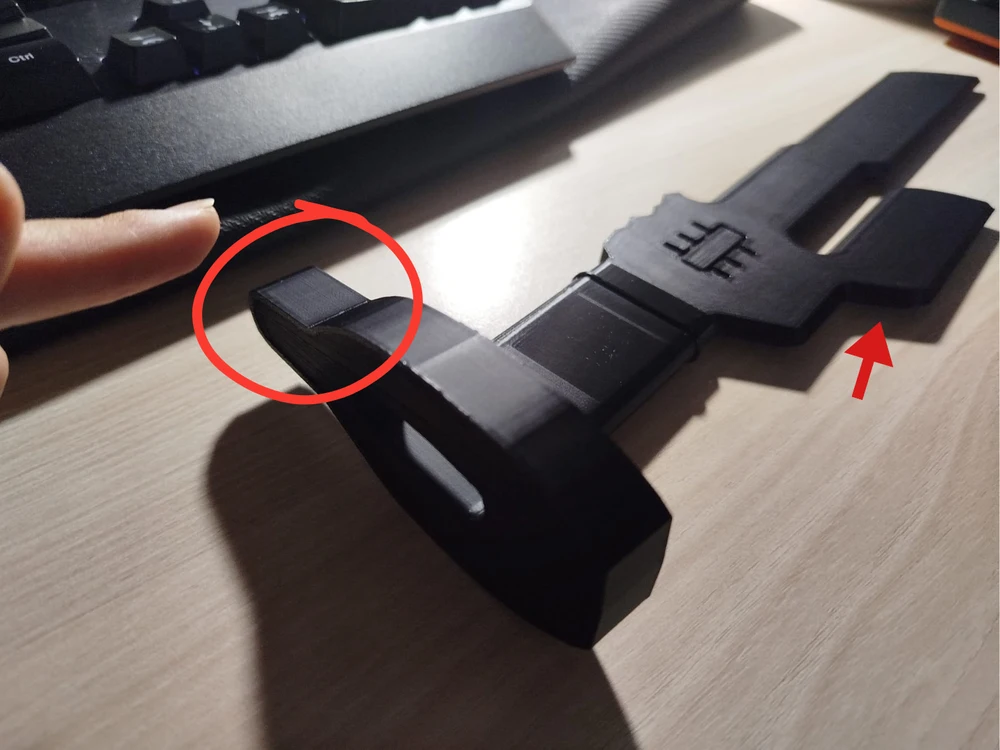
Slide the handguard onto the assembly from Step 1. Alignment Tip: To orient it correctly, look at the blade and the protruding side of the handguard; they should face opposite directions.
Glue is optional for this step. It can be applied at the very end to the handle once everything is together, but it can also be applied now if preferred.
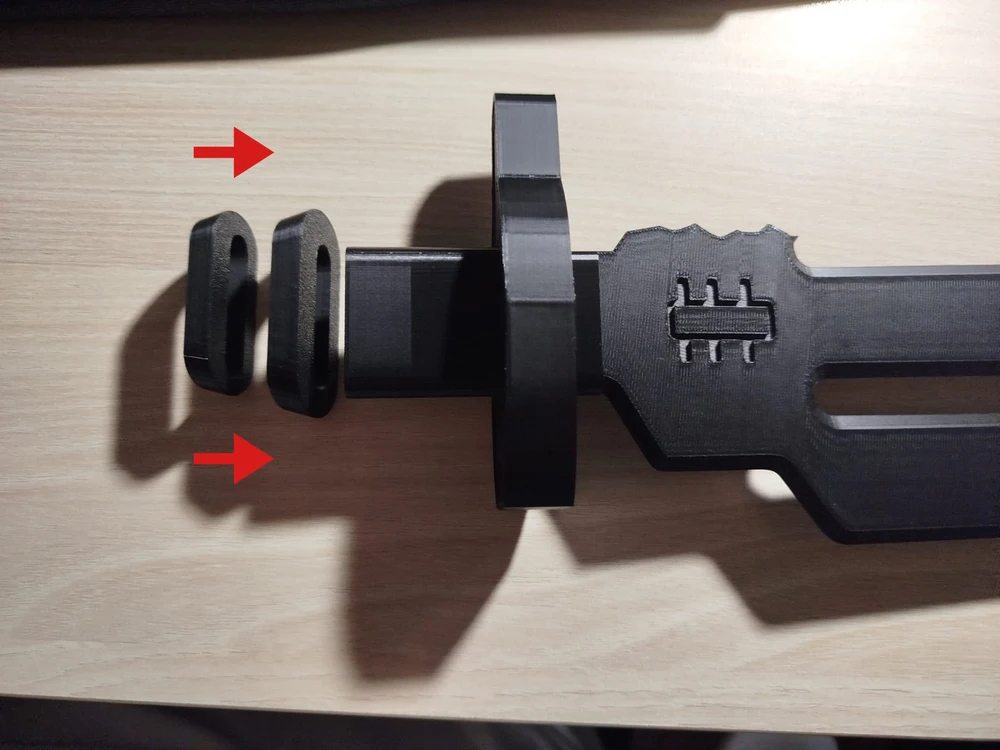
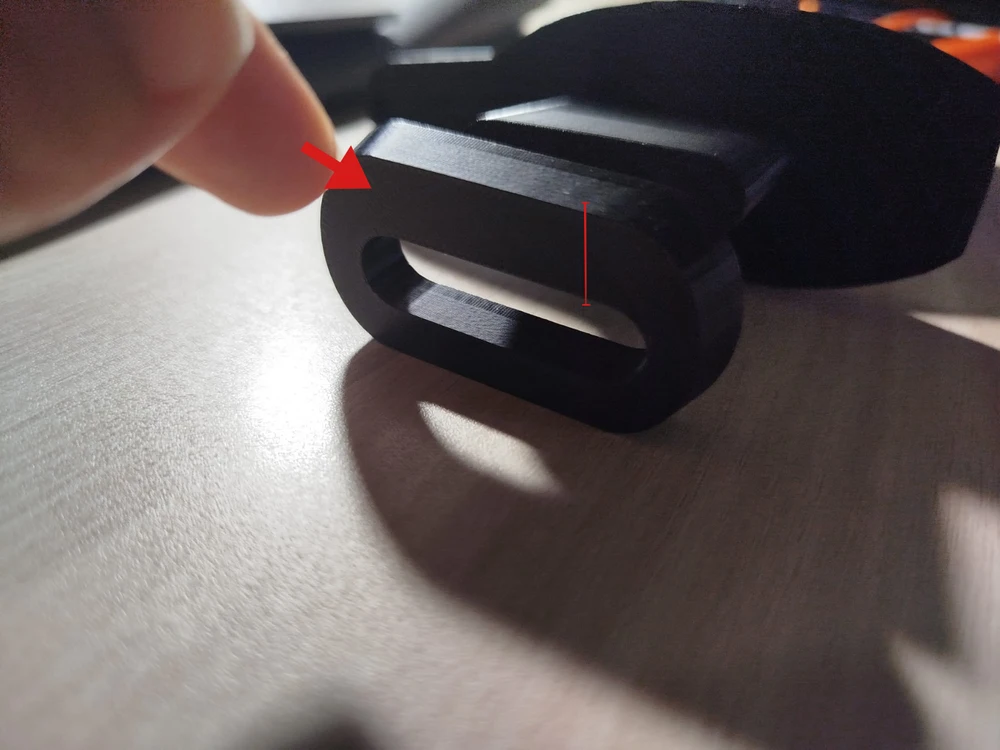
- Step 3: Sliding the Small Rings
Insert the two small ring pieces next. Slide the larger one in first, followed by the smaller one.
Alignment Tip: Notice that these pieces have one side thicker than the other. The thicker side must face upwards.
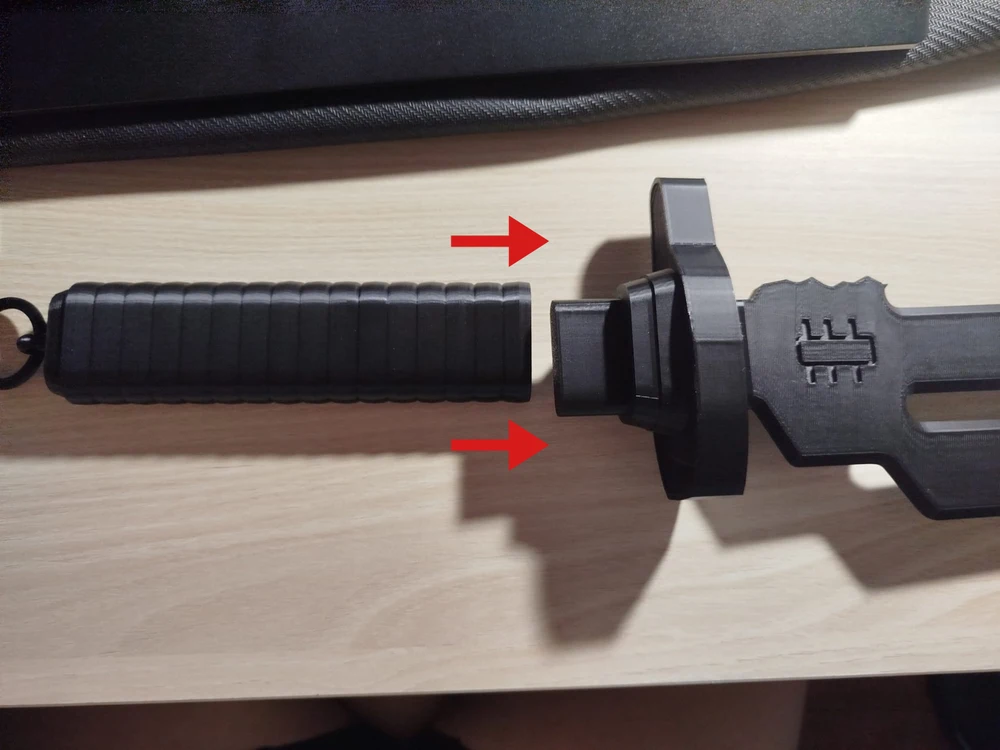
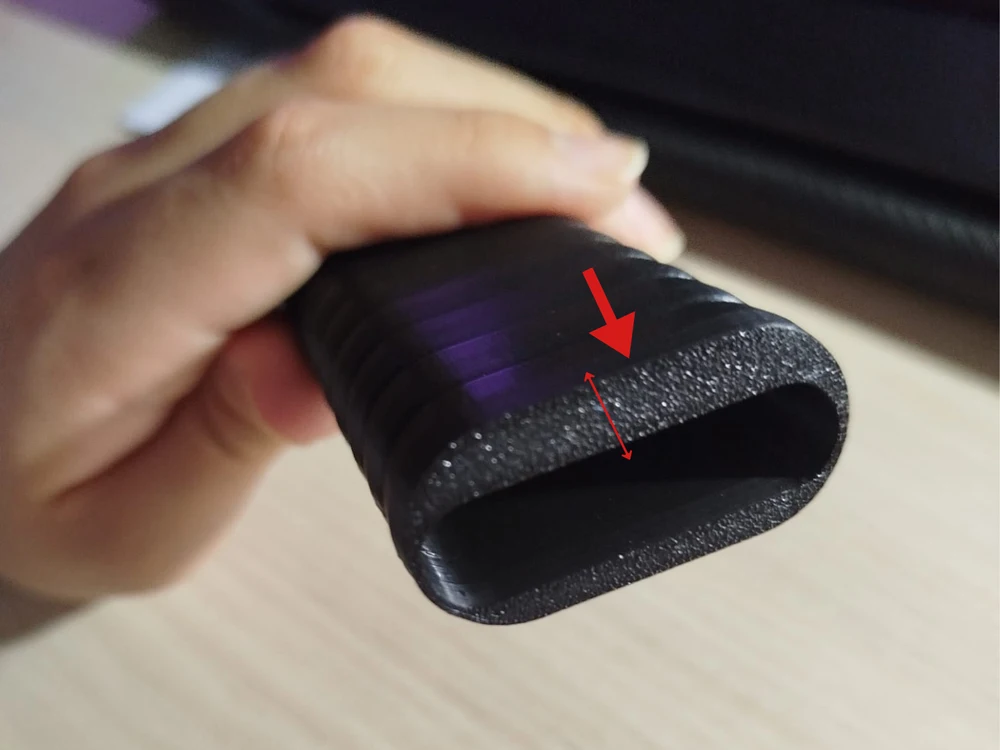
- Step 4: Attaching the Handle
Connect the handle to the rest of the assembled model.
RECOMMENDATION: This is a good point to apply glue inside the handle to permanently seal all the components together.
- Step 5: The Final Ring
Pass the final ring through the hole at the bottom of the handle, and the assembly is complete.