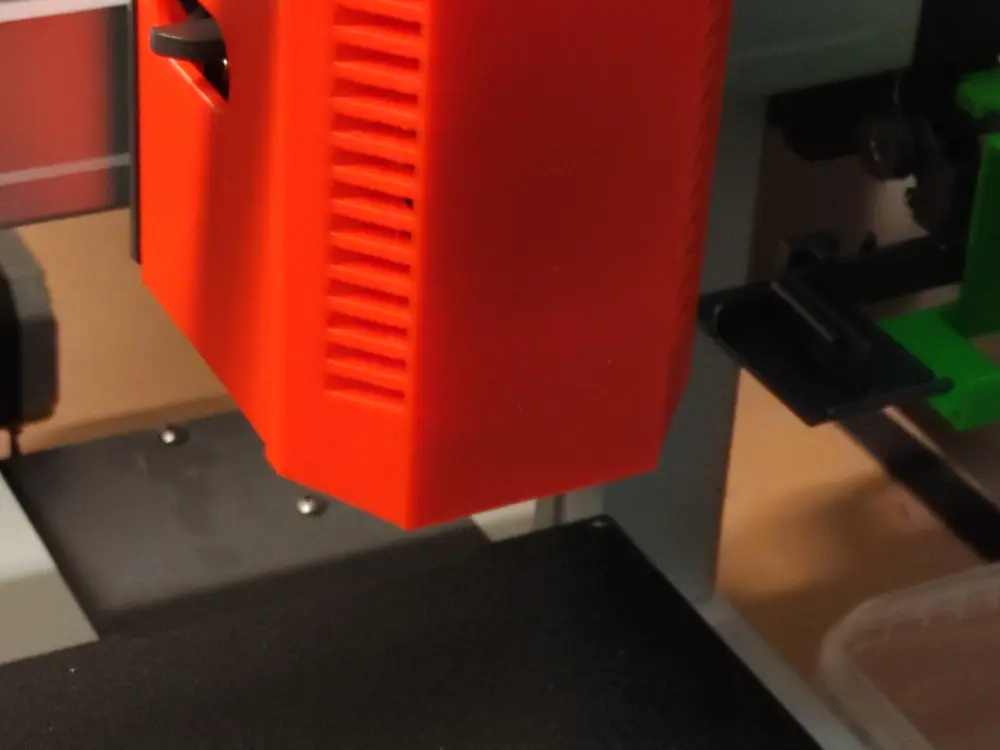
Kobra 3 and Kobra 3v2 magnetic print head shroud (designed for 3D printing)


The is a print head shroud replacement for the Kobra 3 and Kobra 3v2, where the front cover is magnetically attached.
This shroud has been designed from the ground up to provide the same function as the original shroud while being easy to print, where other shrouds seem to try to replicate the visual design and features of the original shroud, a design which is very unsuited for 3D printing.
The weight of the new shroud (with magnets) is a little less than the original by a few grams (at 20% infill or less).
Printing
Print both parts - the base which is mounted on the print head replacing the original base and the cover (called "front" in the files). Both parts can be printed in PLA as the distance from the hot end to the shroud is so long, that the temperature does not exceed the glass transition temperature of PLA (55° or more). The shroud has been tested with PLA, High Speed PLA (higher temperature) and PETG without any problems.
If using the STL files and slicing the objects yourself, please note, that the base should be printed with support (normal, touching build plate), while the front can be printed without supports.
Remove the old shroud
First remove the cover from the existing print head shroud and remove the two wires to the fan and the light. Then remove the base of the shroud - there are two hex screws that are accessed from the front (toward the bottom) and two slightly small hex screws at the rear of the print head near the top. Now you can remove the shroud by tilting it toward the left while removing it.
Assembly
The shroud is meant for magnets with a diameter of 5mm and a depth of 1.5mm (these are often sold as 5mmx2mm) and should be pressed into the plastic or glued in as appropriate. Keep the pole all magnets on the base oriented in the same direction, and the magnet on the cover also all the same, but reversing the poles. Test carefully to ensure the magnets are oriented correctly, before pressing them into place or gluing them in place! After they are glued in place test the function by attaching the cover to the base - it should snap together effortless - if not, you might have to post-process the prints a little.
After setting the magnets into place, use the two self cutting screws (the smaller hex screws) to pre-cut a thread into the base by screwing a screw into each hole and move it forth and back a couple of times - the will make it easier when you attach the base to the printer.
Remove the fan from the original front and likewise the electronics board (PCB) - the latter can be a little hard to get out, but it is possible.
Mount the PCB in the new font - place it under the small knob in one side and press firmly on the other side and it should snap into place. Route the wire in the slot toward the left (with the top pointing away from you) and wiggle the wire into the wire "lock" at the top and place the wire nice between the two wire guide between the bottom and the wire lock.
Now place the fan into place - if the wire from the PCB has been placed correctly, it will not hinder the full insertion of the fan. Screw the fan into place and route the wire into the wire lock (on top of the PCB wire).
Attach the base to the printer, by screwing into place with the two larger screws from the front and the two smaller screws from the back.
Attach the two wires for the fan and the light to the print head and click the cover into place (note, there are a guide in both sides so you can slide in the cover a little high and let the magnets snap it into place).
Design
The base was designed to only need support for the cutout for the cables at the top. All other features does not need any supports.
The front was designed not to use supports at all. Instead of the closed rectangle wire guide of the original, the wire guides are designed to wiggle the wire through the opening at the top. The lighting PCB tabs are using a knob design, which still keeps the PCB in place, but which is much easier to press into place and also to remove if needed.