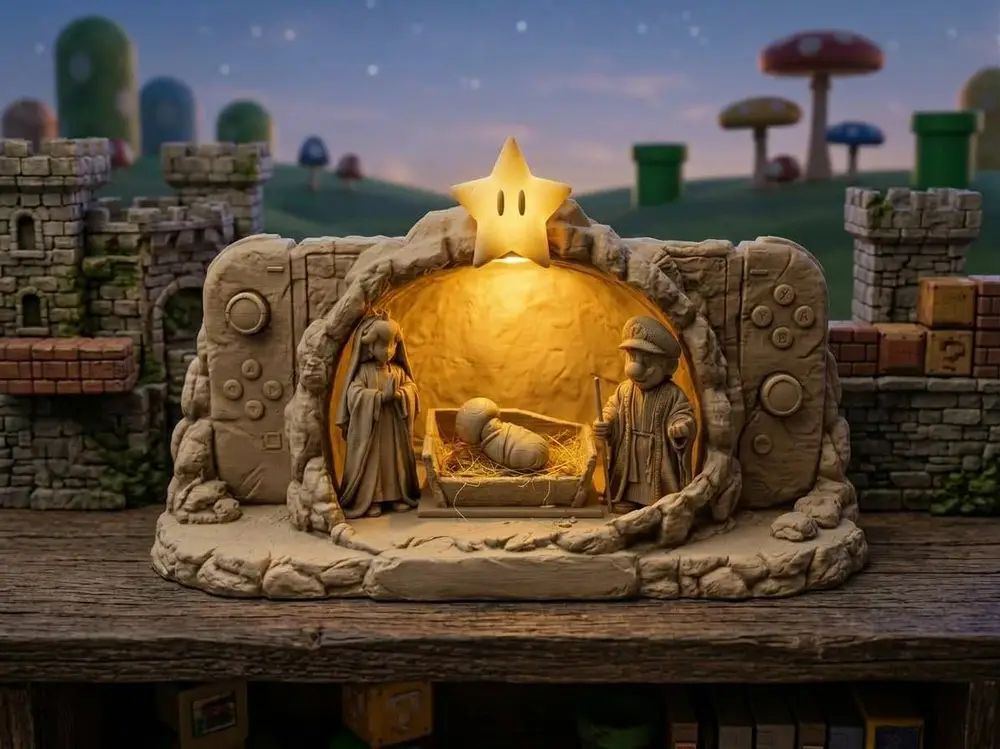
Natale Presepe Geek - Nintendo Switch Christmas


🎮 🎄 Presepe Geek: Grotta Nintendo Switch con Luce LED
Ciao a tutti! Sono davvero felice di condividere con voi questo progetto unico e originale: un Presepe ambientato all'interno di una Nintendo Switch!
Ci ho messo davvero tanto tempo, passione e impegno per pensarlo e progettarlo nei minimi dettagli, fondendo la tradizione del Natale con il mondo del gaming. Spero che vi piaccia e che possa portare un tocco di originalità e magia nelle vostre case!
🛠️ Consigli e Impostazioni di Stampa (Print Settings)
Per ottenere il miglior risultato estetico e strutturale, vi consiglio di dividere la stampa seguendo questi parametri:
1. La Grotta / Scocca Nintendo Switch
- Altezza strato (Layer Height):
0.20 mm - Riempimento (Infill):
5% - Supporti: Supporti ad albero organico (Organic / Tree Supports) dove necessario
2. I Personaggi (Natività)
- Altezza strato (Layer Height):
0.12 mm(consigliata per massimizzare la resa dei mini-dettagli) - Riempimento (Infill):
15% - Supporti: Supporti ad albero organico (Organic / Tree Supports)
⚠️ AVVERTENZE FONDAMENTALI E MONTAGGIO
- Dettagli sottili / Bastone di Giuseppe: Prestare estrema attenzione durante la rimozione dei supporti attorno ai componenti più delicati e ai bastoni dei personaggi, poiché potrebbero spezzarsi facilmente.
- 💡 TRUCCO IN CASO DI ROTTURA: Se un elemento fragile si rompe durante il post-processing, vi consiglio di utilizzare un piccolo pezzo di filamento del colore originale inserito come perno e incollarlo con della colla cianoacrilica (Attak). Risulterà invisibile!
- Illuminazione LED:
- Sul retro della struttura della Switch è presente un foro / alloggiamento dedicato per inserire un punto luce o una candela LED a batteria.
- Si consiglia di fissare il punto luce all'interno utilizzando del nastro biadesivo.
- (In foto potete vedere l'effetto finale ottenuto con il LED acceso).
🎨 Materiali e Rifinitura Estetica
- Materiale consigliato: PLA (Potete stampare i Joy-Con e la scocca in colori diversi per simulare una vera Switch, oppure realizzare un modello monocromatico elegante).
- Pittura opzionale: L'oggetto rende benissimo già con i colori del filamento, ma se volete personalizzarlo potete tranquillamente rifinire i personaggi e i dettagli utilizzando colori acrilici ad acqua.
💬 Un piccolo favore...
Se decidete di stampare il mio modello, vi chiederei con il cuore di pubblicare una foto della vostra stampa nei commenti e di lasciare un feedback o un mi piace! Vedere le vostre creazioni è la ricompensa più grande per il lavoro svolto.
Grazie a tutti per il supporto e... Buona Stampa! 🚀
🎮 🎄 Geek Nativity Scene: Nintendo Switch Grotto with LED Light
Hi everyone! I’m really excited to share this unique and original project: a Nativity scene set inside a Nintendo Switch!
I poured a lot of time, passion, and creativity into designing every last detail, blending Christmas tradition with the world of gaming. I hope you enjoy it and that it brings a touch of wonder and magic into your homes!
Printing Tips & Settings
For the best results and structural integrity, I recommend using these print settings:
1. The Grotto / Nintendo Switch Shell
Layer height: 0.20 mm
Infill: 5%
Supports: Organic tree supports (where necessary)
2. The Figures (Nativity)
Layer height: 0.12 mm (recommended for capturing fine details)
Infill: 15%
Supports: Organic tree supports
Assembly & Important Notes
Fine details / Joseph's staff: Be extremely careful when removing supports from the main components and the figures' staffs; they can snap easily.
💡 FIX FOR BREAKAGE: If a delicate part breaks during post-processing, I recommend using a small piece of filament (in the matching color) as a pin and gluing it with cyanoacrylate (super glue). It becomes invisible!
LED Lighting:
There is a dedicated hole/slot on the back of the Switch structure to insert an LED light or LED tea light. 💡 I recommend attaching the light source inside using double-sided tape.
(The photo shows the final effect with the optional LED).
🎨 Materials and Aesthetic Finish
Material: PLA (You can print the Joy-Cons and the body in different colors to mimic a real Switch, or create a sleek, monochromatic model).
Painting: The object looks great using the filament colors straight from the printer, but if you want to customize it, you can paint the characters using water-based acrylics.
One small favor...
If you decide to print my model, I would sincerely appreciate it if you shared a photo in the comments and left some feedback or a "like"! Seeing your creations is the greatest reward for the work I've put into this.
Thanks everyone for the support, and... Happy Printing! 🚀
You are prohibited from sharing, sub-licensing, selling, renting, hosting, transferring, or distributing the digital file or 3D printed versions of this object, as well as any other derivative work in either digital or physical form (including remixes).You are not allowed to use the objects in any manner that involves charging money or collecting fees without permission.