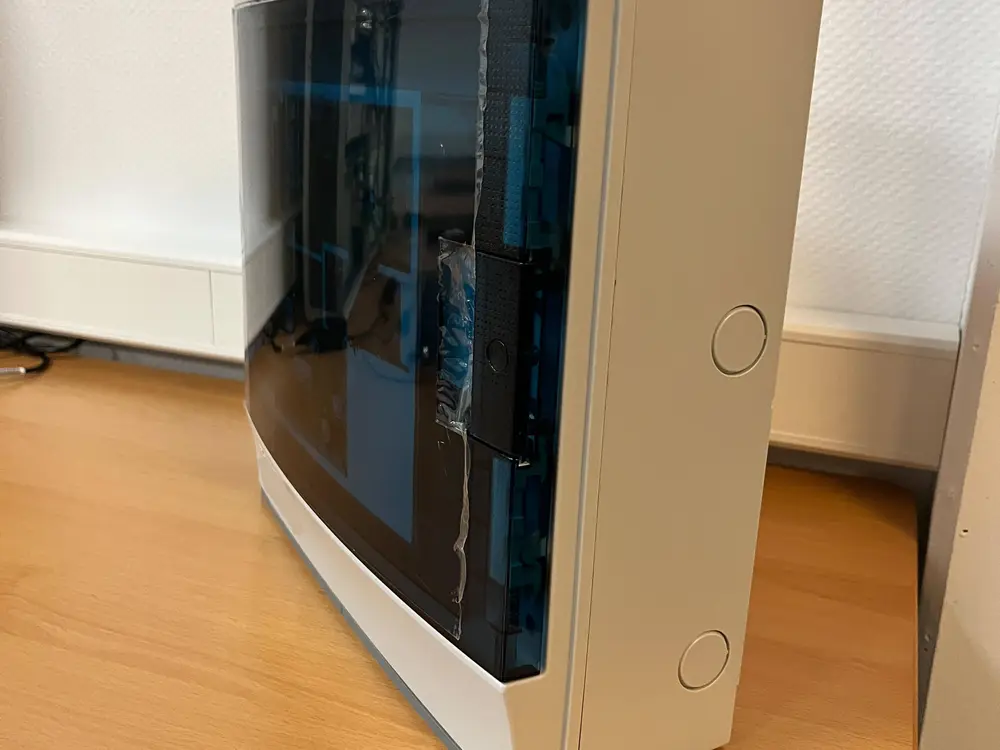
Standfuß - Stand base Aufputz-Verteiler ABB Striebel & John - Mistral 65 - on-wall distributor


Standfuß AP-Verteiler ABB STRIEBEL & JOHN Mistral 65
Für die zweireihigen Aufputz-Verteiler von ABB STRIEBEL & JOHN - Serie Mistral 65 habe ich eine zweiteilige Stütze entworfen, damit der Verteiler beim Öffnen der Tür, falls er z.B. für Schulungen oder Vorführungen auf einem Tisch verwendet wird, nicht nach vorne umkippt und stabil auf dem Tisch stehen bleibt. Der AP-Verteiler eignet sich hervorragend zu Demo- und Schulungszwecken für diverse Bussysteme (z.B. KNX, etc.) und kann mit Hilfe der Standfuß-Stützen somit auch auf eine Arbeitsplatte gestellt werden.
Je Stromkreisverteiler wird ein Set benötigt. Zur Befestigung der Stützen wurde der spezielle Sekundenkleber KRAFTPROTZ - FLÜSSIG verwendet. Die Oberfläche vorher gut mit Isopropanol oder Spiritus reinigen, abtrocknen lassen und den Kleber auf der unteren vorderen Fläche des Verteilers verteilen. Die beiden Sützen zusammenstecken, auf die Klebefläche mit der leicht stufigen Seite auflegen und antrocknen lassen. Auf einer präparierten Oberfläche den Verteiler umdrehen und stehen lassen, damit das Eigengewicht für etwas Druck sorgen kann. Den Kleber vollständig durchtrocknen lassen - fertig. Für einen rutschfesten Stand sollten unbedingt kleine, selbstklebende Gummipads aufgebracht werden.
Druckeinstellungen
Layerhöhe: 0,2mm
Wandlinien: 3, Arachne
20% infill, Gitternetz
Adaptive Layerhöhe
Stand base ABB STRIEBEL & JOHN Mistral 65 on-wall distributor
I have designed a two-part support for the ABB STRIEBEL & JOHN Mistral 65 series of double-row surface-mounted distributors so that the distributor does not tip forward when the door is opened, e.g. if it is used for training or demonstrations on a table, and remains stable on the table. The surface-mounted distributor is ideal for demonstration and training purposes for various bus systems (e.g. KNX, etc.) and can also be placed on a worktop using the pedestal supports.
One set is required for each circuit distributor. The special instant adhesive KRAFTPROTZ - FLÜSSIG was used to attach the supports. Clean the surface well beforehand with isopropanol or spirit, allow to dry and spread the adhesive on the lower front surface of the distributor. Put the two supports together, place them on the adhesive surface with the slightly stepped side and allow to dry. Turn the manifold over on a prepared surface and leave it standing so that its own weight can provide some pressure. Allow the adhesive to dry completely - done. Small, self-adhesive rubber pads should be applied to ensure a non-slip stand.
Enjoy printing, and if you would leave a like, comment, or even a make, I would be very pleased... ;-)
Print settings
Layer height: 0.2mm
Wall lines: 3, Arachne
20% infill, grid
Adaptive layer height
You are prohibited from sharing, sub-licensing, selling, renting, hosting, transferring, or distributing the digital file or 3D printed versions of this object, as well as any other derivative work in either digital or physical form (including remixes).You are not allowed to use the objects in any manner that involves charging money or collecting fees without permission.