
mechanical clock



Imagine a 3D-printed mechanical clock, a little masterpiece of engineering and creativity! Its beating heart is a deadbeat escapement, which isn’t in a rush to live: its ticking is steady, marking time with impeccable precision, without the frantic pace of more common escapements.
Printed layer by layer with durable plastic, it almost looks like a steampunk artifact from a future where technology meets craftsmanship. Its gears mesh elegantly, and the balance wheel dances in perfect harmony, like a dancer who never misses a step.
And then there’s that fascinating detail: the crisp, well-defined tick-tock, as if time itself pauses between each beat, with the confidence of something that knows it has everything under control. A little jewel of engineering that proves 3D printing isn’t just for making objects but for bringing marvels to life!
BOM:
all parts are printed except the pendulum rod. the best choice is to buy a m6 threaded rod with a minimum length of 1.1 m (I was lucky enough to find 1.5 m rods, if you can't find them and you find the more common 1 m rods you can also buy a coupler nut to extend the rod to the minimum length of 1.1 m). in addition to the rod you will need two m6 nuts, and fishing line for the weught hanging
in addition to the bar you will need some common materials such as:-lubricant (personally I found a silicone-based spray lubricant that is not greasy, alternatively allmighty WD40 will work well)
-exacto knife to remove blobs and elephant feet from the pieces
-an empty 0.5 lt plastic bottle
-old bolts and nuts
the clock works with a weight of half a kilo. for each hour of operation in fact the weight will drop by about 6 cm. hanging the clock at 1.8 m from the ground the clock will work for about 30 hours
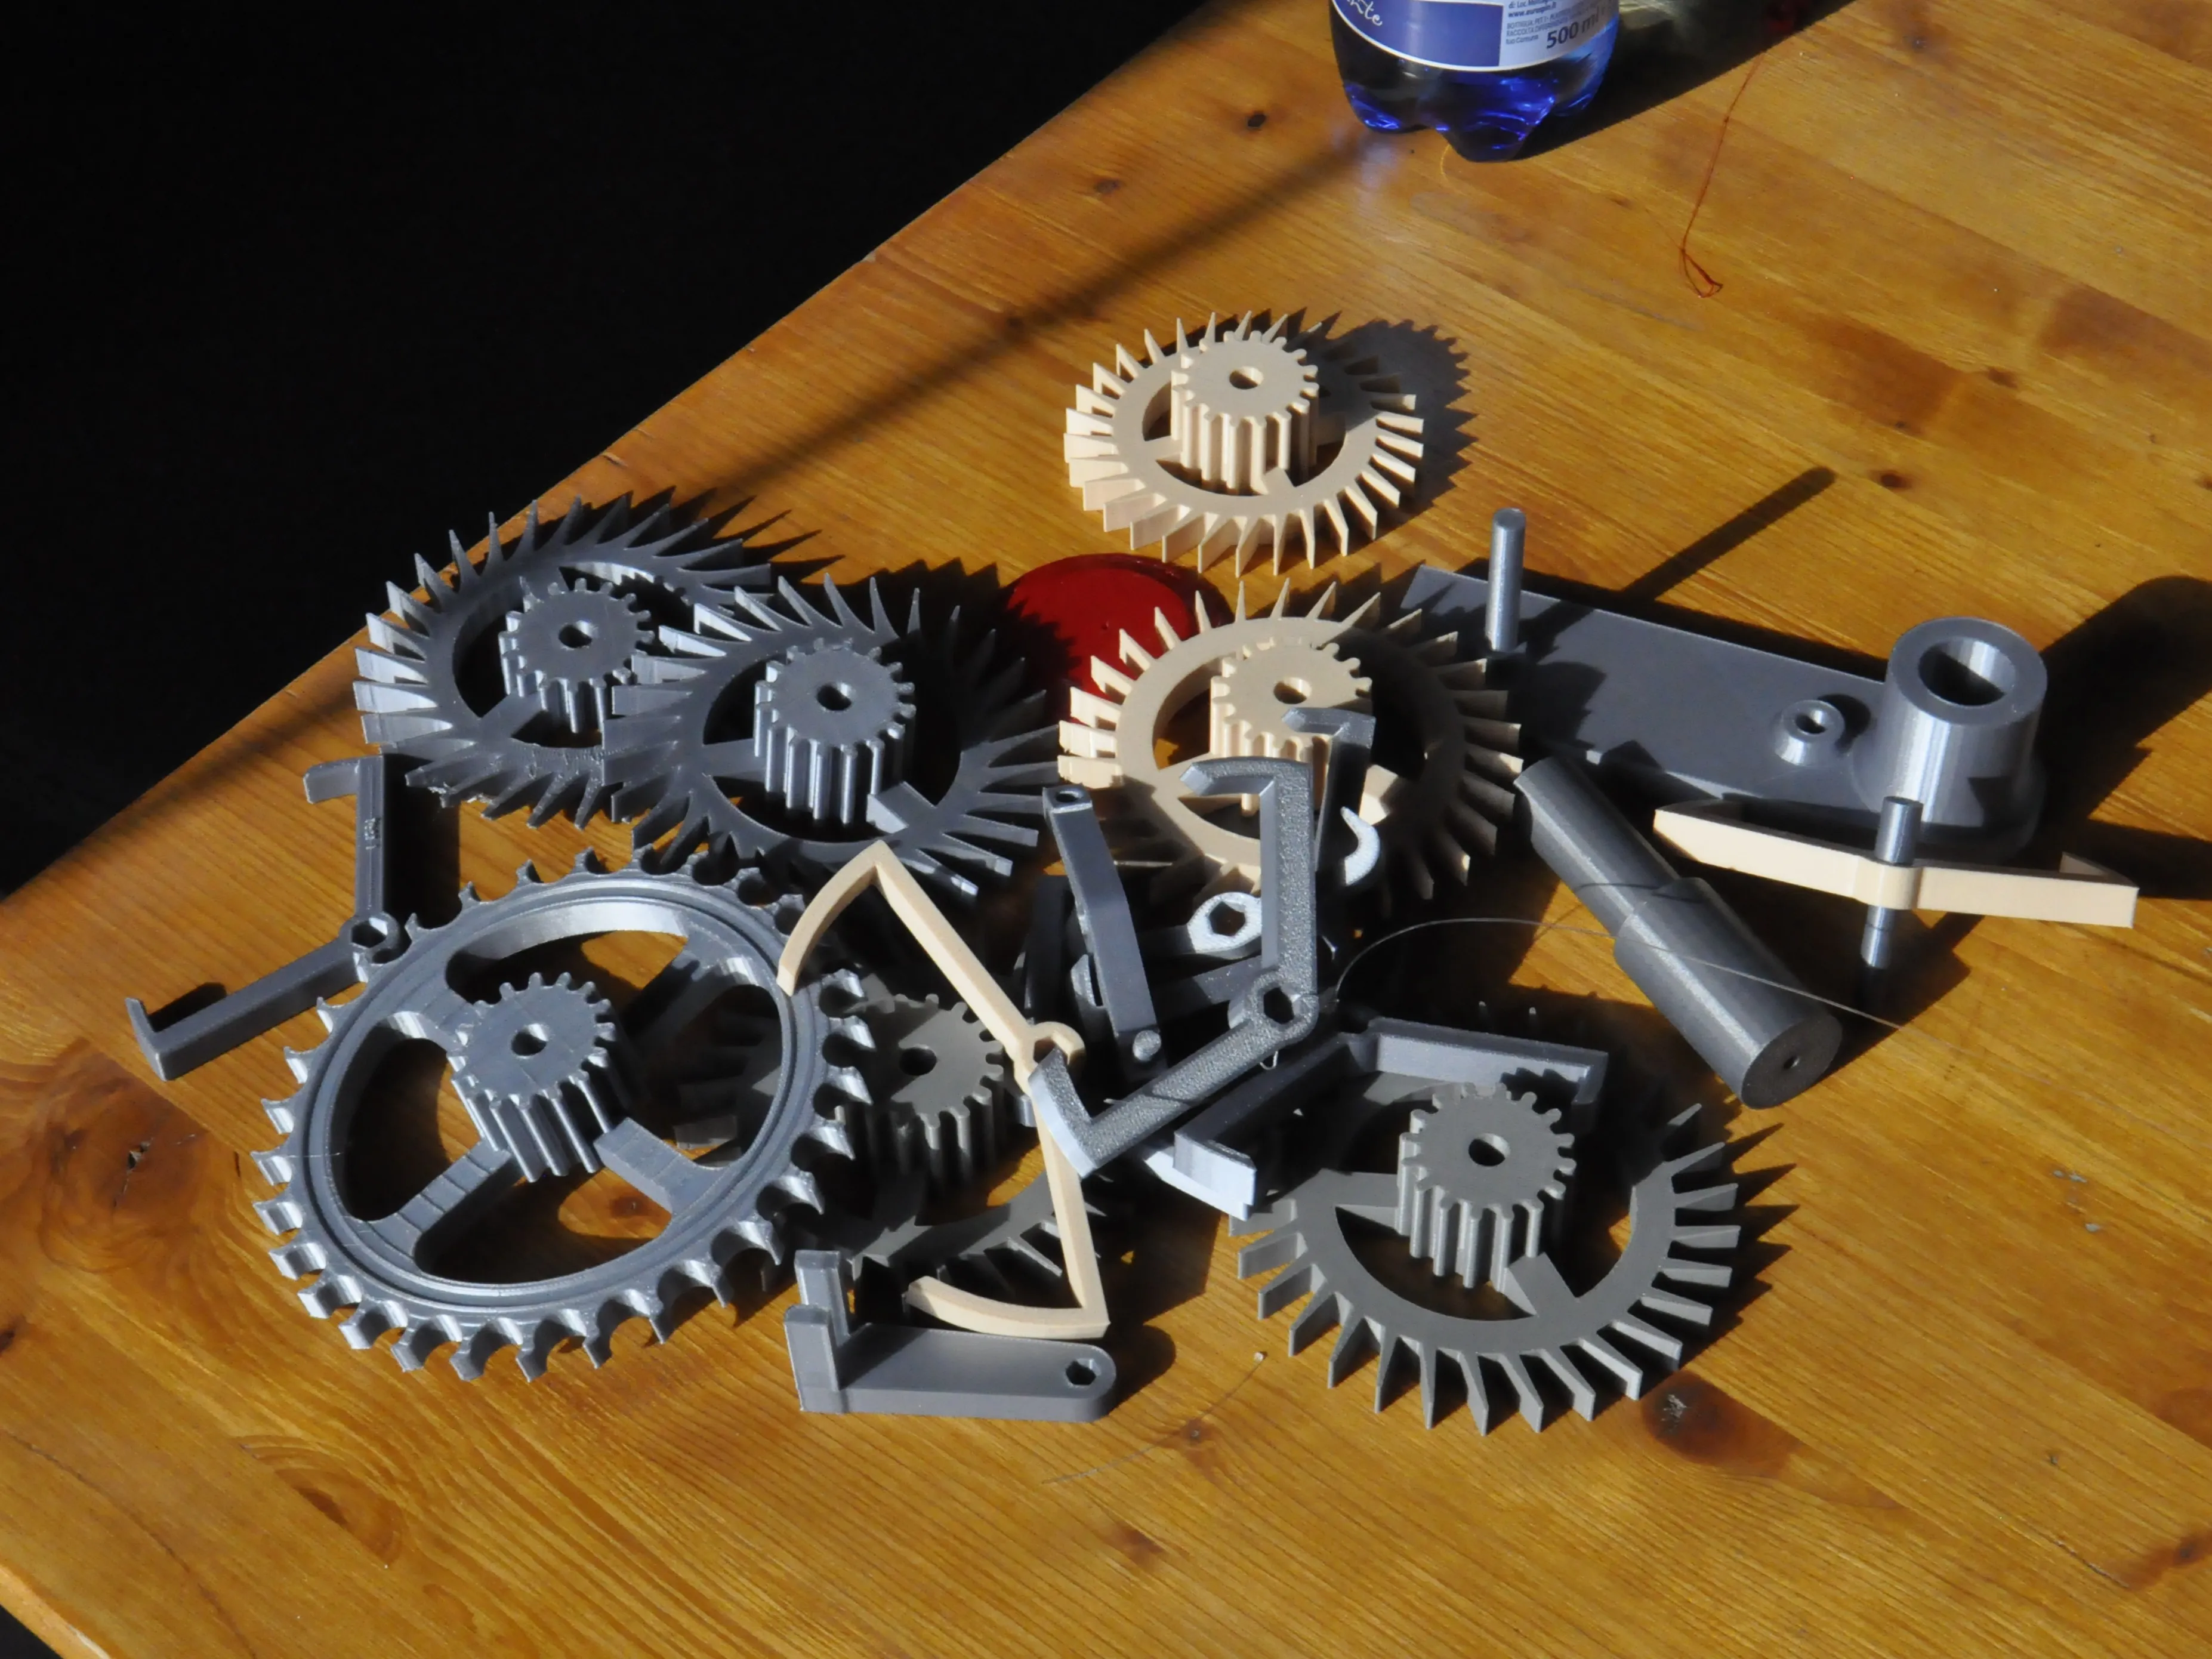
a little bit of iterations on the escapment to get this thing working….
ASSEMBLY GUIDE
PRELIMINARY STEP:-clean all the pins, axles and gears well. remove any burrs and elephant feet. if the geometry of the gears will help you in printing to avoid elevator feet for the escapement gear I could not apply the same changes for the thickness of the teeth. take your time and clean each tooth well, small defects could jam the mechanism.
-make sure that as you assemble the pieces all the gears slide freely on the axle! if you feel any small friction clean the axle with a bit of sandpaper and lubricate all the contact points with wd40 or other lubricant
1) assemble the extension as you see in the photo. now you will have 2 screws to adjust the extension of the pendulum. you will have to use the steel nut to adjust the length of the bar (between the pendulum support and the center of the bob) of about 1 m. then you can make the fine tunbig of the pendulum period using the printed pla nut
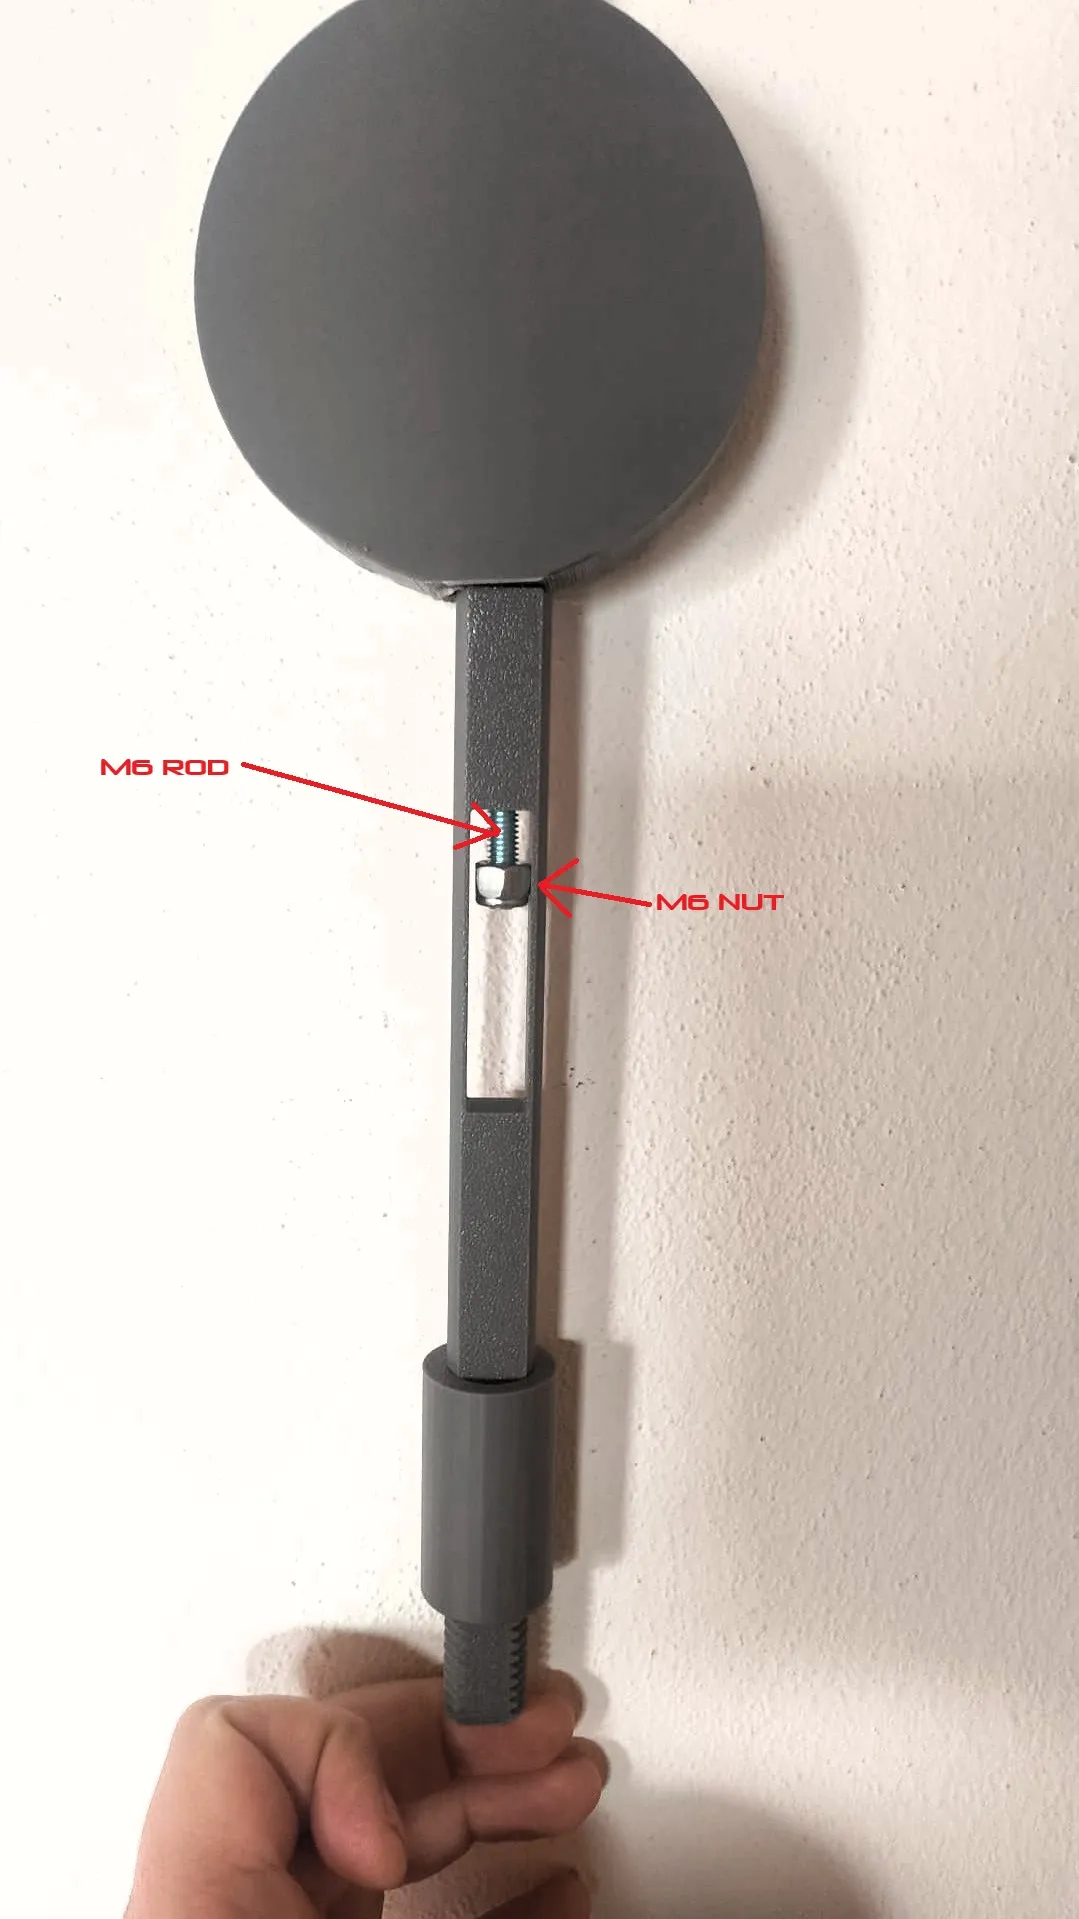
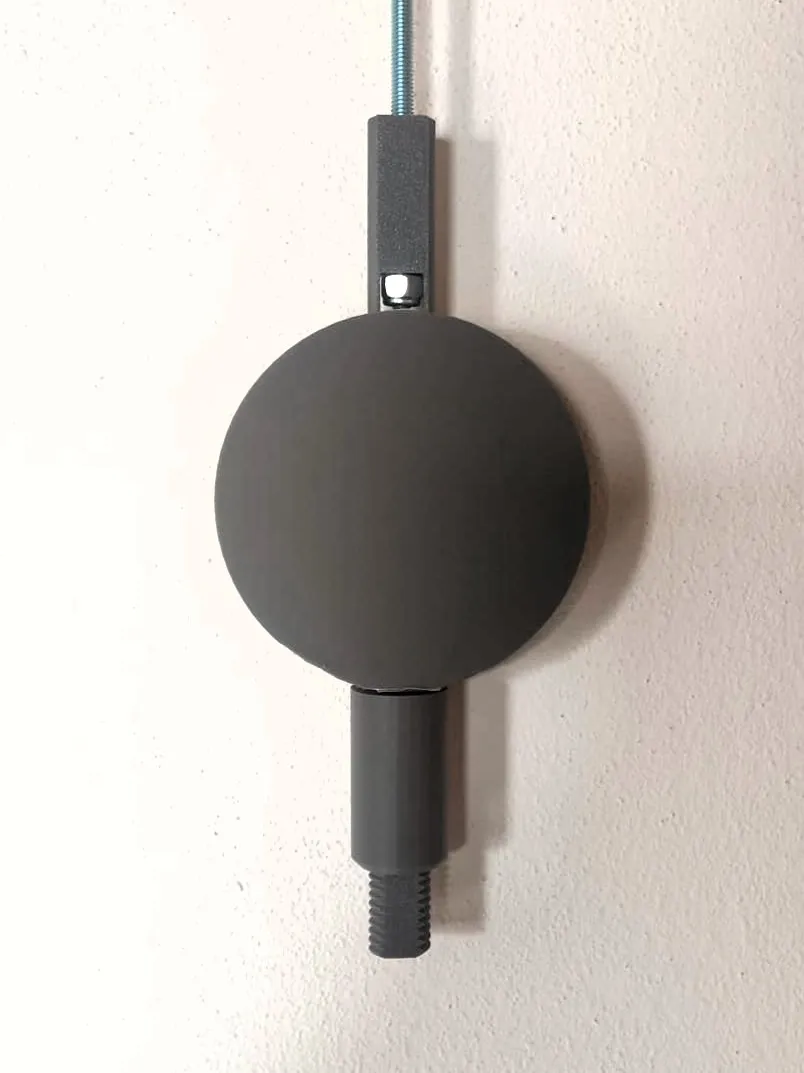
2) Insert the m6 bar into the pendulum hanger. Fix the bar with an m6 bolt inserted into the appropriate slot
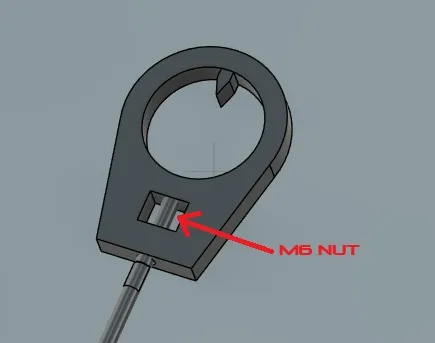
4) insert the main rod of the back of the frame. make sure it slides freely and don't forget to lubricate the axle
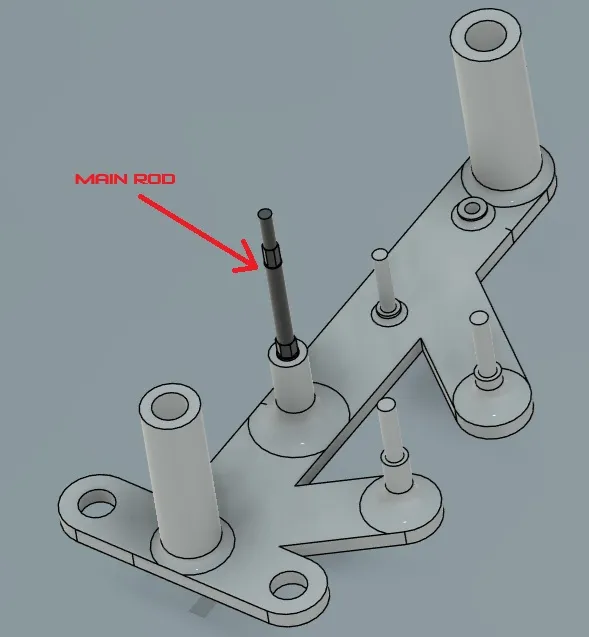
5) Insert escapement wheel
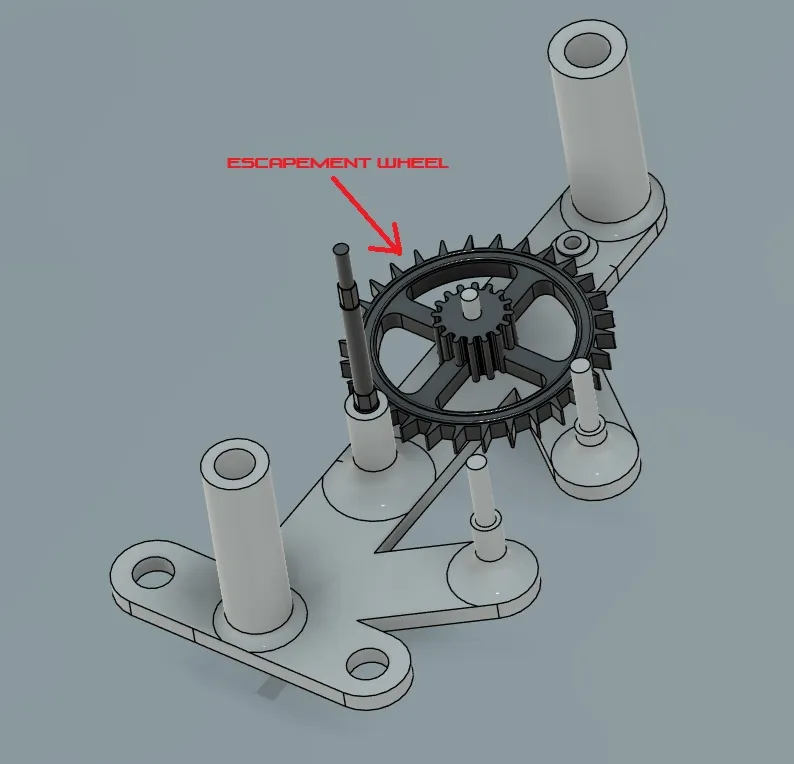
6) Insert gear 1 and gear 2. even if at first glance they seem identical, they are not. make sure that gear 2 is in the position you see in the figure. you will recognize it thanks to an engraving near the axis of rotation
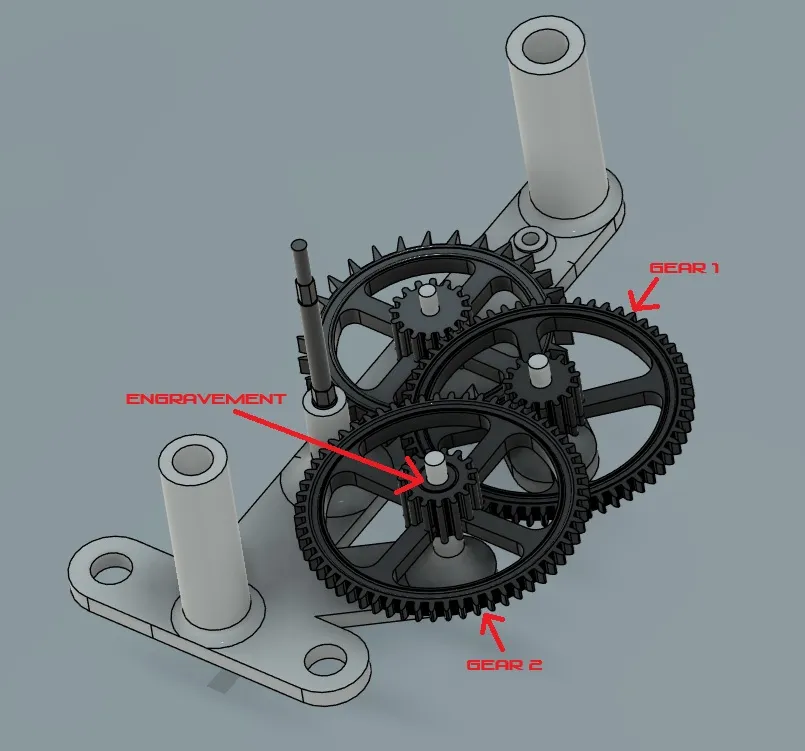
7) insert the driving wheel. this gear and the axle must be solid together so the gear will fit into the hex slot of the axle
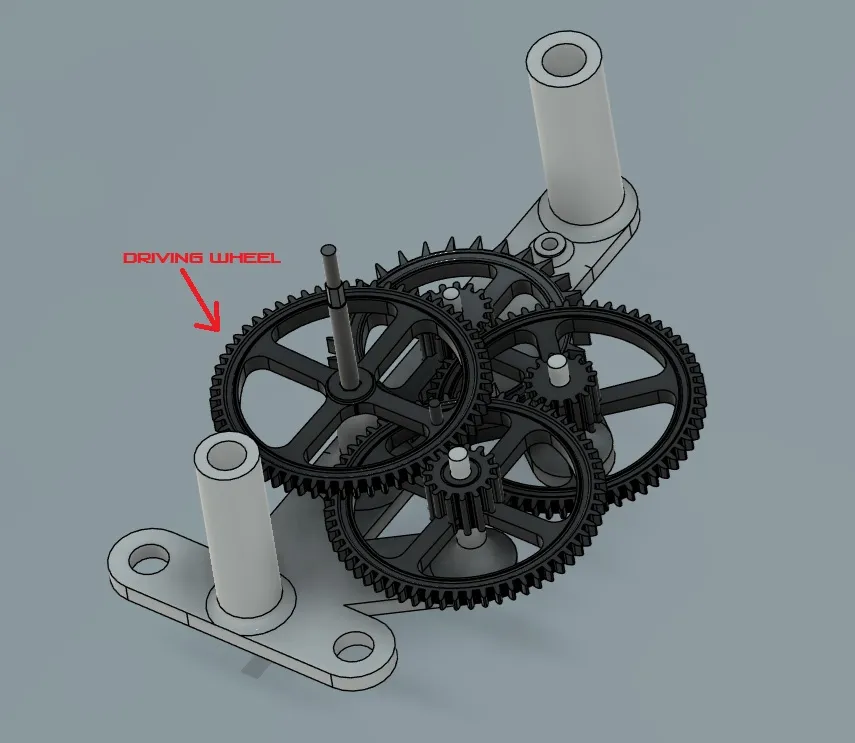
8) prepare the drum. insert the fishing line into the hole on the drum. then wrap the line clockwise (see the drawing) then, for ease of assembly in the subsequent phases you can fix the line with a bit of scotch tape to the side wall of the drum
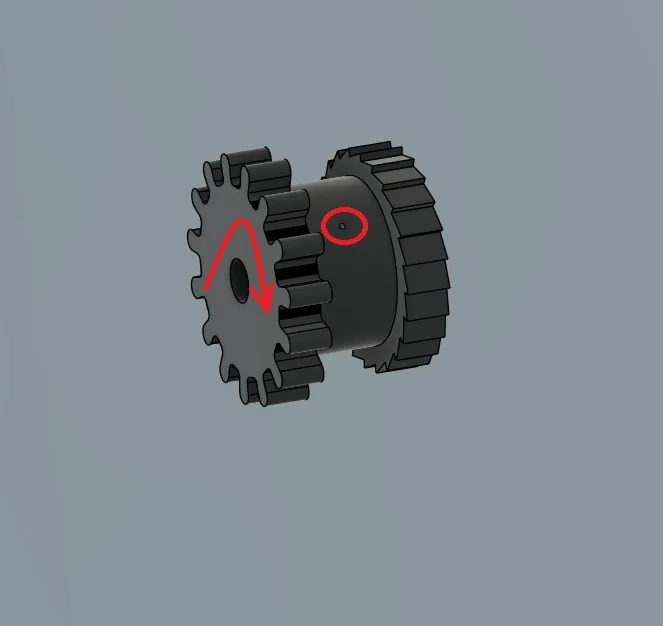
9) Insert the drum onto the axle and then the locking pin onto the driving wheel. Make sure the locking pin is firmly seated on the grooves of the drum to ensure it transmits movement.
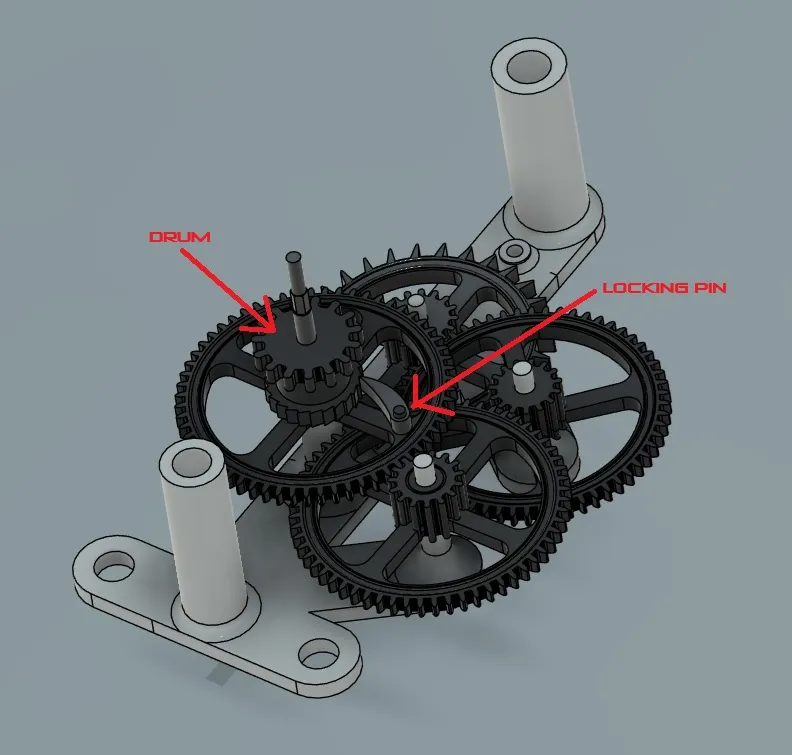
10) assemble the escapement mechanism. fix the pallet on the escapement rod. they will fit together thanks to a hexagonal joint on the axis
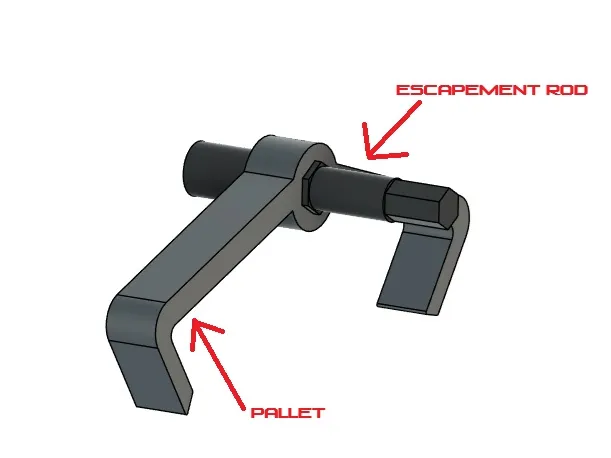
I added a small notch on the pallet to help with the clock assembly. The notch MUST FACING THE OUTSIDE OF THE CLOCK OR the clock will not work
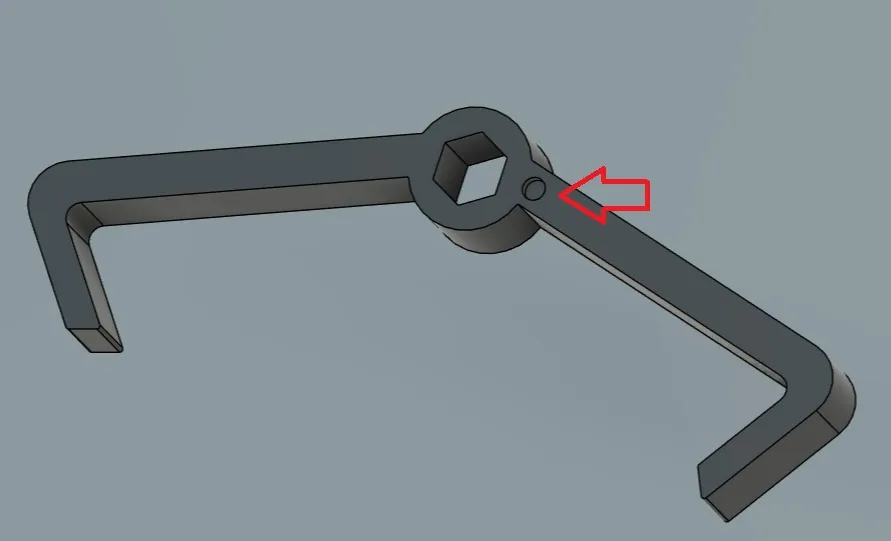
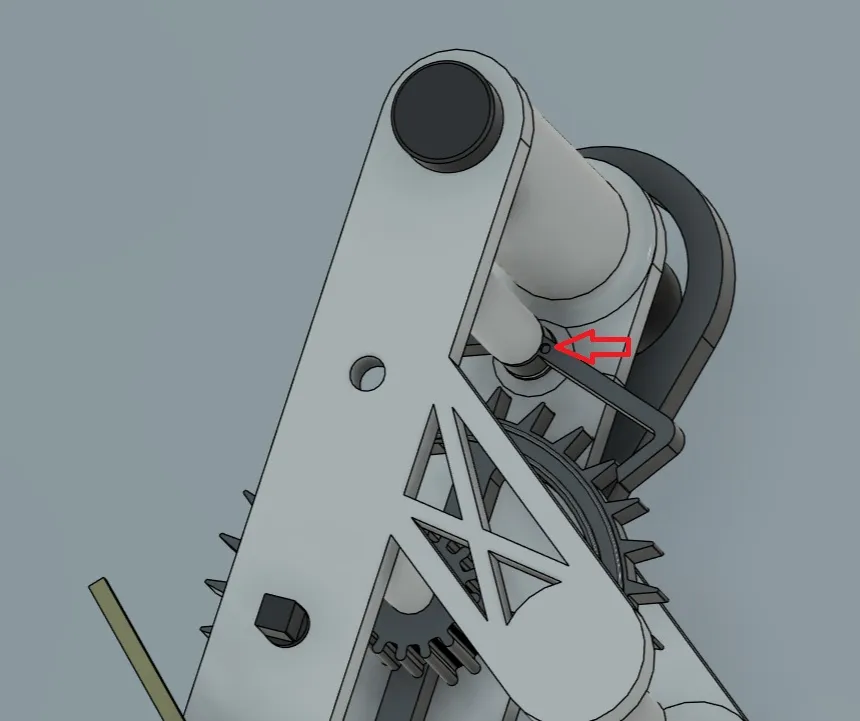
11) insert the assembled pieces into the upper hole of the frame. the cylindrical part must be facing as you see in the photo
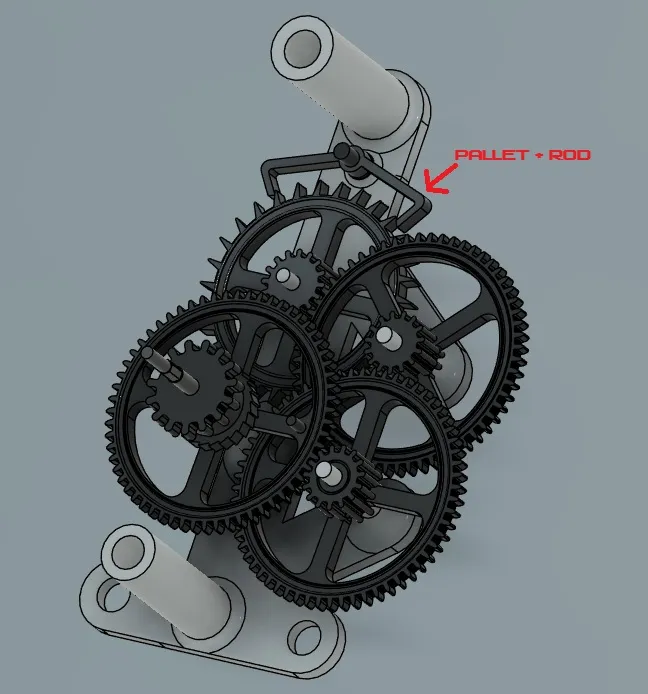
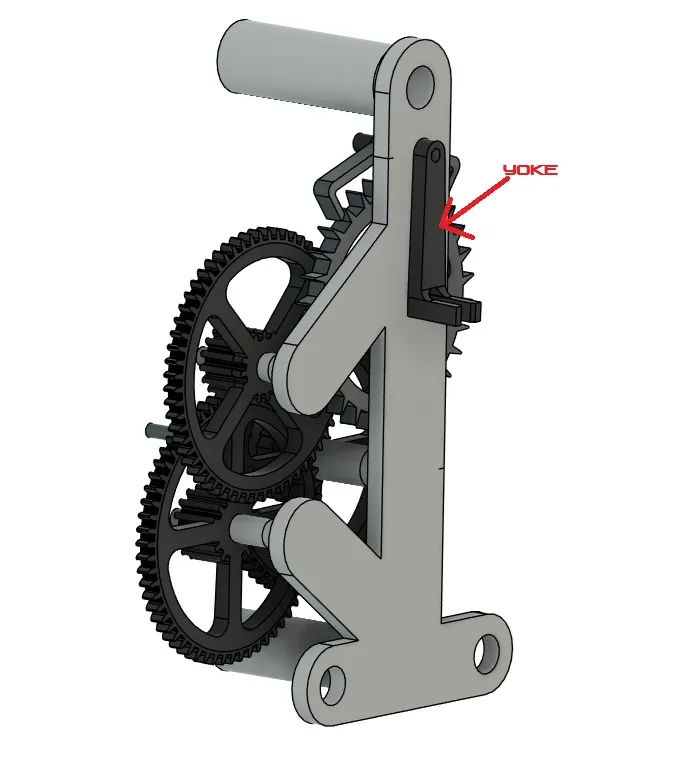
12) fit the yoke into the rear of the axle.
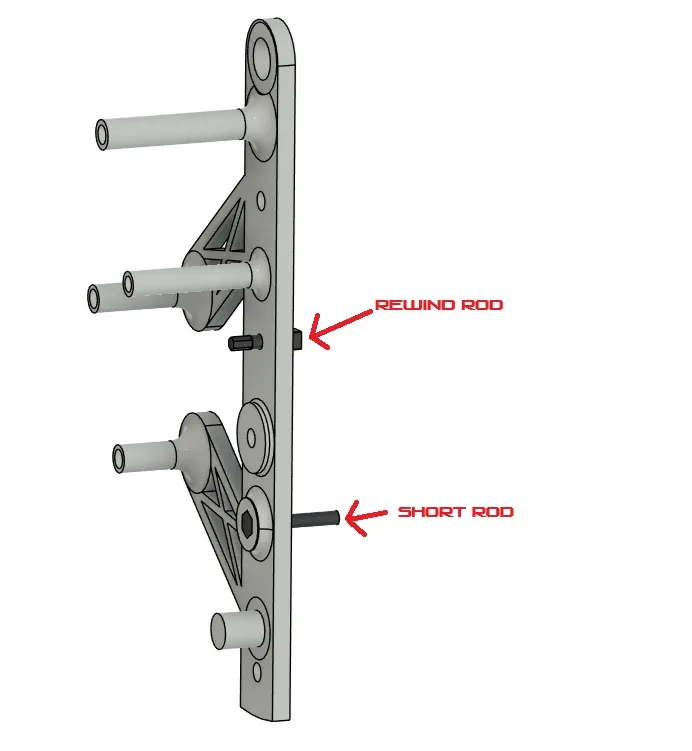
13) fix the rewind rod and the short rod to the front of the frame
14) fix the rewind gear on the axle
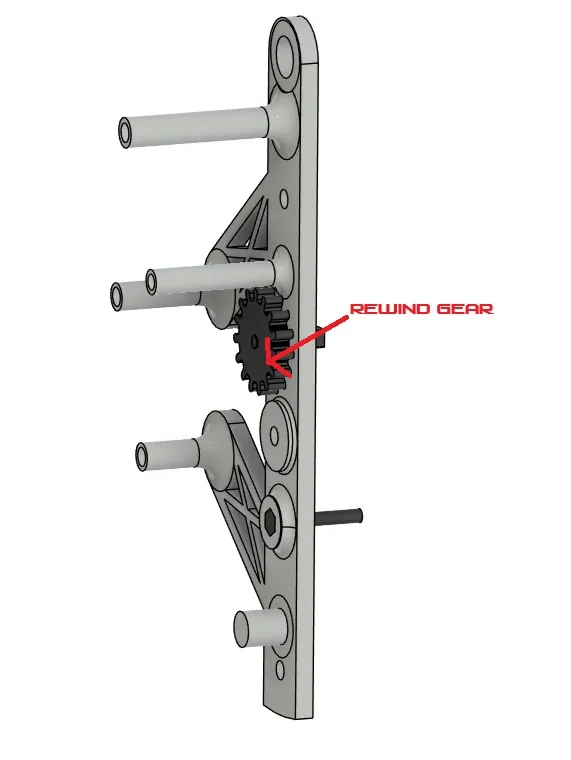
15) connect the front of the frame to the rest of the clock. all the pins are snap-fit, make sure the axles fit into the slots correctly
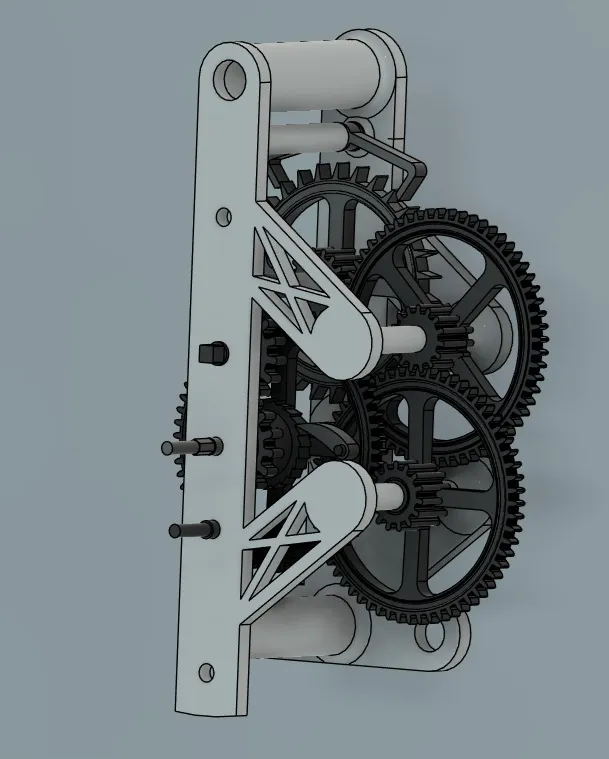
16) connect gear 3 and gear4 to the axles, insert the dial spacers and the front pin to secure the frame
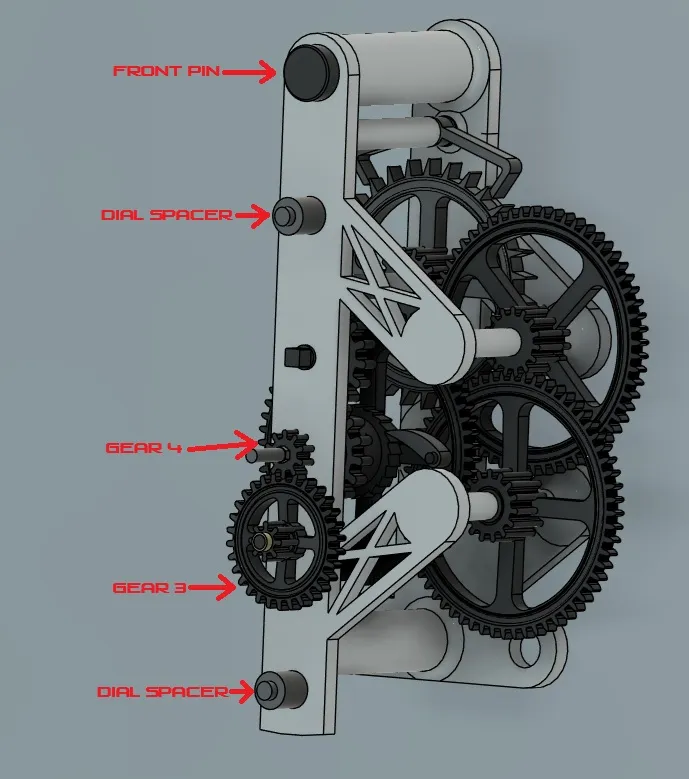
17) place gear 5
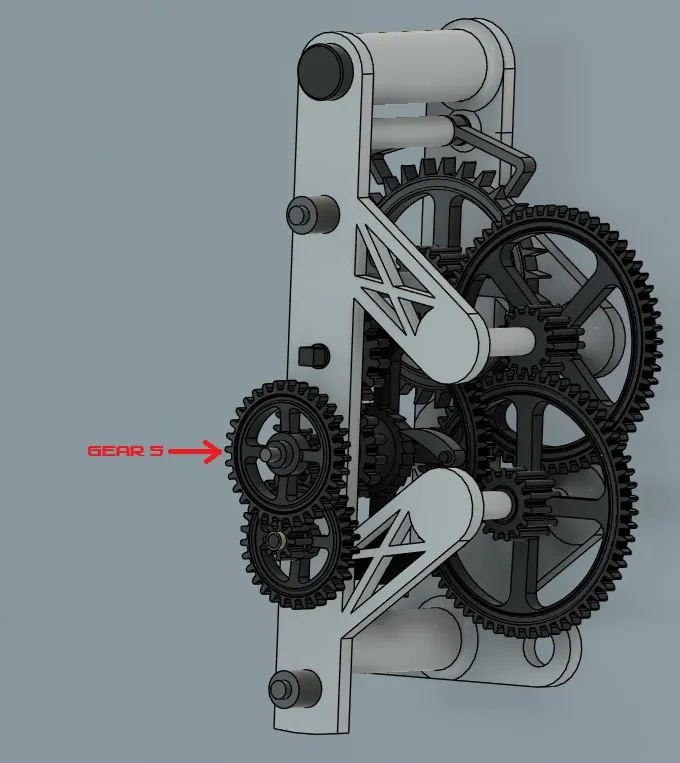
18) connect the hands. The minute hand attaches to the axle, the hour hand attaches to the gear
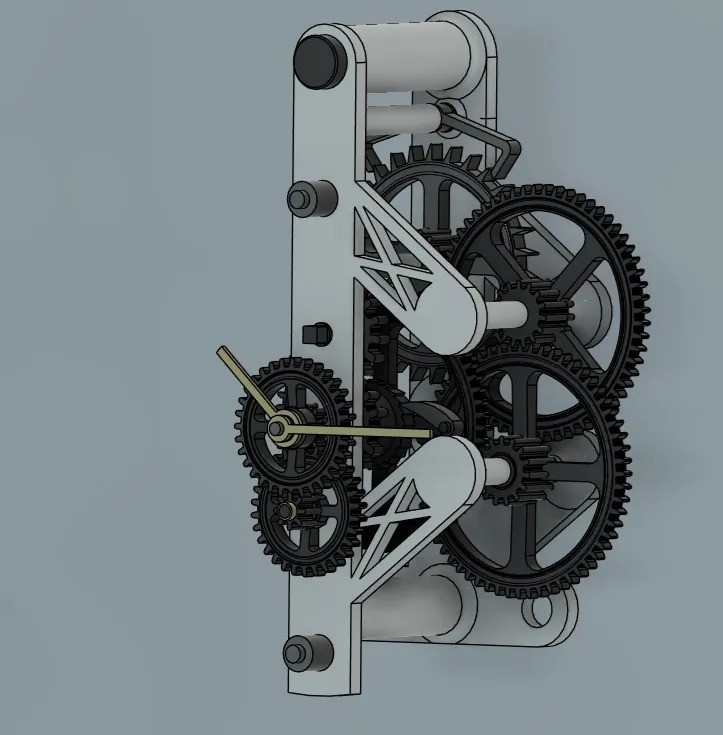
19) Now you can attach the dial to the frame. The inner part will fit into the inner edge of the dial and then you can connect everything to the spacers already attached to the frame
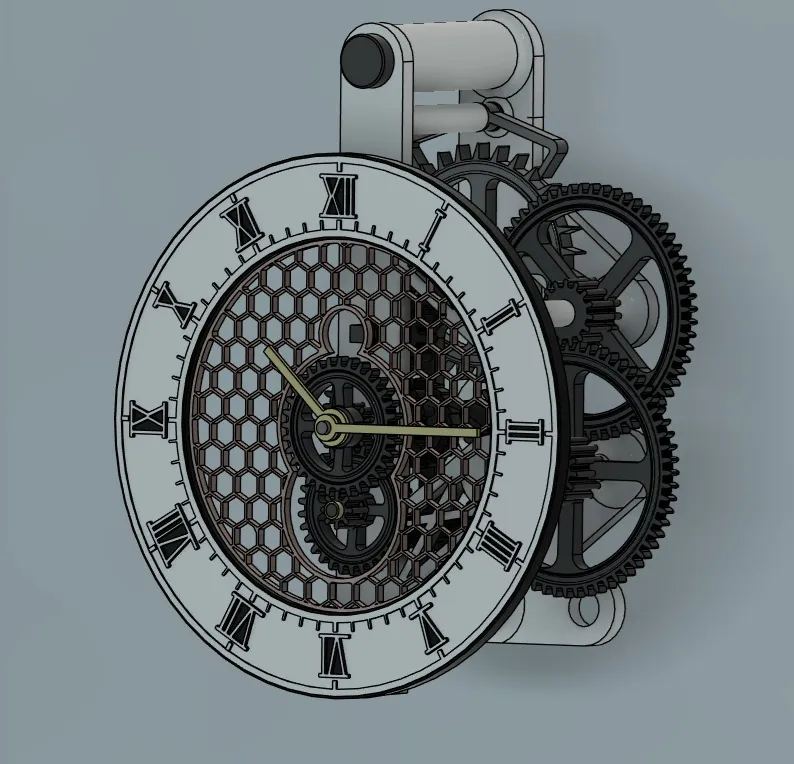
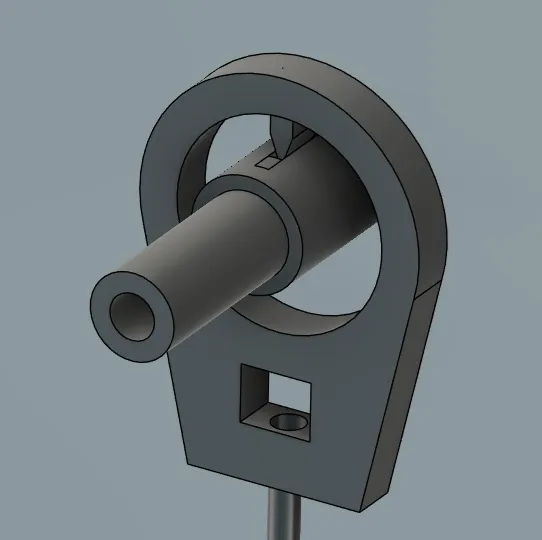
20) Now you can fix the pendum hanger to the wall. The piece is hollow so you can insert a screw and screwdriver to reach the dowel fixed to the wall. the tip of the pendulum hanger must be inserted into the groove as you see in the photo
21) attach the clock to the hanger, make sure the pendulum bar is inserted into the yoke slot.
measure to attach the other two clock brackets to the wall. make sure the axis of the clock is perfectly perpendicular to the ground before attaching the other two brackets. use the pins to hide the holes
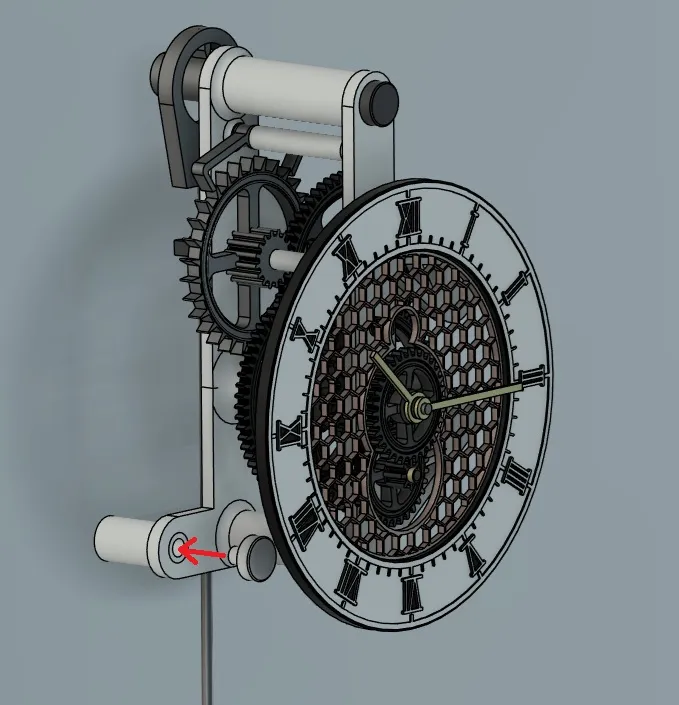
now you can attach the weight to the string. you just need to move the pendulum slightly so that the clock starts ticking. now you will have to do a bit of trial and error to make sure that the clock is ticking. simply by lengthening or shortening the pendulum rod you will be able to make the clock tick. ideally the length from the fulcrum of the pendulum to the center of mass of the pendulum bob should be 1m to have a swing of one second. adjust this time by slightly screwing or unscrewing the m6 nut at the base of the pendulum.
for the weight, fill the bottle with old bolts and screws (much cheaper than printing the full weight, even if you have to buy everything with a couple of euros in the hardware store you can buy a kg of nails or bolts) slide the wire into the hole in the cover and tie the neck of the bottle. slide the bottle into the cover and you're done
to rewind the watch you just need to unhook the pin that holds the drum in place and rewind the thread by turning the rewind wheel counterclockwise using the key found in the file. you can also rewind it by rotating the drum by hand. you just need to reposition the locking pin by fixing it to the drum
enjoy your new clock!
You are prohibited from sharing, sub-licensing, selling, renting, hosting, transferring, or distributing the digital file or 3D printed versions of this object, as well as any other derivative work in either digital or physical form (including remixes).You are not allowed to use the objects in any manner that involves charging money or collecting fees without permission.

