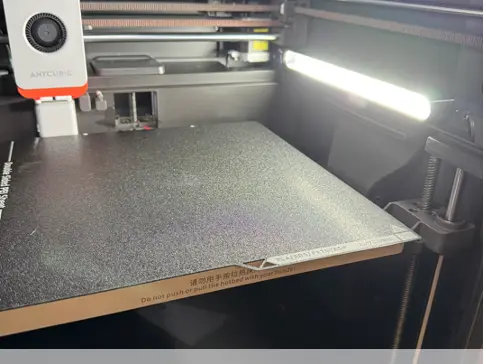
LED bar for Kobra S1 with diffuser


Terrible lighting conditions? I got you covered!
This is a side-bar LED strip holder with a diffuser to protect your eyes, and a shield to prevent the camera from being overexposed.
I wanted a design that's easy for everyone to print, so I made it flat — but you'll need strong double-sided tape to attach it to the frame. You don't have to glue the diffuser; that's up to you. However, I highly recommend replacing the factory adhesive of the led stripes, as it's usually pretty bad.
Depending on the material you're printing with, the chamber can get quite hot. I recommend printing the housing in at least PETG. If you use your printer for PLA only, you can print it in PLA too, but be aware of heat resistance.
I printed the housing in PETG and the diffuser in PLA, because I didn't have transparent PETG on hand.
Use my print profile to achieve a fully filled bottom layer without filament direction changes, for better light distribution.
If you have a smooth build plate, print the diffuser on it for even better optical results.
Here you can see the differences:
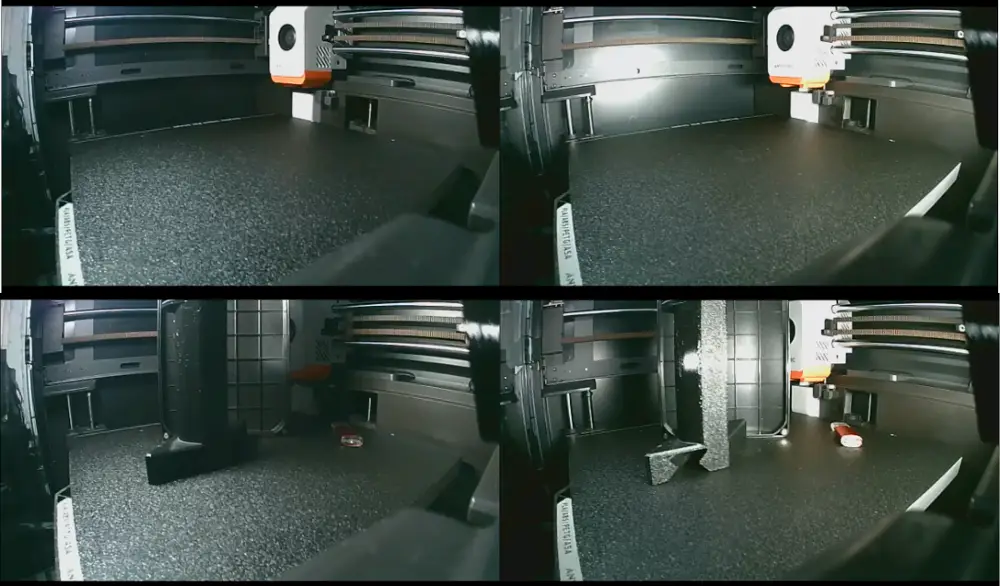
Left images: Factory light only Right images: Factory light + side bar
(Photos were taken during daylight; the effect is even stronger at night.)
You can also clearly see the benefits of using a diffuser — not only is it easier on your eyes, but it also improves light distribution:
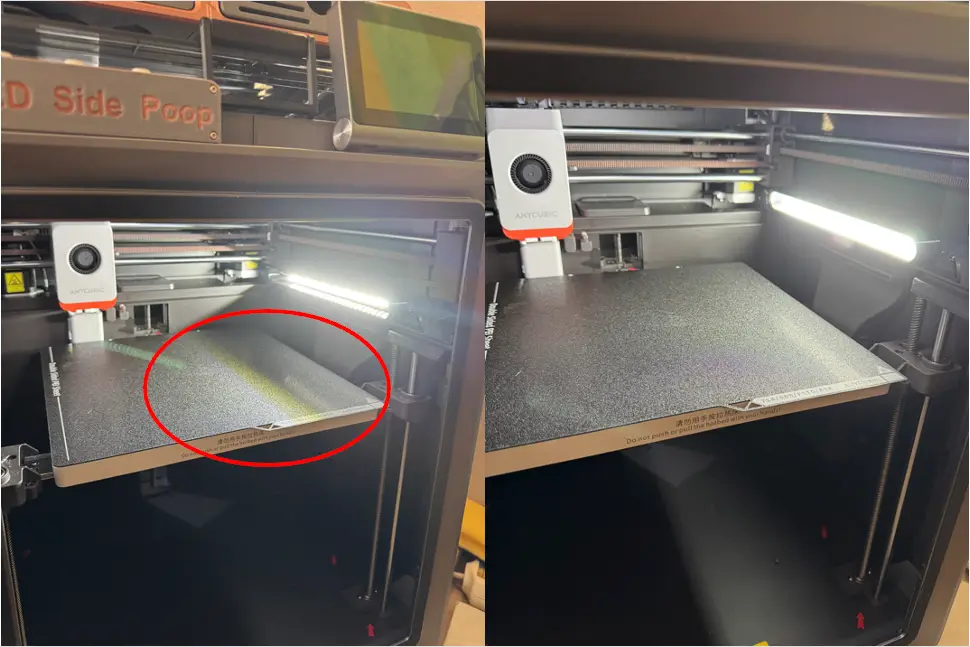
Left image: Without diffuser Right image: With diffuser
It might even have a positive effect on AI spaghetti detection!
Bill of Materials (BOM):
- Any 24V LED strip (the holder fits strips up to 1 cm wide and max 23 cm long — I recommend getting one with a high LED density per meter)
- Strong double-sided adhesive tape
- Transparent filament (PETG recommended)
⚠️ Caution:
Working with electrical components can be dangerous.
Only attempt modifications if you have experience handling electronics and soldering.
I take no responsibility for any damage to your printer, property, or personal injury.
Always double-check your wiring, and if unsure, ask someone experienced for help!
Installation Guide:
It depends on how you want to do it:
- use external powersupply, check my control unit design for the wiring for example
- connect it directly to the printer's 24V power supply. (will turn on and stay on with the printer)
- wire it parallel to the fan of the Mainboard (the light automatically turns on when you start printing)
You can also mount a strip on both sides for full lighting, but be aware this might affect the camera image. (Don't forget to mirror the housing for correct cable routing!)
Unscrew the screws (marked in blue) and remove the cover. There are empty slots for V+ and V- (marked in red) to wire the leds-
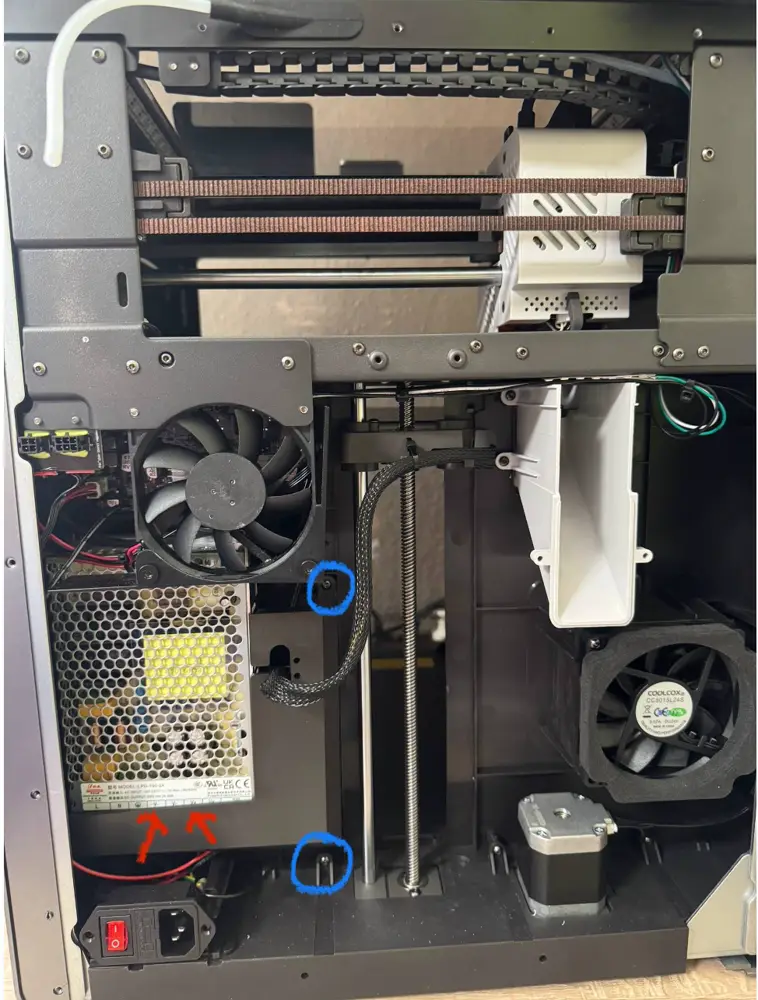
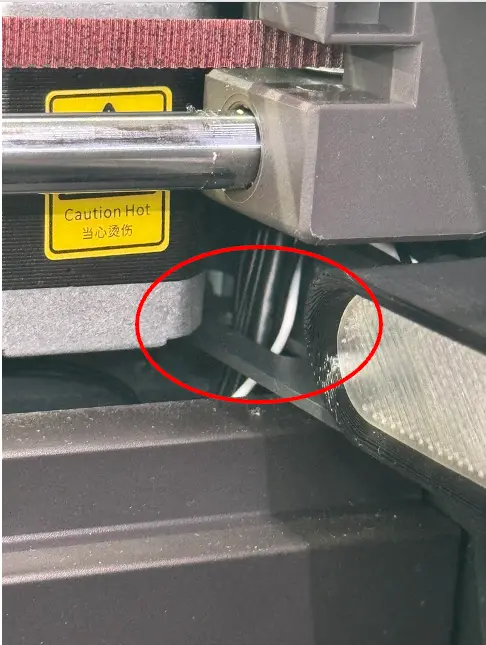
you can route the cables through the opening in the right corner:
I’m using my own designed WLED control unit for the "Kobra S1 Riser", with buttons on the top to control the lighting.
You’ll find it here, including a full wiring guide!
If this design made your printer (and soul) shine a little brighter, feel free to bribe me with a like, coffee or both ☕😄:
You are prohibited from sharing, sub-licensing, selling, renting, hosting, transferring, or distributing the digital file or 3D printed versions of this object, as well as any other derivative work in either digital or physical form (including remixes).You are not allowed to use the objects in any manner that involves charging money or collecting fees without permission.