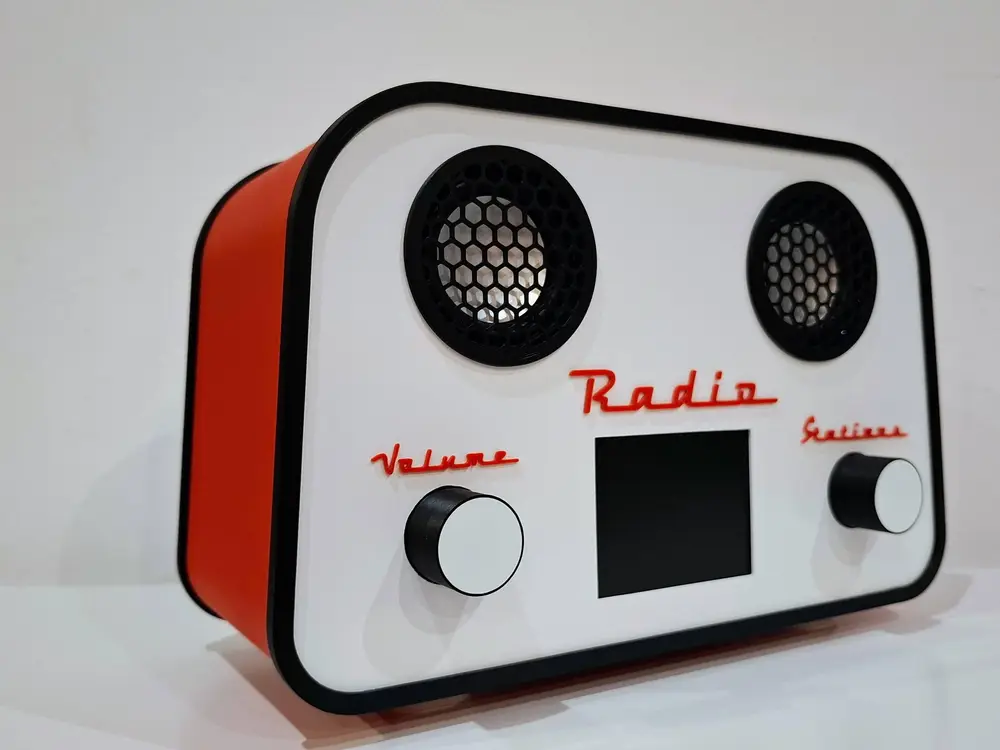
Radio Vintage


"VINTAGE" Radio
DESCRIPTION:
My idea for a VINTAGE radio. The radio was intended to be stylish, yet modern. I think I achieved both :)
LIST OF COMPONENTS:
ILI9341 2.8" 240*320 TFT LCD display, e.g.
https://pl.aliexpress.com/item/1005006623369442.html
53MM 4 Ohm 3W speaker, e.g.
https://pl.aliexpress.com/item/1005007331185845.html
ESP32S3 N16R8 chip, e.g.
https://pl.aliexpress.com/item/1005008786048447.html
EC11 encoder e.g.
https://pl.aliexpress.com/item/1005009889978797.html
I2S PCM5100A Speaker Module e.g.
https://pl.aliexpress.com/item/1005009660188314.html
Connector e.g.
https://pl.aliexpress.com/item/1005008871212596.html
USB Type-C e.g.
https://pl.aliexpress.com/item/1005006044405766.html
M2 8mm Screws e.g.
https://pl.aliexpress.com/item/4001074924245.html
ASSEMBLY:
It is best to solder the electronic circuit before placing it in the enclosure. Then, the circuit should be Program it. This way, you can test its functionality before final assembly. You can use your own software or use projects available online. I recommend the following project:
https://github.com/VaraiTamas/yoRadio
It works very well and is stable. The website includes descriptions of the connections and programming.
Then we can print all the components.
We glue the labels to the front panel.
Mount the encoders on the front panel. Next, we place the display and speakers. We mount them by heating the plastic pins with a soldering iron to ensure a secure fit. We glue the front panel to the side walls with glue (two-component epoxy glue or cyanoacrylate glue). If you want better sound, you can line the chambers with felt or thin foam. These should be glued in place. This sound insulation can be seen in the photos.
If you want your knobs to have a nice, smooth surface, print the "Radio - knob cover" file in vase mode and apply it to the knobs.
Insert the USB-C port and the power switch into the holes on the rear panel. Solder the power and power cables and connect them to the circuit. Then we place the rear panel and secure it with screws. The frames fit perfectly, so you can press them in or glue them in. The rear frame is larger to cover the screws.
SUMMARY:
I hope that installing the radio won't be a problem for you, and that the descriptions provided will help. If you're happy with my project and want to show your appreciation, I encourage you to support me. This will encourage me to continue working on it and help me achieve my goals.
Thank you, and I encourage you to try my project.
You are prohibited from sharing, sub-licensing, selling, renting, hosting, transferring, or distributing the digital file or 3D printed versions of this object, as well as any other derivative work in either digital or physical form (including remixes).You are not allowed to use the objects in any manner that involves charging money or collecting fees without permission.