
The Nativity of Jesus - Bauble Cristmas Ornament



If you want to sell prints of this model, as well as all of my models - future and past
Subscribe to My Patreon: C3D | 3D Models | Patreon


Celebrate the true meaning of Christmas with The Nativity of Jesus ornament 🎄✨. This beautifully detailed design captures the sacred scene of Mary, Joseph, and baby Jesus in the manger, surrounded by intricate poinsettias and a wreath of holly 🌸🌿. Every delicate detail, from the serene expressions to the flowing robes, brings this timeless moment to life 🌟.
Perfect for adding a touch of reverence and tradition to your tree 🎁🕊️, this ornament is a heartfelt reminder of the season's spiritual significance. Whether for your own decorations or as a thoughtful gift, it’s a piece that radiates peace and joy ❤️🙏.
- 6 and 4 Color Versions - Pick the prefered prepared Profile
- Two Ornament sizes 160mm(BIG) and 120mm(SMALL) - Pick the correct plate when slicing the file.
For best results use 0.2 nozzle if possible, but 0.4 is also works great (The pictures show a model printed with a 0.4 nozzle)
The design allows for printing with simple color changes at layer, which saves a lot of filament!
USE A LIGHTER! - a quick pass with a torch on the printed parts will get rid of the inevitable stringing that comes with this type of models.
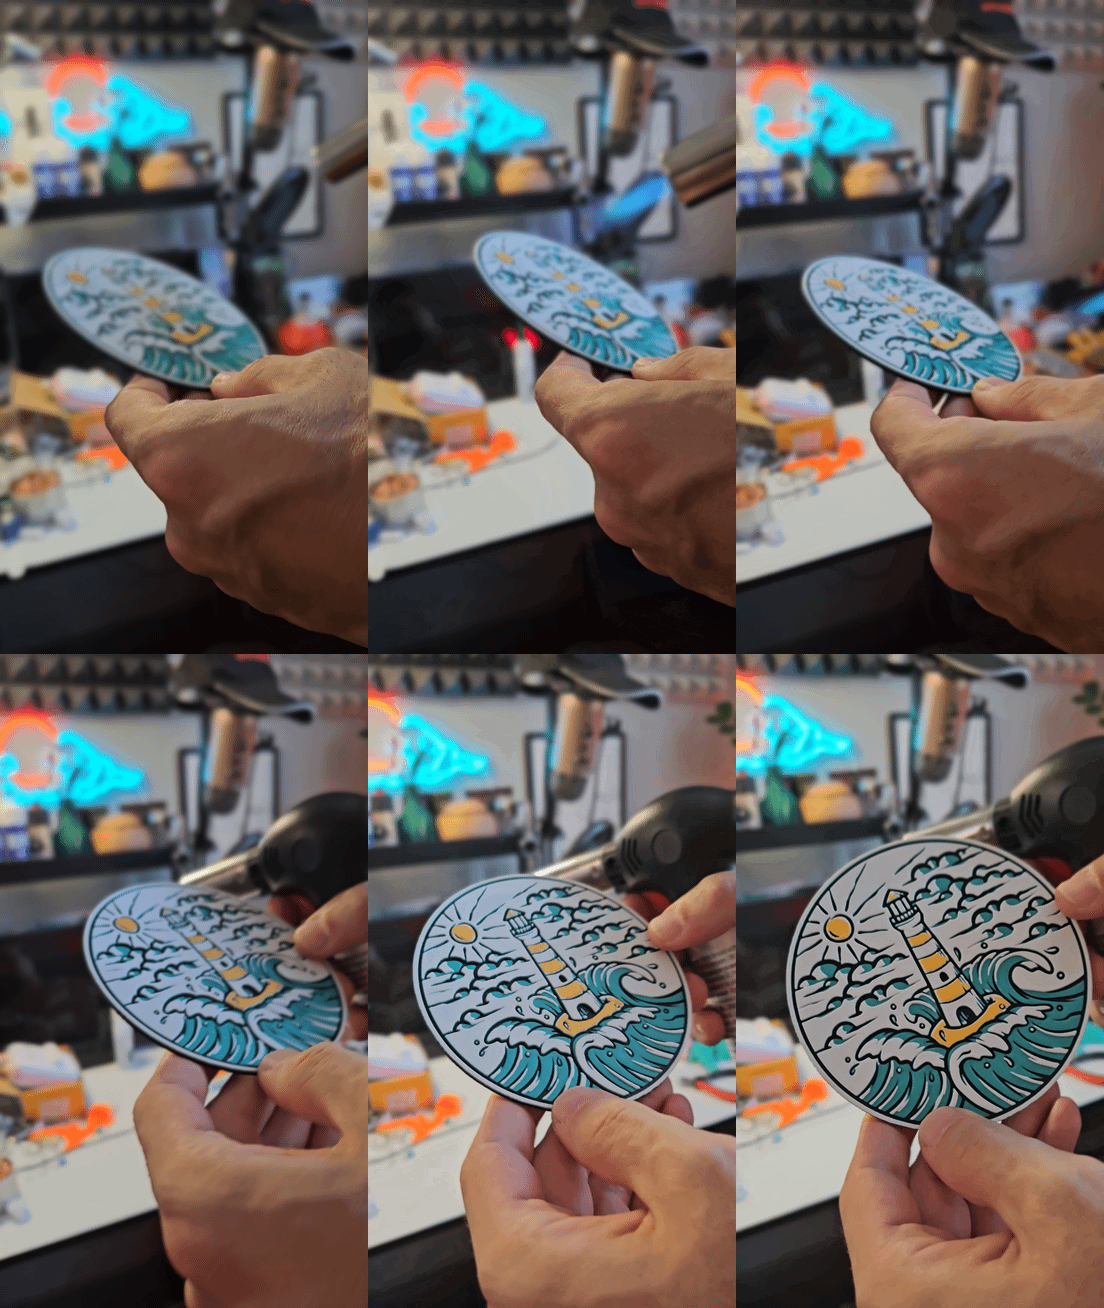
Print at 100% infill with a layer height of 0.08mm with a base layer of 0.16mm
Filaments Used:
PLA Kingroon Black Transmission Distance: 0.4 / Amazon
PLA BambuLab Matte Charcoal Transmission Distance: 0.6
PLA Jayo Gray Transmission Distance: 2.1 / Amazon
PLA Kingroon Gray Transmission Distance: 2.4 / Amazon
PLA Geetech Matte Light Gray Transmission Distance: 0.7 / Amazon
PLA Kingroon White Transmission Distance: 6.9 / Amazon
Color Pallete (6 Color Version):
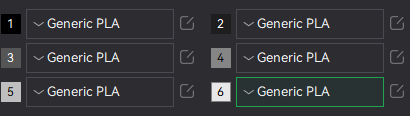
Color Pallete (4 Color Version):

Swap Instructions(6 Color Version):
Start with Black
At layer #13 (1.13mm) swap to Charcoal
At layer #16 (1.37mm) swap to Dark Gray
At layer #20 (1.69mm) swap to Gray
At layer #27 (2.25mm) swap to Light Gray
At layer #31 (2.57mm) swap to WHITE for the rest.
Swap Instructions(4 Color Version):
Start with Black
At layer #16 (1.37mm) swap to Gray
At layer #20 (1.69mm) swap to Gray
At layer #27 (2.25mm) swap to WHITE for the rest.
Boost MeEnjoying this model? Give it a boost! 🌟 Your support helps my creations reach more makers—thank you for keeping the magic alive! ✨🚀
How to do more than 4 colors on a single AMS/Ace Pro?
To use more than 4 colors with a single AMS is pretty simple when it comes to HueForges.
Always start the print from either Bambu Studio/Anycubic Next or Bambu Handy App/Anycubic App - This will allow you to map the rolls of filaments to a certain slot in the AMS:
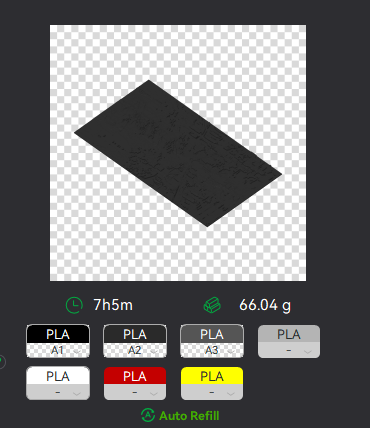
Now map the first 4 colors (which should already be inserted in the AMS to Slots 1 - 2 - 3 - 4
Once thats done move to maping colors 5 - 6 - 7 - 8 to respectively AMS Slots 1 - 2 - 3 - 4 again!
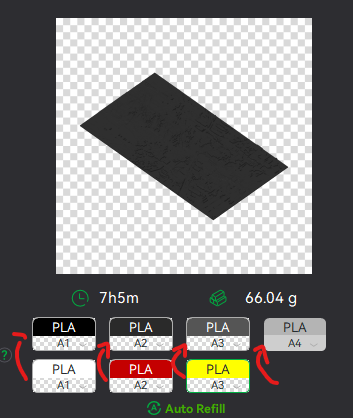
This will allow you to Change the rolls of filament once the printer is done with that color.
For example, in the picture above once we are done with the Black color (Which is usually first) we are going to remove the black roll (you can do that while printing) with White, then once Charcoal Black is done we are going to change that to Red, Dark Gray to Yellow and we are done. ~ You can do that with as many colors as you need!
YOU CAN PLACE A PAUSE ON THE LAST LAYER OF COLOR 4 TO AVOID HAVING TO BABYSIT THE PRINTER. ONCE PAUSED CHANGE 1-2-3 WITH 5-6-7 AND RESUME. IF YOU NEED MULTIPLE PAUSES YOU CAN DO THAT TOO
Drop me a follow!🤜🤛
You are prohibited from sharing, sub-licensing, selling, renting, hosting, transferring, or distributing the digital file or 3D printed versions of this object, as well as any other derivative work in either digital or physical form (including remixes).You are not allowed to use the objects in any manner that involves charging money or collecting fees without permission.

