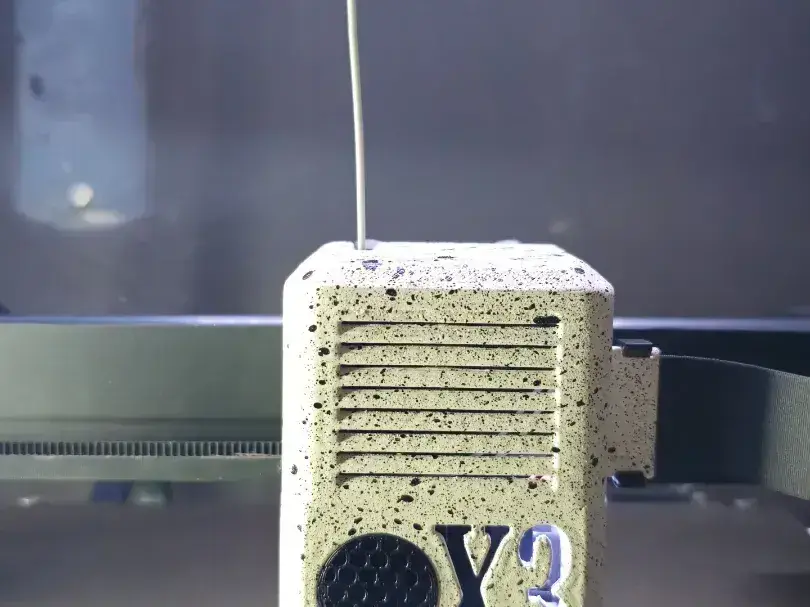
X3 Plus Case Artillery Sidewinder


The case allows the disassembly of itself, without unplugging the flat cable on the side, or the filament, making it easier to disassemble.
The weight is lower than the standard case.
I wanted to keep the elongated case to prevent a possible plate of spaghetti from colliding with the fans, thus being able to give it security and an aesthetic touch with the front letters.
It has lightened parts in squares, to dissipate more heat, and reduce the weight a little.
The ventilation is relocated so that it has good air intakes, and good heat dissipation.
The LED illuminates the letters on the front, thus creating the number 3 on the bed.
The side screw can be kept as standard, but I changed it for an M3 a little longer than the standard one to make it easier.
I added a foam rectangle behind the side wall to hold the flat cable with superglue, leaving the cable just right, but without being crushed.
I decided to place all the grids with a little superglue on the inside after painting everything, to ensure their fixation.
The printing position that has worked very well for me is diagonally as in the photos that I will attach, with supports. (I have not tried it lying down without supports but it can work)
I hope you like my rock/graffiti finish and I hope you share photos of your finishes! PRINT! :D
Keep creating! Soon measurements and parts to enclose a printer of these characteristics with 2 IKEA Lack tables.
Remember to give it a Like and comment on your impression! :D
You are prohibited from sharing, sub-licensing, selling, renting, hosting, transferring, or distributing the digital file or 3D printed versions of this object, as well as any other derivative work in either digital or physical form (including remixes).You are not allowed to use the objects in any manner that involves charging money or collecting fees without permission.