2026-10-04 04:09:49
260
40
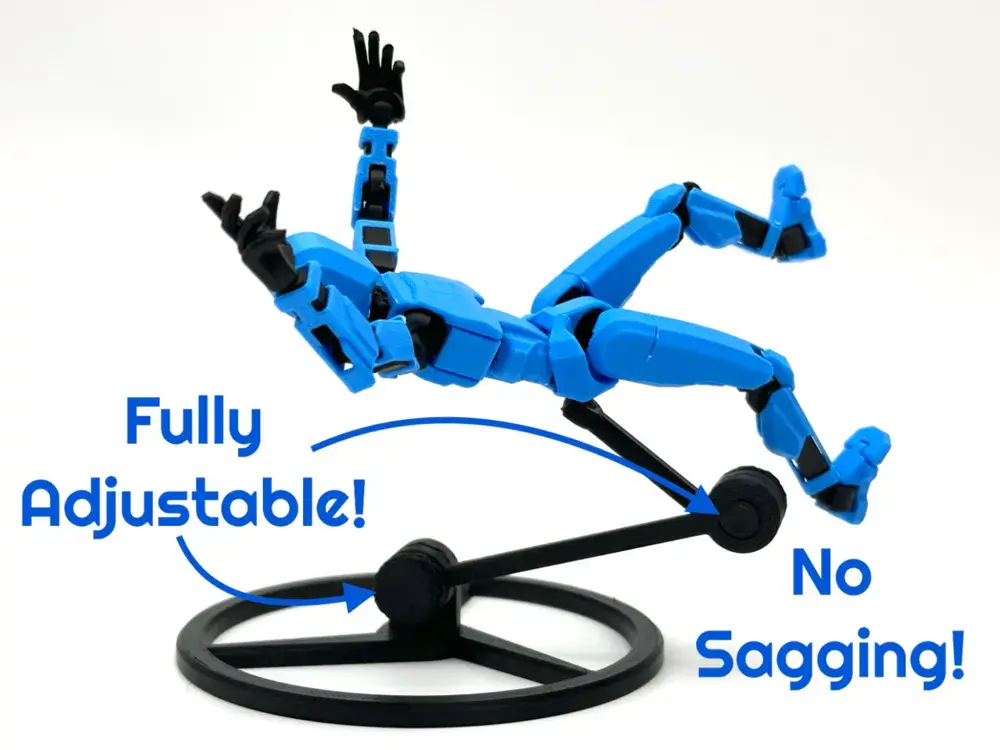
Dummy 13 Secure Locking Stand

@IntroPrints_5942519
打赏
私信
关注
推荐打印方式
添加
Dummy 13 Locking Stand
Kobra X
Kobra 3
、
Kobra 2
、
Kobra S1
、
Kobra 4
、
Kobra 3 V2
、
Kobra 3 Max
、
Kobra 2 Max
、
Kobra 2 Pro
、
Kobra 2 Neo
、
Kobra 2 Plus
/ 分盘:2
/ 1h39m
3
分享


描述
This stand stands above other dumm stands by holding your dummy secure while it takes on a precarious position. Both arms are adjustable in 36° increments. Once you find the perfect angle, tighten the bolt to lock it down.
Note: PETG is strongly recommended for the 200% and larger sizes.
🔧 Assembly Guide
BOLT → SMOOTH HOLE → THREADED HOLE
The smooth (non-threaded) hole is always sandwiched between the bolt head and the threaded hole.
Get an arm the wrong way round and the bolt screws into the near hole instead of the far one — the joint never pulls tight and the stand stays floppy.
Know your holes
Every Lower Arm has two different holes, one at each end. They look the same from the outside — look into the hole:
- Threaded hole — ridges spiralling down the wall. The bolt screws in here.
- Smooth hole — clean, straight wall. The bolt slides through; it does not grip.
The golden rule, at every joint
- Bolt drops in from the outside.
- Shaft passes freely through the smooth hole of the part you are adding.
- Shaft screws into the threaded hole of the part already on the stand.
- Tighten and the two parts clamp together — friction locks the joint at any angle. That's what makes it a locking stand.
Build order
- Start with the Base. The threaded hole in the upright hub is your first anchor.
- Add a Lower Arm. Put its smooth hole over the base hub. Drop a bolt through and screw it into the hub. Its threaded hole now faces outward.
- Add the Upper Arm. Its smooth ring goes over the arm's threaded hole. Bolt through, screw in.
- Clip on the Adapter. Press it into the claw — no bolt. The adapter is what connects to your Dummy 13 figure.
标签
版权声明
Standard Digital File License
该作品受标Standard Digital File License保护。
您不得分享、转授权、出售、出租、托管、转让或分发该数字文件或该对象的3D打印版本,以及以数字或物理形式存在的任何其他衍生作品(包括混音)。未经许可,您不得以任何方式使用这些物品进行费用收取。
您不得分享、转授权、出售、出租、托管、转让或分发该数字文件或该对象的3D打印版本,以及以数字或物理形式存在的任何其他衍生作品(包括混音)。未经许可,您不得以任何方式使用这些物品进行费用收取。
基于以下模型二次创作
https://makerworld.com/en/models/1306715-dummy-13-secure-locking-stand?from=search#profileId-1340208