2025-01-25 01:47:42
7.9k
704
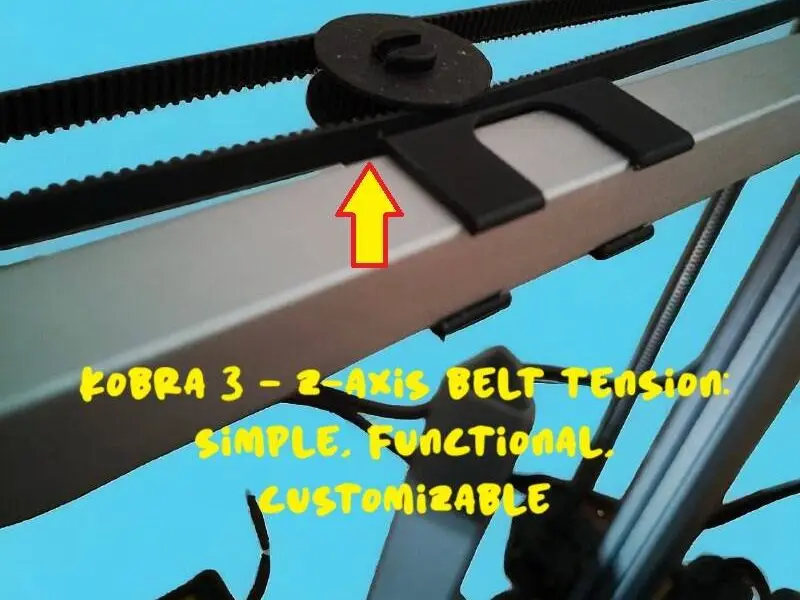
Kobra 3 - Z-Axis Belt Tension

@OMBRA3D_205816
打赏
私信
关注
添加
Profile pla
Kobra 3
Kobra 2
、
Kobra S1
、
Kobra 4
、
Kobra X
、
Kobra 3 V2
、
Kobra 3 Max
、
Kobra 2 Max
、
Kobra 2 Pro
、
Kobra 2 Neo
、
Kobra 2 Plus
/ 分盘:1
/ 51m 20s
165
分享


描述
⚠️ Warning: No Need to Remove Screws or Disassemble the Belt!
Before installing the tensioner, simply loosen the belt slightly by hand. Do not remove any screws or disassemble the Z-axis belt, as this could disrupt the alignment of the dual Z-axis system.
Kobra 3 - Z-Axis Belt Tension
A simple and functional solution to ensure proper belt tension on the Z-axis of the Anycubic Kobra 3.
Key Features:
- Intuitive Design: Consists of two interlocking pieces.
- Quick Installation: Takes just a few seconds, no tools required.
Installation Steps:
- Interlock the two parts of the tensioner.
- Loosen the belt and insert the pulley.
- Attach the tensioner base to the bar, aligning it with the belt.
- To adjust or center the tensioner: Slide it along the bar to the desired position, ensuring the belt is loosened beforehand.
Optional Tip: Add a small amount of grease between the pin and the pulley for smoother movement and reduced friction.
For an even more secure fixing, you can apply a strip of thin double-sided tape between the bar and the pulley support.
Benefits:
- Improves print accuracy with a properly tensioned belt.
- Reduces wear on the belt and pulleys by preventing misalignment and uneven stress.
- Adaptable and easy to use.
An essential upgrade to optimize the performance of the Kobra 3.
标签
版权声明
Standard Digital File License
该作品受标Standard Digital File License保护。
您不得分享、转授权、出售、出租、托管、转让或分发该数字文件或该对象的3D打印版本,以及以数字或物理形式存在的任何其他衍生作品(包括混音)。未经许可,您不得以任何方式使用这些物品进行费用收取。
您不得分享、转授权、出售、出租、托管、转让或分发该数字文件或该对象的3D打印版本,以及以数字或物理形式存在的任何其他衍生作品(包括混音)。未经许可,您不得以任何方式使用这些物品进行费用收取。