
Kobra X - Camera Support


This works with both versions of the Cobra X: the early units and the later consumer release model
Installation instructions for the consumer version of the Cobra X:
1- First, turn off the machine.
2- Then remove the screw on the side panel (photo)
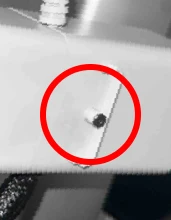
4- Gently pry the panel open and remove the cover.
5- Carefully disconnect the camera cable. Next, gently lever the camera out of its original position.
6- Remove the three screws and release the cover (photo)
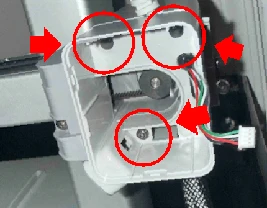
7-Cut a bit of the black tape that holds the cables together so you can free the camera cable a little more (photo)
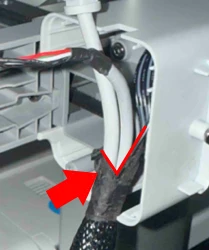
8-Replace the cover and the three screws.
9-Place the camera in the new 3D-printed cover and connect the cable to the camera.
10-Once everything is done, carefully place the 3D-printed cover in position and you’re done
(keep in mind that the print can be somewhat tricky; first make sure the camera works before installing the final piece, because if you try to remove the 3D-printed cover, its clips may break and you’ll have to print another one again)
--------------------------------------------------------------
I designed this new camera mount because I wasn’t satisfied with the angle of the original one 📷✨
I recommend downloading the profiles since they are already painted 🎨, especially if you want to print it in color.
Everything was printed using the Kobra X printer
AI Functions
This modification may affect AI-related features.
Advantages:
The spaghetti detection works perfectly ✅
Disadvantages:
Foreign object detection does not work properly with this setup ⚠️
👍 Please consider giving a "Like" if you download the model — it helps me a lot!
📸 Share your prints so we can see your results!
我设计了这个新的相机支架,因为我不太喜欢原始支架的角度 📷✨
我建议下载这些配置文件,因为它们已经上好颜色了 🎨,如果你想彩色打印会很方便。
所有部件都是用 Kobra X 打印机完成的
AI 功能
此修改可能会影响 AI 功能。
优点:
意大利面检测功能运行非常完美 ✅
缺点:
异物检测在这个修改后无法正常工作 ⚠️
👍 如果你下载了模型,请点个“赞”,这对我帮助很大!
📸 欢迎分享你的打印成果,让大家一起看看!

