
2025-12-01 17:32:16
17.3k
1.9k
举报
举报
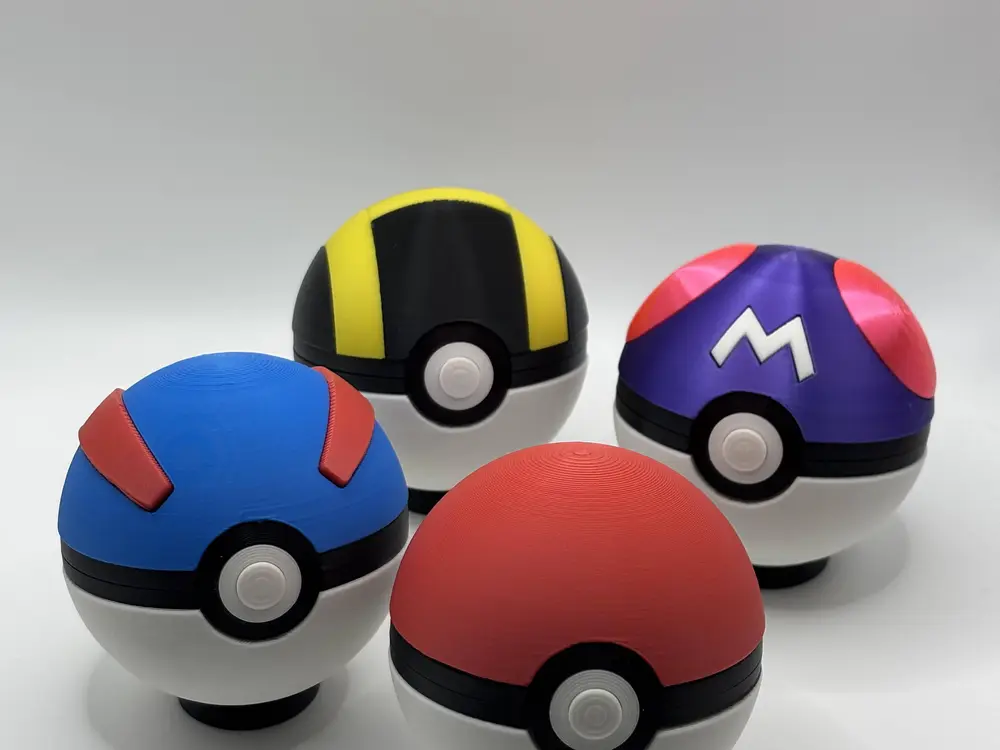
Pokeballs - Pokemon
打印配置文件 (4)
原始模型文件 (0)
- All Printers
- Kobra 3
- Kobra 2
- Kobra S1
- Kobra 2 Plus
- Kobra 2 Neo
- Kobra 2 Pro
- Kobra 2 Max
- Kobra 3 Max
- Kobra 3 V2
- Kobra X
- Kobra 4
No data
添加
Pokeball
举报
举报
Thr33D_Land
上传:2026-04-11 20:18
文件大小: 3.45MB
Kobra X
Kobra 3
、
Kobra 2
、
Kobra S1
、
Kobra 4
、
Kobra 3 V2
、
Kobra 3 Max
、
Kobra 2 Max
、
Kobra 2 Pro
、
Kobra 2 Neo
、
Kobra 2 Plus
PLA
:17.50g
PLA
:6.93g
PLA
:16.90g
0.4 mm nozzle
分盘(3)
分盘 1
0.2mm layer /
46m
PLA:17.50g
分盘 2
0.2mm layer /
20m
PLA:6.93g
分盘 3
0.2mm layer /
43m
PLA:16.90g
Designer
Pokeball
Kobra X
Kobra 3
、
Kobra 2
、
Kobra S1
、
Kobra 4
、
Kobra 3 V2
、
Kobra 3 Max
、
Kobra 2 Max
、
Kobra 2 Pro
、
Kobra 2 Neo
、
Kobra 2 Plus
/ 分盘:3
/ 1h49m
Superball
举报
举报
Thr33D_Land
上传:2026-04-11 20:18
文件大小: 4.05MB
Kobra X
Kobra 3
、
Kobra 2
、
Kobra S1
、
Kobra 4
、
Kobra 3 V2
、
Kobra 3 Max
、
Kobra 2 Max
、
Kobra 2 Pro
、
Kobra 2 Neo
、
Kobra 2 Plus
PLA
:4.06g
PLA
:6.93g
PLA
:16.88g
PLA
:14.81g
0.4 mm nozzle
分盘(4)
分盘 1
0.2mm layer /
15m
PLA:4.06g
分盘 2
0.2mm layer /
20m
PLA:6.93g
分盘 3
0.2mm layer /
43m
PLA:16.88g
分盘 4
0.2mm layer /
42m
PLA:14.81g
Designer
Superball
Kobra X
Kobra 3
、
Kobra 2
、
Kobra S1
、
Kobra 4
、
Kobra 3 V2
、
Kobra 3 Max
、
Kobra 2 Max
、
Kobra 2 Pro
、
Kobra 2 Neo
、
Kobra 2 Plus
/ 分盘:4
/ 2h0m
Ultraball
举报
举报
Thr33D_Land
上传:2026-04-11 20:19
文件大小: 3.94MB
Kobra X
Kobra 3
、
Kobra 2
、
Kobra S1
、
Kobra 4
、
Kobra 3 V2
、
Kobra 3 Max
、
Kobra 2 Max
、
Kobra 2 Pro
、
Kobra 2 Neo
、
Kobra 2 Plus
PLA
:6.41g
PLA
:20.35g
PLA
:16.88g
0.4 mm nozzle
分盘(3)
分盘 1
0.2mm layer /
21m
PLA:6.41g
分盘 2
0.2mm layer /
1h3m
PLA:20.35g
分盘 3
0.2mm layer /
43m
PLA:16.88g
Designer
Ultraball
Kobra X
Kobra 3
、
Kobra 2
、
Kobra S1
、
Kobra 4
、
Kobra 3 V2
、
Kobra 3 Max
、
Kobra 2 Max
、
Kobra 2 Pro
、
Kobra 2 Neo
、
Kobra 2 Plus
/ 分盘:3
/ 2h7m
更多
选择要打开的文件
提示
Anycubic Slicer Next 唤起失败
下载打印配置文件
提示
币奖励
534
904
- 新建收藏夹
新建收藏夹
分享
Facebook
Pinterest
Twitter
Reddit
- 复制链接
币奖励
模型信息
评论 & 评分
二次创作
相关模型
描述
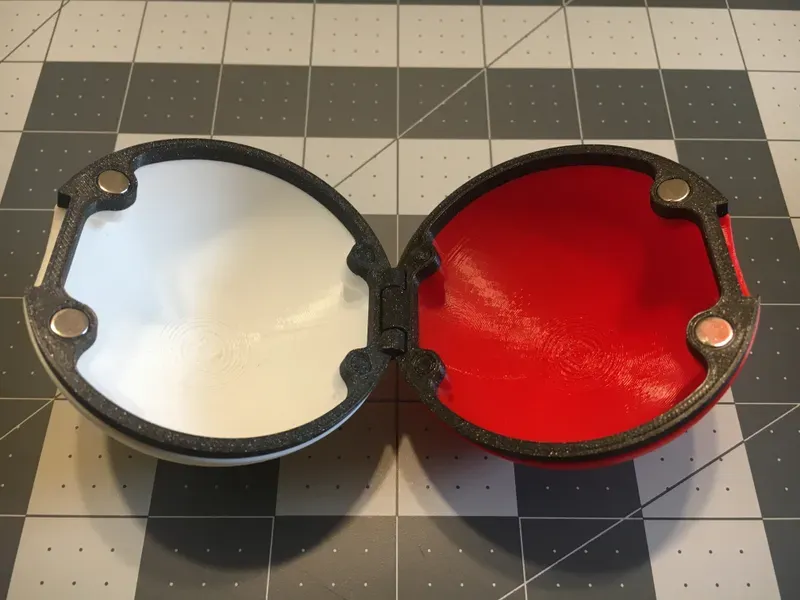
The magnets: measure 6mm x 1.75mm (6x2 nominal).
Assembly Instructions:
Insert 4 pins into the holes in the lid. IMPORTANT: The 8mm pins go in the back, and the 6mm pins go in the front.
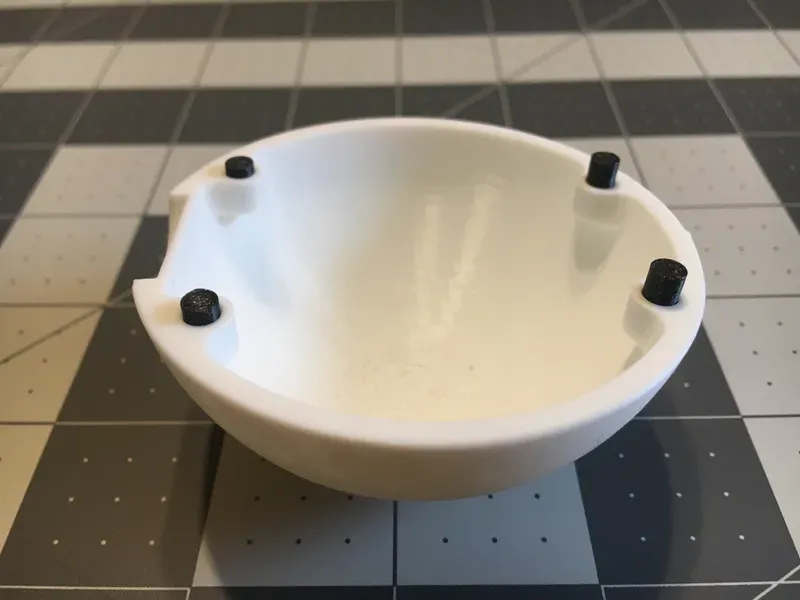
Attach the lid piece to the ring. I recommend not gluing the pieces together until the magnets have been tested.
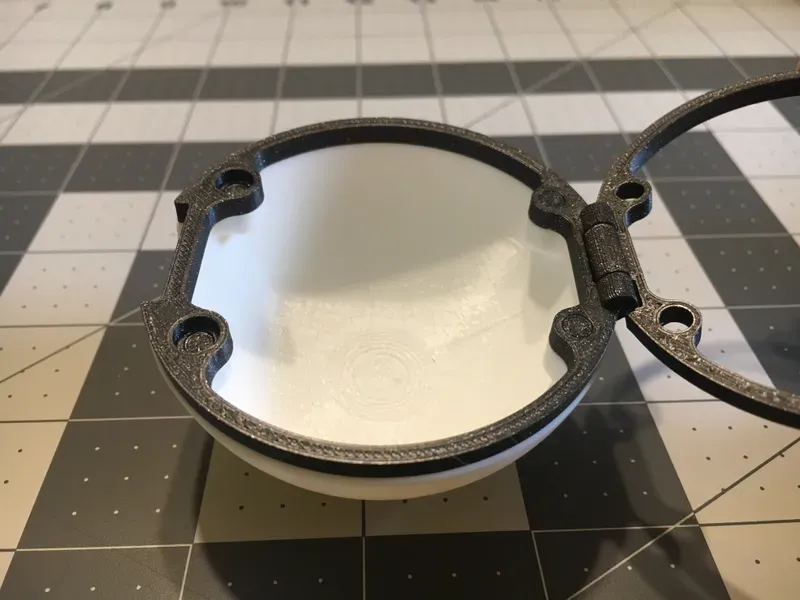
Repeat previous steps with other lid piece, and insert the magnets into the front counterbores. Make sure the Magnets are facing the correct direction before gluing them.
标签
pokeball
pokemon
版权声明
Standard Digital File License
该作品受标Standard Digital File License保护。
您不得分享、转授权、出售、出租、托管、转让或分发该数字文件或该对象的3D打印版本,以及以数字或物理形式存在的任何其他衍生作品(包括混音)。未经许可,您不得以任何方式使用这些物品进行费用收取。

找不到该模型
该模型可能尚未发布或不存在
