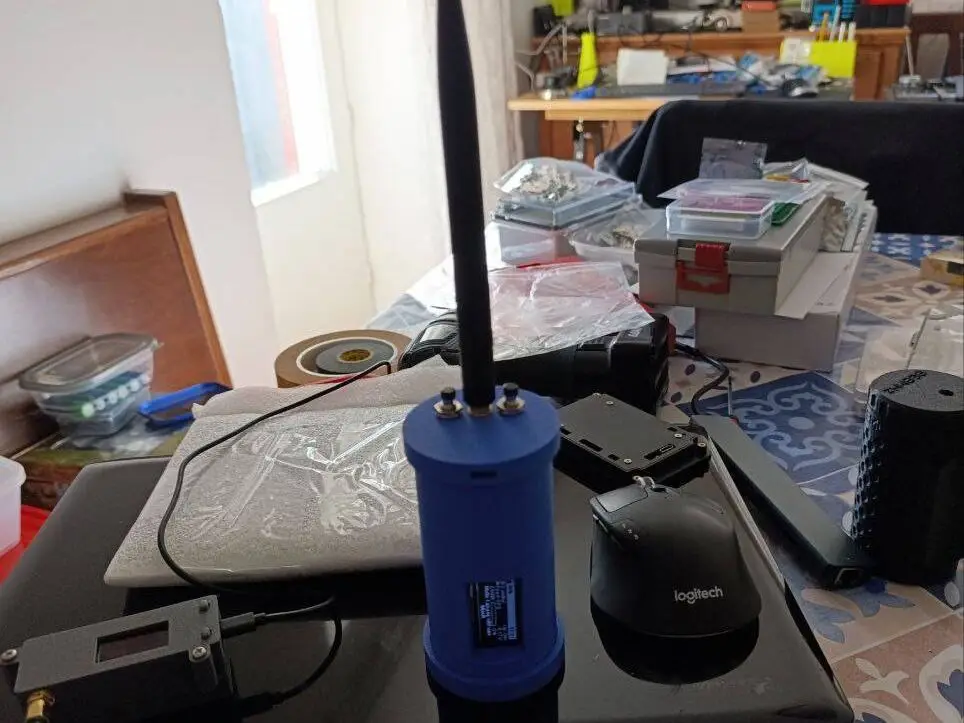
Portable Cylindrical Meshtastic Node - XIAO nRF52840 & Wio-SX1262


Portable Meshtastic Node - XIAO nRF52840 & Wio-SX1262
Compact cylindrical portable node for Meshtastic network. Design optimized for portability and 10-20 days battery life.
For experienced makers - Requires soldering, wiring, and custom firmware flashing.
📐 Specifications
- Size: Ø52mm × 110mm (without antenna)
- Weight: 175g (1 battery) / 220g (2 batteries)
- Battery life: ~10 days (1×18650) / ~20 days (2×18650)
- Kit: XIAO nRF52840 & Wio-SX1262 with custom firmware
- Display: OLED 1.3" I2C
- Sensors: INA219 (battery) + AHT20+BMP280 (environment)
- Charging: TP4056 USB-C
- Antenna: SMA 868MHz 6dBi recommended
🎯 Features
✅ Single-file 3D printable design
✅ Serviceable (unscrew bottom cap + remove cover)
✅ 1 or 2 battery configuration
✅ Complete telemetry (battery + temperature/humidity/pressure)
✅ Integrated threaded posts for component mounting
📦 Files
- nodo_portatile.stl - Universal STL
- nodo_portatile.3mf - Pre-configured for direct printing
🛠️ Bill of Materials
Electronics: XIAO nRF52840 & Wio-SX1262 Kit • OLED 1.3" I2C • INA219 • AHT20+BMP280 • TP4056 USB-C • 1-2× 18650 batteries • Battery holder plates • SMA female connector • 2× Ø7mm panel buttons • 868MHz antenna • uFL-SMA cable • 10kΩ resistor (MANDATORY for D0)
Hardware: 4× M2.5 screws • 6× M2 screws • 2× M3 screws • Wire • Hot glue • Heat shrink
🖨️ 3D Printing
- Material: PLA (PETG/ASA for strength)
- Layer: 0.2mm, Infill: 20-30%
- Supports: For SMA connector and display window
.3mf file includes optimal orientation and support settings.
📡 Custom Firmware - REQUIRED
Download: https://tntfiles.com/l4nasxug9r/seeedstudio-xiao-nrf-52840-i2c-meshtastic-firmware
Version: Meshtastic v2.7.14 with I2C on D6/D7 (instead of default pins)
Flash: Double-click RESET button → drag .uf2 file to USB drive → auto reboot
🔧 Assembly - Critical Steps
⚠️ ANTENNA WARNING
ALWAYS connect complete antenna (external + uFL cable) BEFORE powering! ❌ Powering without antenna = permanent LoRa chip damage
Key Assembly Points
- Component prep: Solder all cables before assembly. Display cables go UNDER PCB (not on top)
- Top assembly: Install buttons (Ø7mm), SMA connector, TP4056 (hot glue)
- Join top+body: Snap-fit + secure with 2× M3 screws (permanent)
- Electronics: Mount INA219 (4× M2.5), display (4× M2), sensor (2× M2), press-fit kit
- Wiring: I2C bus on D6/D7 • Power: TP4056→INA219→Kit
- 🔴 CRITICAL - D0 Button: Twist button wires together
- Connect: one to D0, other to GND directly from board (not shared junction)
- MANDATORY: Solder 10kΩ resistor between D0 and 3.3V
- Without these: button will fail after 2-12 hours!
- Antenna: Screw external antenna → connect uFL cable to Wio-SX1262
- Power up: Insert batteries (node powers on) or test via USB first
- Close: Insert cover + screw bottom cap
🔋 Battery Options
Standard (220g): 2× 18650 parallel = ~20 days
Light (175g): 1× 18650 = ~10 days (ideal for hiking)
💡 Critical Notes
🔴 Display cables: MUST be under PCB
🔴 D0 Button stability: Requires twisted cables + dedicated GND + 10kΩ pull-up (see assembly step 6)
🔴 Antenna: Mount BEFORE any power connection
🔴 Kit power: Solder VCC/GND before press-fitting (wires stay between boards)
Sensor hole: Optional breathable fabric inside cover for dust protection while maintaining airflow.
🔓 Maintenance
Access: Unscrew bottom cap → remove cover → direct access to kit and batteries
Reprogram: Connect USB-C to kit
Battery swap: Remove via bottom opening
📄 License
CC BY-NC-SA 4.0 (Creative Commons Attribution-NonCommercial-ShareAlike)
✅ Personal use, modify, share modifications
❌ Commercial use prohibited
Attribution required
🎯 For Makers Who
- Want customizable Meshtastic nodes
- Have soldering/wiring skills
- Prefer DIY over commercial plug & play
- Appreciate open source hardware