Hand fruit plate/plate riser


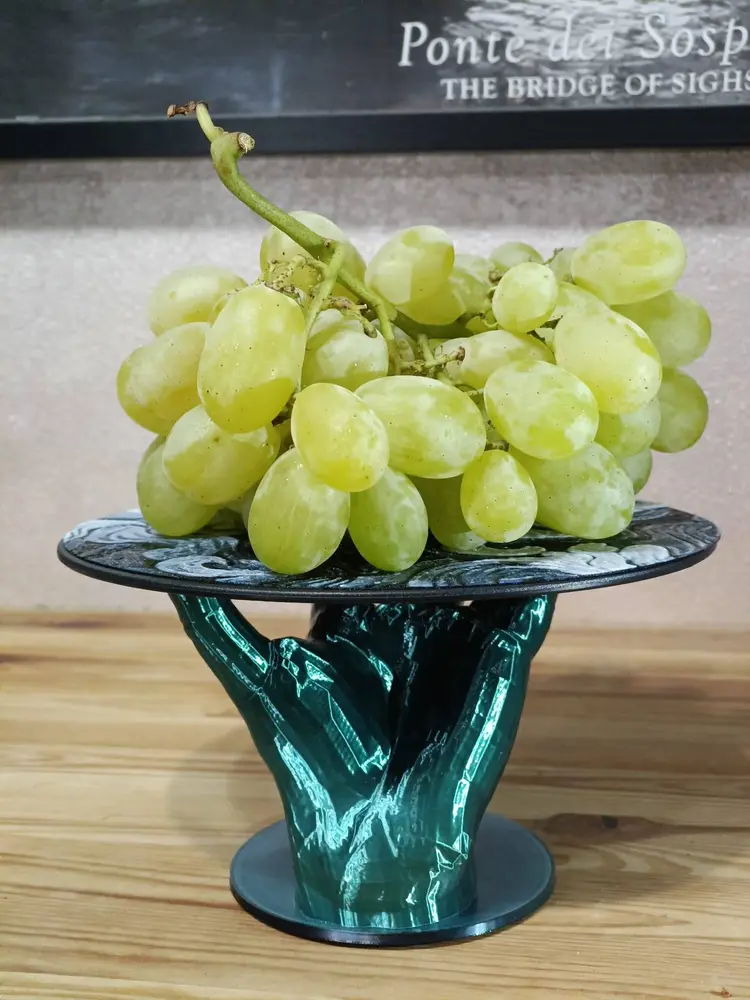
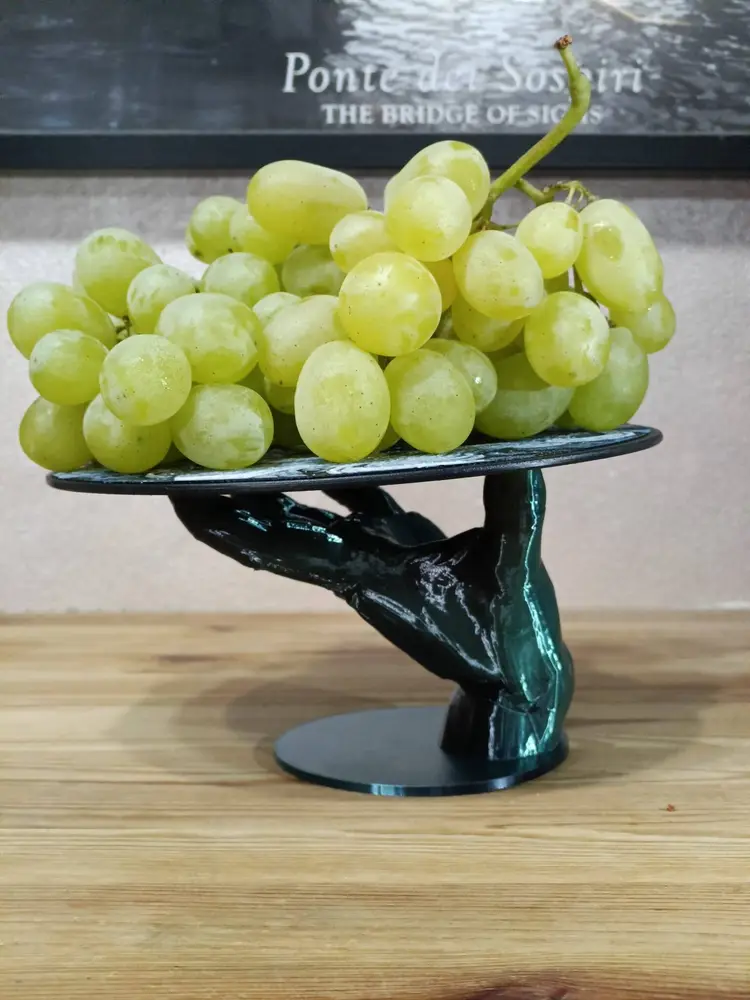
Hello everyone. If you're passionate about 3D printing like me you surely use a lot of filament with your machines. It's always a pity when you finish a spool and you're left with a lot of plastic waste, so I thought I would give it new life! Here comes my latest creation: a hand fruit plate/plate riser 🖐 Do you have in mind the film scenes of those fancy dinners with a table full of dishes and pastries and fruits on plate risers? Well, this is my modern version of a fruit plate/plate riser, with a twist 😁 It's not entirely 3D printed, in fact, the plate is recycled from an empty spool and decored with a HueForge filament painting 😃💪 It's always a pity when you finish a spool and you're left with a lot of plastic waste, so I thought I would give it new life!
I have used a teal and black dual silk PLA that is gorgeous in my opinion. The layer height is 0.2mm layer height but silk filaments hide layer lines wonderfully. Unfortunately, I had to use supports for this print. Avoiding supports is quite tricky when printing hands. I have prepared the print profile files with the custom organic supports that I have used.
Since PLA is quite strong, 10% infill is plenty enough for the task, but if you want to feel safer, feel free to bump it to 20%.


Let's dive deeper into the model. You'll need four printed parts: a hand, a base, a hole filler for the center hole of the spool, and the HueForge decoration. The spool I've used had a hole a diameter of 82mm and an external diameter of 200mm. If you have a different spool, it's really easy to adapt the model by simply scale it in the slicer.

Then of course you'll need the base of the spool. I have used a Japanese blase to cut the spool and sand the surface down to make it smooth.


You can also decide tskip the spool recycling process and go with all 3D printed parts. For this reason, I have also uploaded the model for a 3D printed plate. I thought that reusing a spool that otherwise would end upo in the trash was a cool idea and a way to save filament 😃
If you decide to take my path, glue the hole filler onto the spool and the hand to the base. The base distributes the weight of the spool/plate evenly onto the table.


As you can see, I have cut a small portion of the fingers to have a flat area. We can now glue the plate on the hand fingers.

Now to wrap up the build you need to glue the HueForge print onto the cut spool.
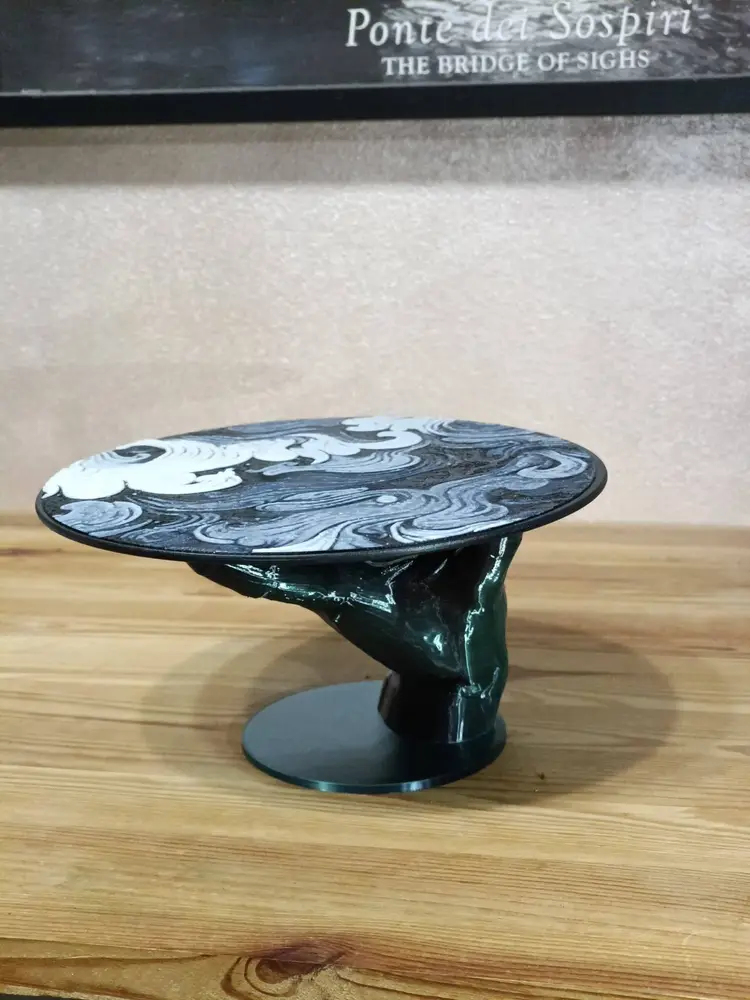
I have used my freshly opened Kobra 3 Combo for this Hueforge print and I'm really happy with the result 🔥 You canf ind the print profile for it between the files that I have uploaded. I decided to go for an abstract image that maches the modern style of the hand. Here are the instructions for the HueForge print:
Print at 100% infill with a layer height of 0.08mm with a base layer of 0.16mm
The Model is 200x200mm in size
You may print at higher layer heights below the Min Depth of 0.48mm
The Max Depth is 2.2mm and the Actual Depth is 1.9mm
Filaments Used:
PLA SUNLU Black Transmission Distance: 0.5
PLA GratKit Green Transmission Distance: 10
PLA SUNLU White Transmission Distance: 6
This print uses 3 unique filaments
Swap Instructions:
Start with Black
At layer #7 (0.64mm) swap to Green
At layer #11 (0.96mm) swap to White for the rest.
And here is the final result ladies and gentlemen. Hope you enjoy! 😊
You are prohibited from sharing, sub-licensing, selling, renting, hosting, transferring, or distributing the digital file or 3D printed versions of this object, as well as any other derivative work in either digital or physical form (including remixes).You are not allowed to use the objects in any manner that involves charging money or collecting fees without permission.