
Kobra X external camera time lapse layer change G-CODE bluetooth remote clicker


WHAT IS THIS?
This G-Code modification and button clicker mount will move the printhead aside after each layer (or calculated height), and physically press a BlueTooth button remote to take a photo with an external camera. Stitch the photos together in the time lapse software of your choice.
WATCH FIRST
https://www.youtube.com/watch?v=C9b3QzNcmQM
INFO
The 3MF file contains TIME LAPSE Layer Change G-Code.
The STL files are for the bluetooth clicker holder and face plate.
I found this code intially on MakerWorld, but the markup was in Chinese and the code was working but too agressive.
I had to modify it (click hold time and pause after photo). A little bit of trial and error and it was fixed.
This was tested with an iPhone 16.
NOTE: I don't have a way to test this on Andriod. Please share your Andriod experience in the comments
BLUETOOTH CLICKER REMOTE
2-pack Bluetooth clicker button (Amazon Affiliate link)
Feel free to use the button of your choice but you may have to tinker with the clicker holder design
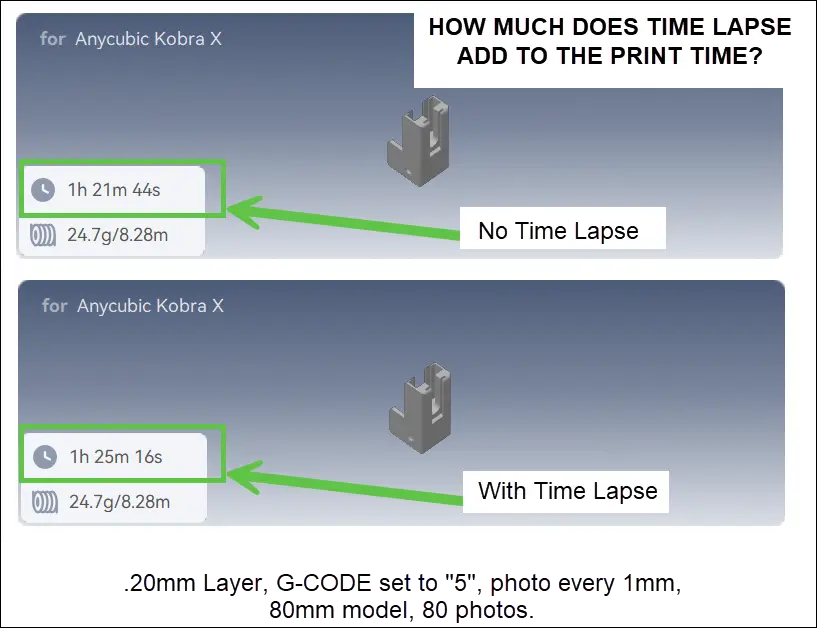
HOW MUCH TIME DOES TIME LAPSE ADD TO PRINT TIME?
EXAMPLE:
MY IMPROVEMENTS to the original design
-Translated the markup to English
-Added storage slot for when not in use
-Added a pull tab for easier removal and insertion of face plate
-Added screw hole for secured mounting, optional (longer M3 screw required)
-Added customizable tile badge and Anycubic logo versions
-Add-on holster option for onboard backup/secondary clicker
-Removed hard edge off the button pusher face (it would occasionally "stick" in the toolhead housing vent)
-Added more detailed usage documentation (layer usage examples, click time, pause time)
-All packaged up offered it here to the Anycubic community (no need download Bambu Studio to get the STL).
INSTRUCTIONS
1- Download the STL files FIRST (the clicker holder), enable supports and print using regular Kobra X printer profile.
2- Download the 3MF file SECOND, open that file.
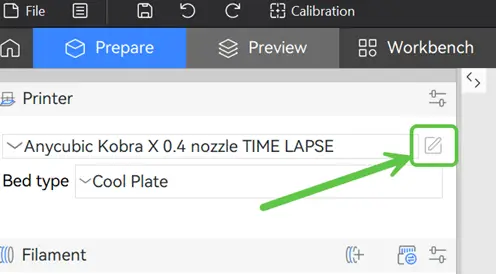
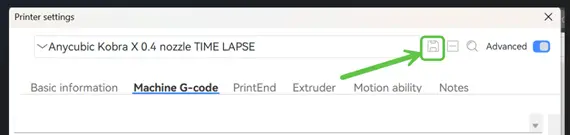
3- Edit the printer settings and rename it to something new. These new settings contain the time lapse code.
EDIT
SAVE
GIVE IT A NEW NAME:
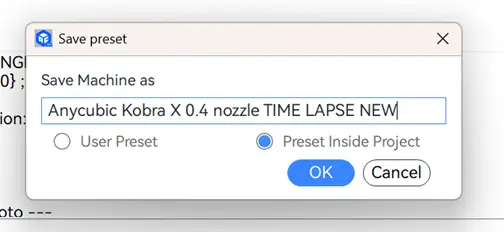
4- Every time you want to print an external time lapse, use this printer profile.
5- NOW, open any STL file inside the Anycubic Slicer
6- Run the preview (slice it), take note of the number of layers OR height in MM, whichever you prefer
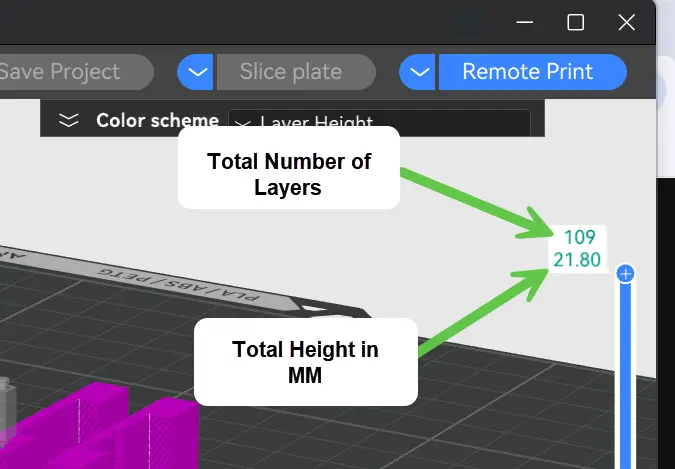
7- Go back to Prepare > Printer Profile Settings > ADVANCED > MACHINE G-Code > scroll down to Layer Change G-Code section
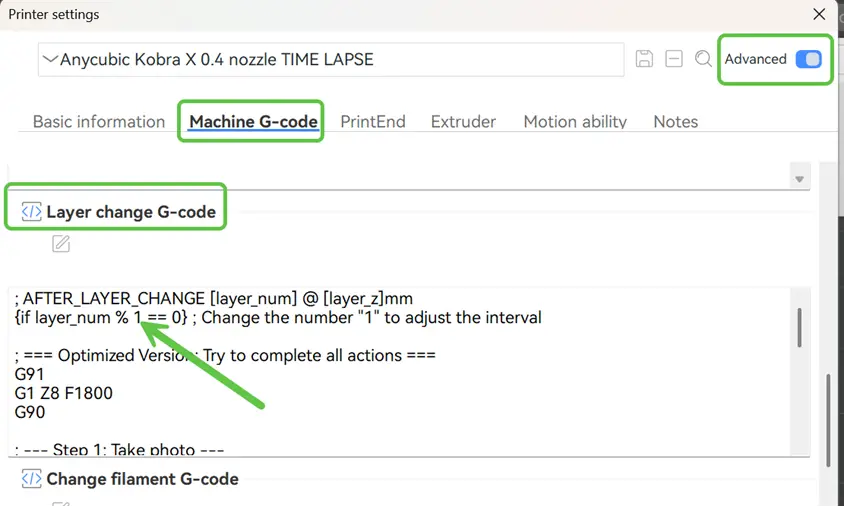
Edit the value to configure your photo interval. Examples below:
ADJUSTMENTS
If your layer height is .20mm and you have the setting below, a photo will shoot every .20mm (every layer). This may not be ideal for larger prints.
{if layer_num % 1 == 0}
DEFAULT SETTING: If your layer height is .20mm and you have the setting below, a photo will shoot every 1mm (.20 x 5). If your print is 80mm high, this is 80 photos.
{if layer_num % 5 == 0}
If your layer height is .12mm and you have the setting below, a photo will shoot every 12mm (.12 x 100).
{if layer_num % 100 == 0}
You get the idea, do the math based on your layer height in step 6.
8- SAVE and Send to print
The code itself is included in the documentation attached below, if you want to just copy and paste from that.
To modify click time edit this section in step 1
G4 P200 ; Hold button 0.2s - quick tap to avoid video trigger
To modfy pause time edit this section in step 2
G4 P2000 ; 2 second pause after relase
UPDATES
v1.03 - 5/21/2026 - G-CODE updated, pull away additional 2mm after button press
v1.02 - choose from plain, Anycubic logo, customizable tile badge
v1.01 - 1st edit
v1.0 - original
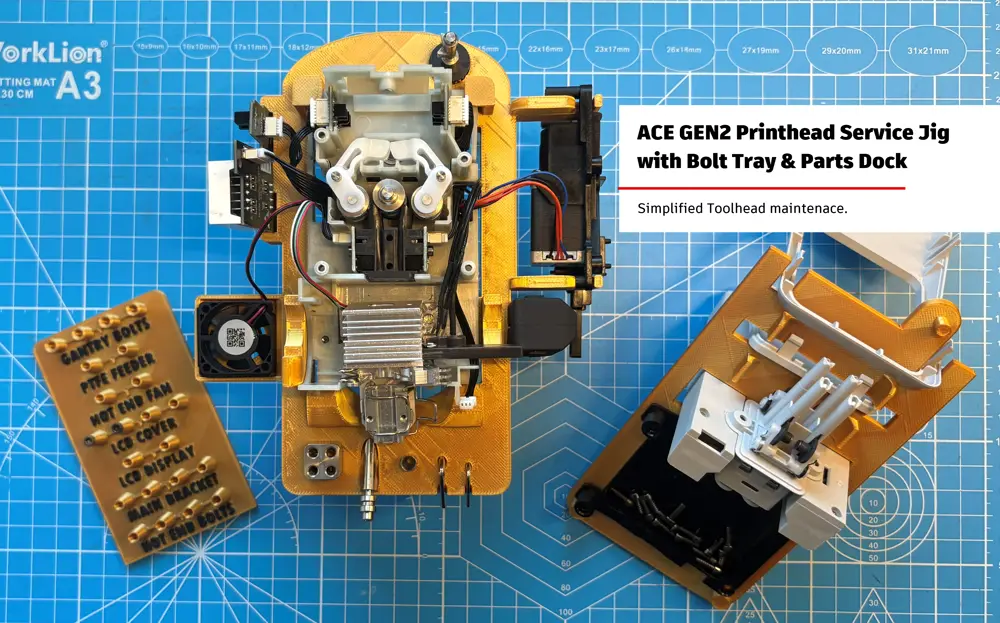
Need a STABLE PLATFORM for eash ACE GEN2 printhead maintenance? Check out the ACE GEN2 printhead service Jig I created!
Thank you for your interest and support!
Use COUPON CODE "BC3D" for $15 OFF Anycubic products
https://store.anycubic.com/?ref=BC3D
You are prohibited from sharing, sub-licensing, selling, renting, hosting, transferring, or distributing the digital file or 3D printed versions of this object, as well as any other derivative work in either digital or physical form (including remixes).You are not allowed to use the objects in any manner that involves charging money or collecting fees without permission.

