LED Stars


Hello everyone! 👋
I'm signing up for this competition with a small project designed to attract your attention (if it really can do that 😆 to adults, rather to children), like the stars in the sky. This project that I named "My Galaxy" (somehow related to the stars that shine, but with LEDs instead) is the result of some attempts that date back some time, but I will talk about it during the presentation.
In short, the list of components is something like this:
- 1 card with ATMega8AU-TH;
- 4 rings with WS2812B LEDs;
- 1 IR detector module;
- 1 push button;
- 1 power switch;
- 1 DC jack;
- 5V power supply.
I no longer count hand tools, soldering iron or wires.
For some time I wanted to make simple board versions with ATMega uC, even if I don't make them in small sizes like the Arduino Nano, I wanted to have a board containing only uC and pin headers. Why? Because I need to have quantity, and the constructions are advantageous to me.
As the HW and SW part is not the subject of this contest, I am moving to 3D printing.
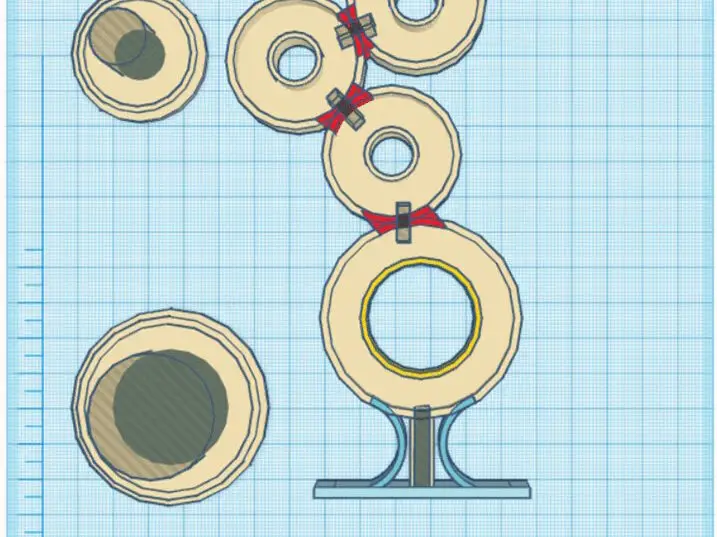
The model in which the rings are placed is inspired, but I like their placement, and since it was not easy for me to make this model for the rings using cardboard or something similar, I said to try something 3D printed. I have no knowledge at all, so I checked YouTube (😆) and chose Tinkercad, I work online, and for simpler things it's enough. I use many individual shapes, which I later combine into a single piece.
I found a 3D printer in town, very good so far. But, with all my enthusiasm, I started with many mistakes, until I made this 3D these piece, I had 3 attempts, and I made mistakes like either not leaving more generous tolerances to fit the pieces, or thicknesses, or because of the white material something happens and the piece had spots, something brown like a burn (you can also see it on the last piece). Then I thought about how thick the piece should be in the area where the LEDs light up, and in the end I have 1.2mm, I have to give the piece some rigidity. The piece didn't come out with round edges because I didn't use what was needed in Tinkercad. It is more cultured but it is resistant.
The box in which I placed all the pieces is at the limit of its dimensions, another thing to improve in the future, and hence quite a lot of time spent to be able to do something to fit the pieces. I have to file the switch and the DC plug because they are very close (I can't even mount the nut on the DC plug anymore 😟). Besides, I have to use a file for all the parts (😂😅) because the holes were not right, and no, I didn't have much inspiration when placing and holding the parts in the boxes, so I had to use adhesive tape and a little glue Using two screws and nuts I attached the base rings. The part with the rings is slightly deformed at the base, but I was able to fit it, but I happened to break a drill bit in the box (at the base), and now I can no longer mount the fourth screw. I have to find a way to remove that broken drill bit.
Soldering the wires was a long job, because (again, my mistake) I left a small space, and a bit cramped, but using tweezers to grab those thin wires I somehow managed to solder them. I made a few holes in the pieces through which I passed the wires.
For the whole project I use a single 5V power supply, which means it's very convenient, I just need the DC plug to fit.
Take a look at what came out. 😁👍
I also leave a short video, that's the only way to see it best. ✔
https://youtube.com/shorts/byI-oUrSXMg?feature=share
This is all for today. Thank you and have a nice day!