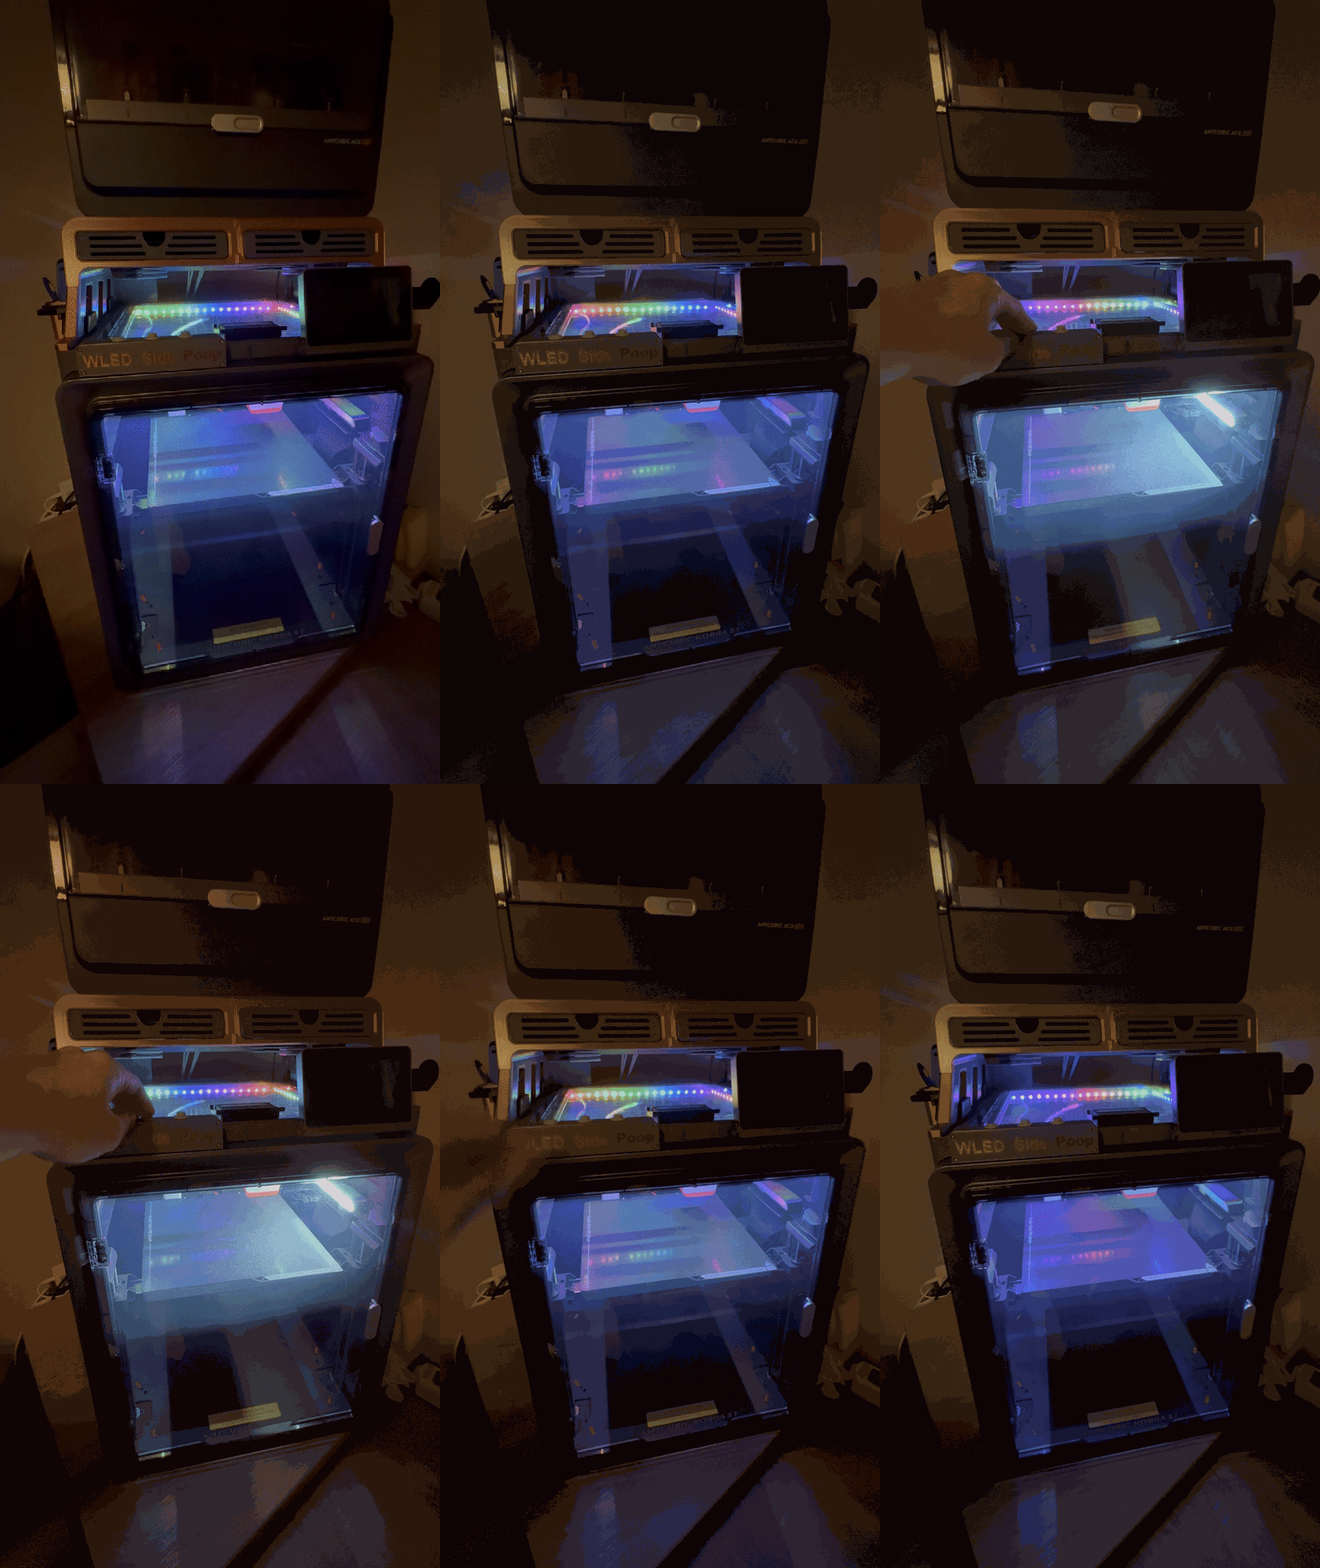
WLED / LED light control unit for the Kobra S1 riser with control buttons


WLED Control Unit for Kobra S1 Riser
I wanted to install WLED on my "Kobra S1 Riser" by @Darren3dprint_3680478, so I designed a control box along with a matching front panel button module.
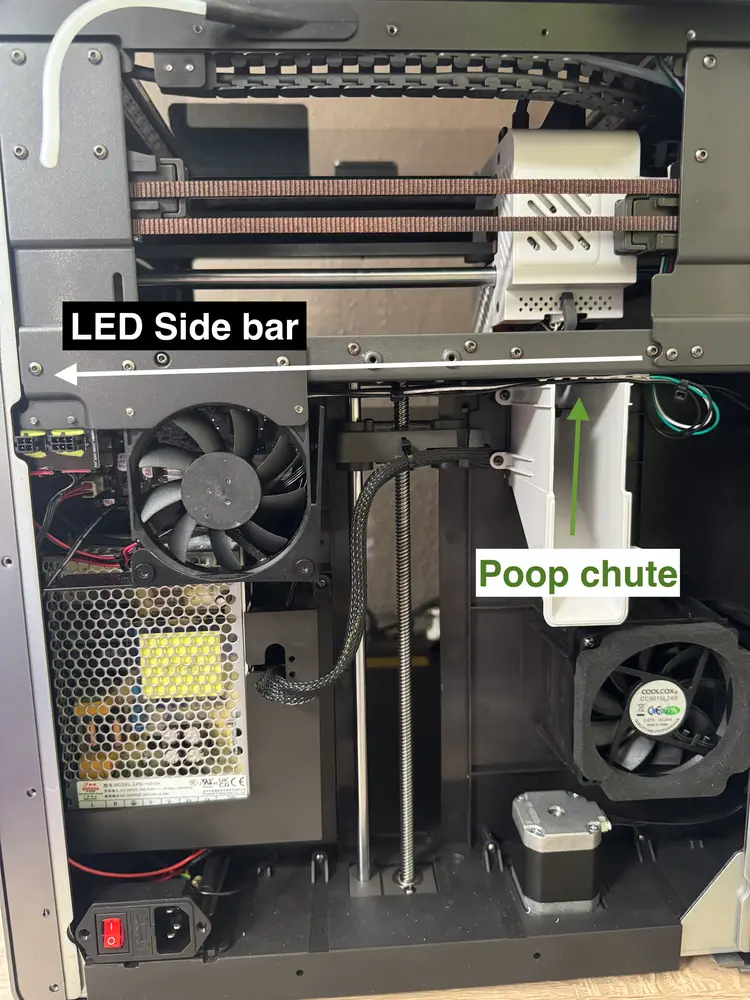
This setup pairs nicely with my "LED Light Side Bar" and also with the awesome "Kobra S1 Poop Chute Light" by @Frank_1450817.
🛠️ Custom Fit Note:
This design is based on my personal modifications to the Kobra S1 Riser. Since the original file is a paid model, I can’t share the edited version.
However, you have two options:
If you haven't printed the riser yet:
Use the mounting holes included in my control unit and button module as a reference to manually add matching holes or a wire channel to your own edited version of the paid riser file.
Good news — the original designer has updated the files on cults3d and added my modification with the hole for the cables! 🥳
See Modifications for WLED control unit on the file structure
Huge thanks to @Darren3dprint_3680478 for the update!
If you've already printed the original riser:
No worries — you can still add new holes to my control box and simply route the cables externally over the riser to the control unit.
Alternatively, just print the updated three files for the left side — they now include proper cable routing!
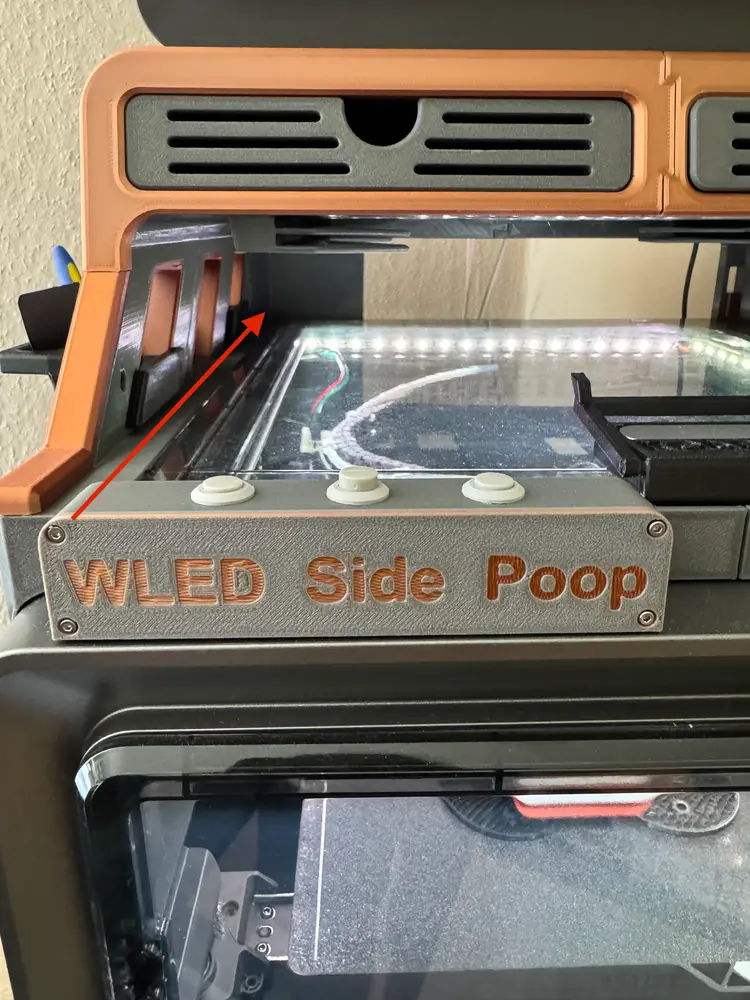
For the button control box, you can use the original brackets from the "Kobra S1 riser"
(See image below for a visual reference.)
🔧 Bill of Materials (BOM):
- ESP32
- WS2812B LED strip (or another compatible type: WLED-compatible strips)
- Power Supply (24V, 12V, or 5V depending on your LED setup)
- Female Power Adapter (optional — mounting hole included in the design)
- Step-Down Module (e.g. Amazon Link – needed if you're not using a 5V supply)
- WAGO 221-413 Wire Connectors (optional — mounting clips included in the design)
- JST SM 3-Pin Connectors (male + female)
- 0,23mm² wiring cables (e.g. Amazon Link) — or slightly thicker; the cable channel has some extra space
- M2 Screws (for mounting the control box lid and front panel lid — length depends on your printers fine tune, just order few different sizes, you need them always 😄)
- Klick in Buttons (e.g. Amazon Link)

⚠️ Caution:
Working with electrical components can be dangerous.
Only attempt modifications if you have experience handling electronics and soldering.
I take no responsibility for any damage to your printer, property, or personal injury.
Always double-check your wiring, and if unsure, ask someone experienced for help!
🌈 WLED Installation
There are many tutorials on YouTube on how to flash and set up WLED. Just make sure to adapt the data pin in the WLED config to match your wiring.
In my case, I used D2 on the ESP32. If you're using a different pin, be sure to connect your LED data wire accordingly.
⚡ Wiring Guide
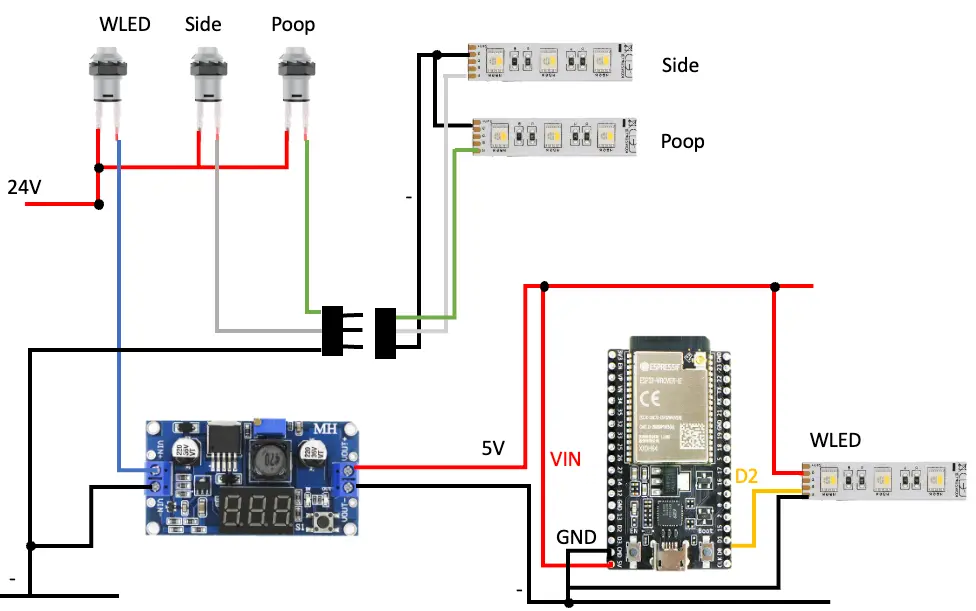
Note: The drawing may show a different step-down module. Always adjust the output voltage properly before use!
🧰 Installation Guide
- Print all parts of the Kobra S1 riser (See the "Modifications for WLED control unit" folder in the file structure)
- Print all parts of this upgrade, including the control unit and button module.
- Flash WLED onto your ESP32. (There are many good YouTube tutorials available if you need help.)
- Prepare the control unit:
- Mount the step-down module (⚠️ Set the correct output voltage before installation!)
- Mount the ESP32 in place using the designed screw holes
- Assemble all printed parts, including the riser and this upgrade kit, into one complete unit
- Pull the four wires (red, blue, white, and green as shown in the wiring guide)
from the button unit through the cable channel into the control unit.
- Route the male JST SM 3-Pin connector from the control unit
down through the lower cable duct into the printer chamber.
(I chose a plug connection so I can easily remove the riser for maintenance.)
- Install all buttons, make all necessary connections, and test the system.
🔌 My Example Setup:
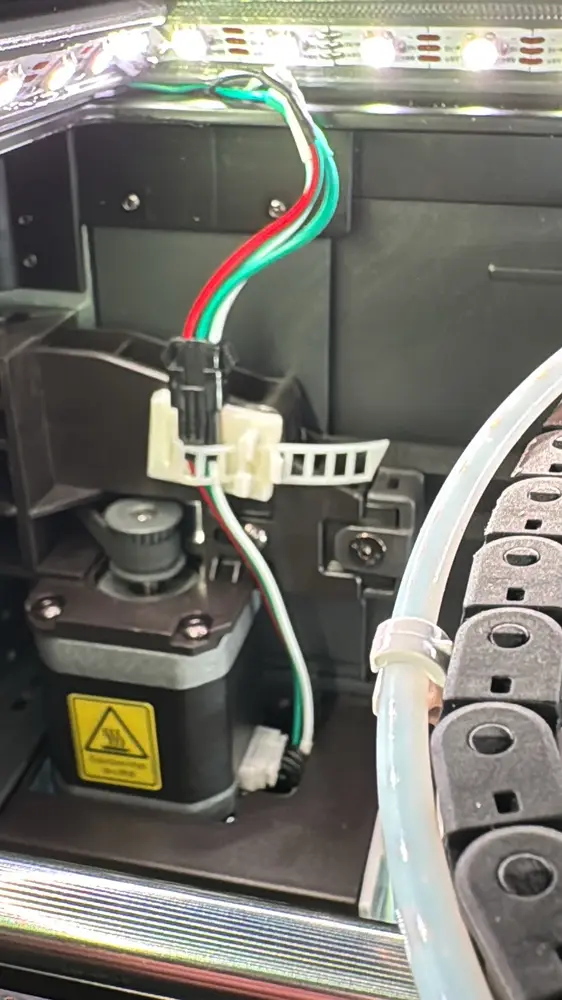
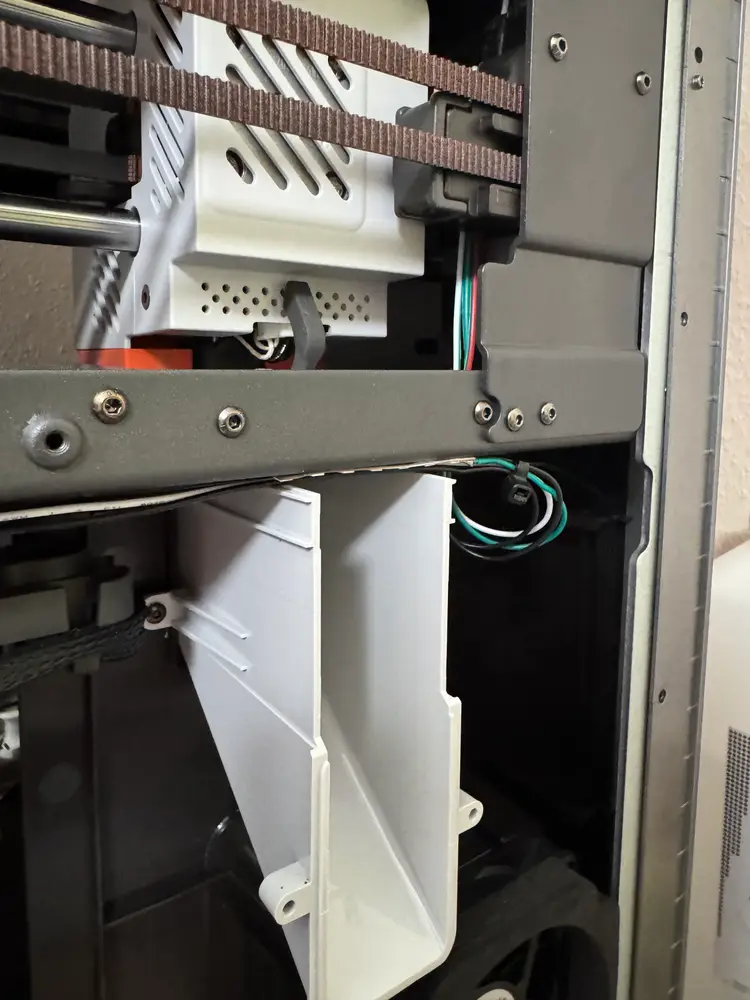
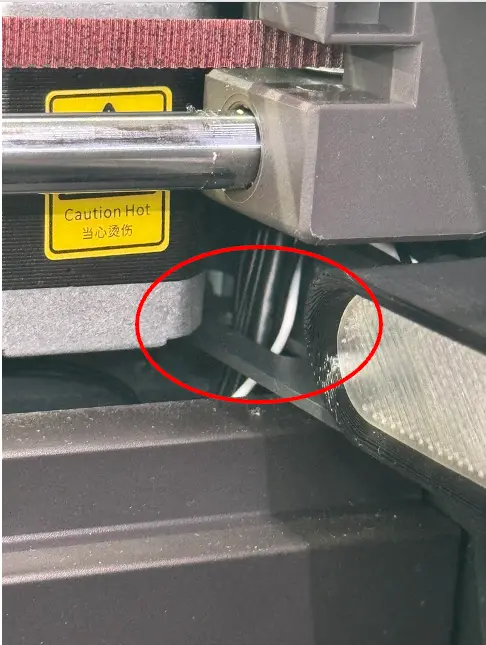
I routed the JST SM 3-Pin connector through the opening near the motor and secured it with a self-adhesive cable tie.
From there, I connected the Poop Chute Light, then ran the cable over the mainboard fan to the other side for the Side Bar LED.
(See image below for reference.)
If this design made your printer (and soul) shine a little brighter, feel free to bribe me with a like, coffee or both ☕😄:
You are prohibited from sharing, sub-licensing, selling, renting, hosting, transferring, or distributing the digital file or 3D printed versions of this object, as well as any other derivative work in either digital or physical form (including remixes).You are not allowed to use the objects in any manner that involves charging money or collecting fees without permission.